PayPal now available at checkout
Free US Shipping On Orders $99+
Previous slide
Next slide
June 2022 orig.
Any damage or issues resulting from improper service will not be covered by warranty. If you have a fork still in its original warranty period and do not wish to void your warranty, please contact an authorized Cane Creek service center.
These service instructions cover the basic service procedures using standard service kits. If your suspension requires parts beyond standard replacement parts – CSU, compression rods, etc. – please consult your authorized Cane Creek service center or contact us at our Cane Creek Support Center.
These instructions cover just the air spring leg of a complete 100 hour service. Combine these instructions with the appropriate damper side and 50 hour lower service to get a complete 100 hour fork service.
Additionally, you can send the damper for a service with an authorized Cane Creek service center.
BAG0451 – HELM Air Spring Rebuilt Kit
AAD0555 – 8mm & 9.5mm Shaft Clamp
Sockets – 8mm, deep well 22mm & chamfer-less 30mm
Crowfoot wrenches – 20mm
Open Ended Box wrenches – 10, 20 & 22mm
Torque wrenches
Pick
Suspension Grease
Royal Purple 10w-30
Torque & Loctite Chart
| Part | Torque Spec | Loctite Spec |
| Seal Head Assembly | 5 Nm | 243 (Blue) |
| Air Piston to Shaft | 6 Nm | 263 (Red) |
| Seal Head Install | 16 Nm | None |
| Doublair Top Cap | 36 Nm | 243 (Blue) |
Oil Chart
| Oil Location | Oil Type | Oil Amount |
| Top of Air Spring | Royal Purple 10w-30 | 2.5 mL |
Review all related TSBs before performing any service.
No specific HELM Air spring TSBs at this time.
Prior to beginning damper service, remove the lower assembly per the 50 hour service instructions.
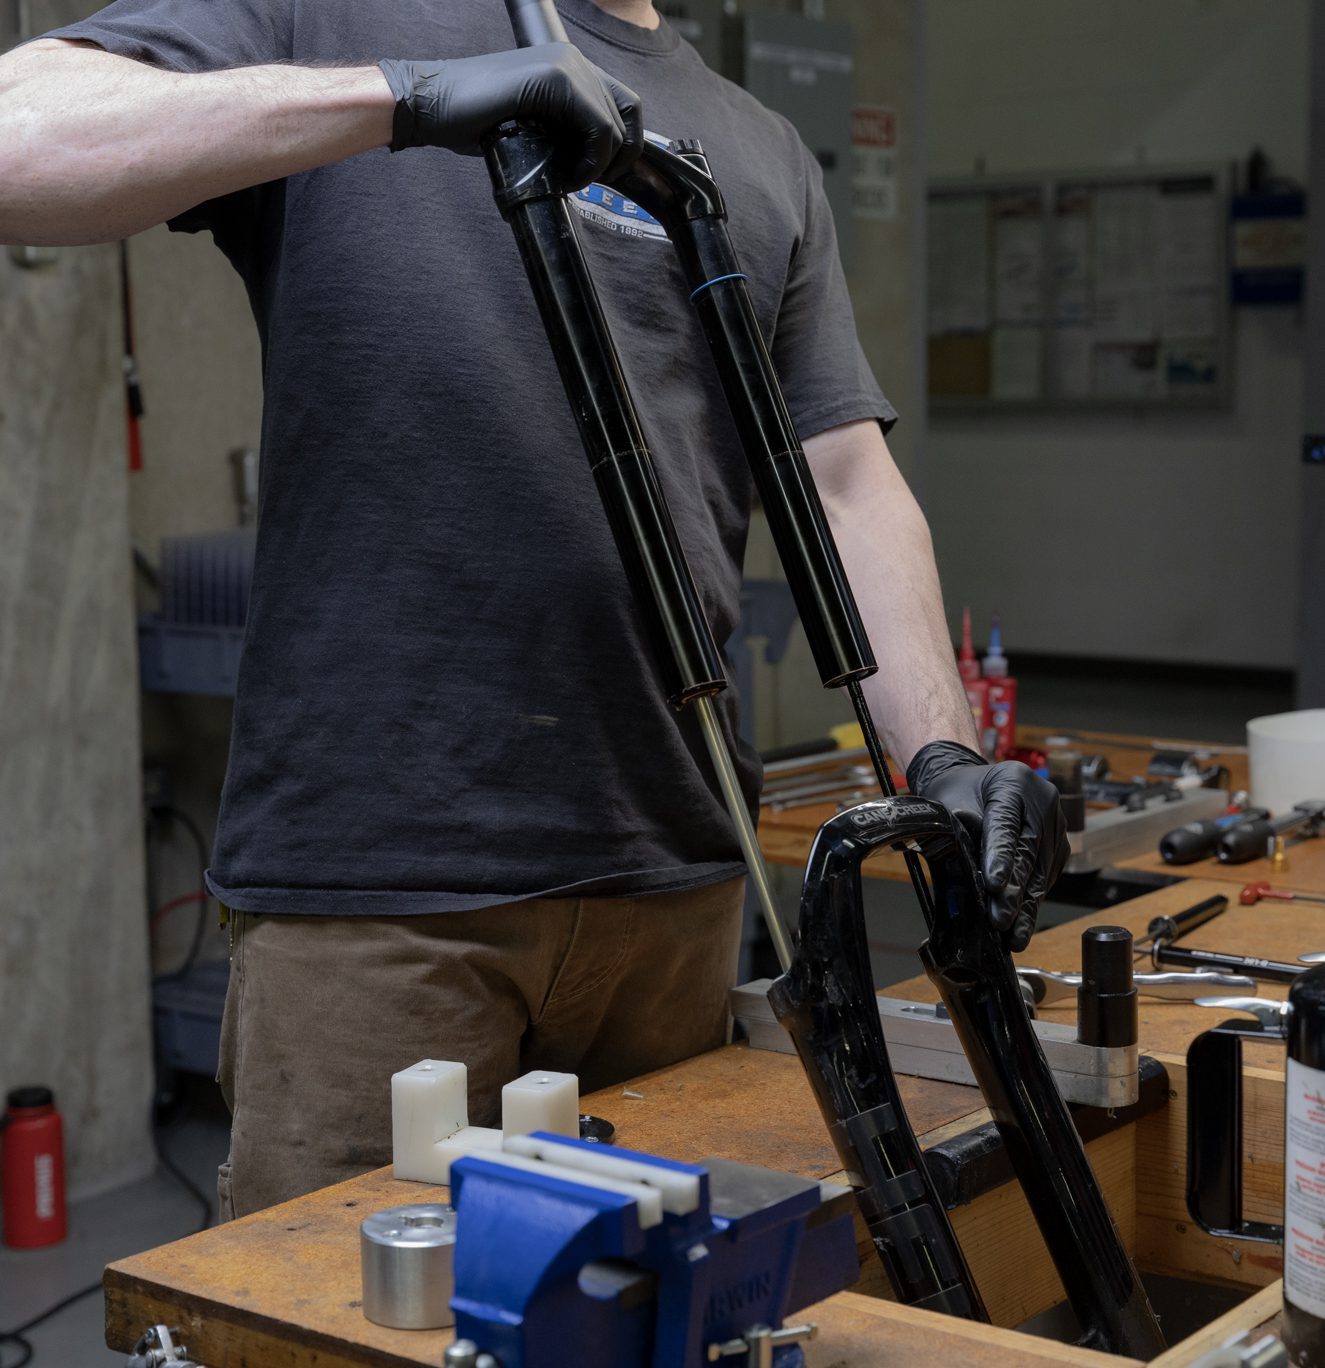
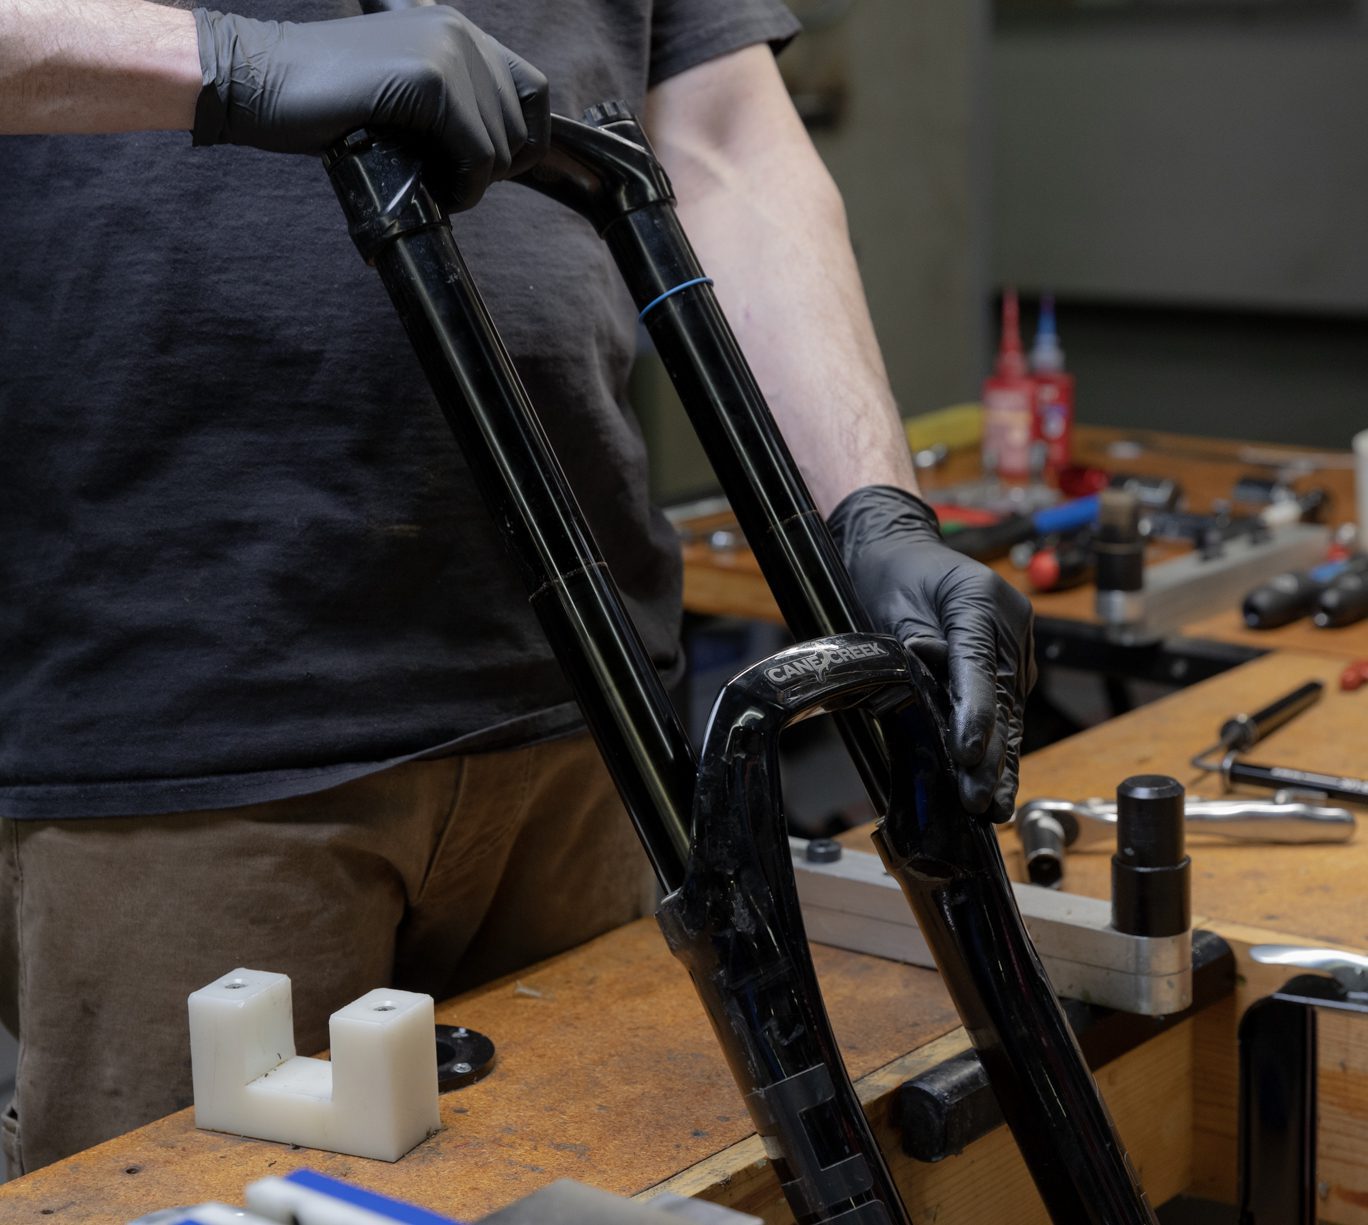
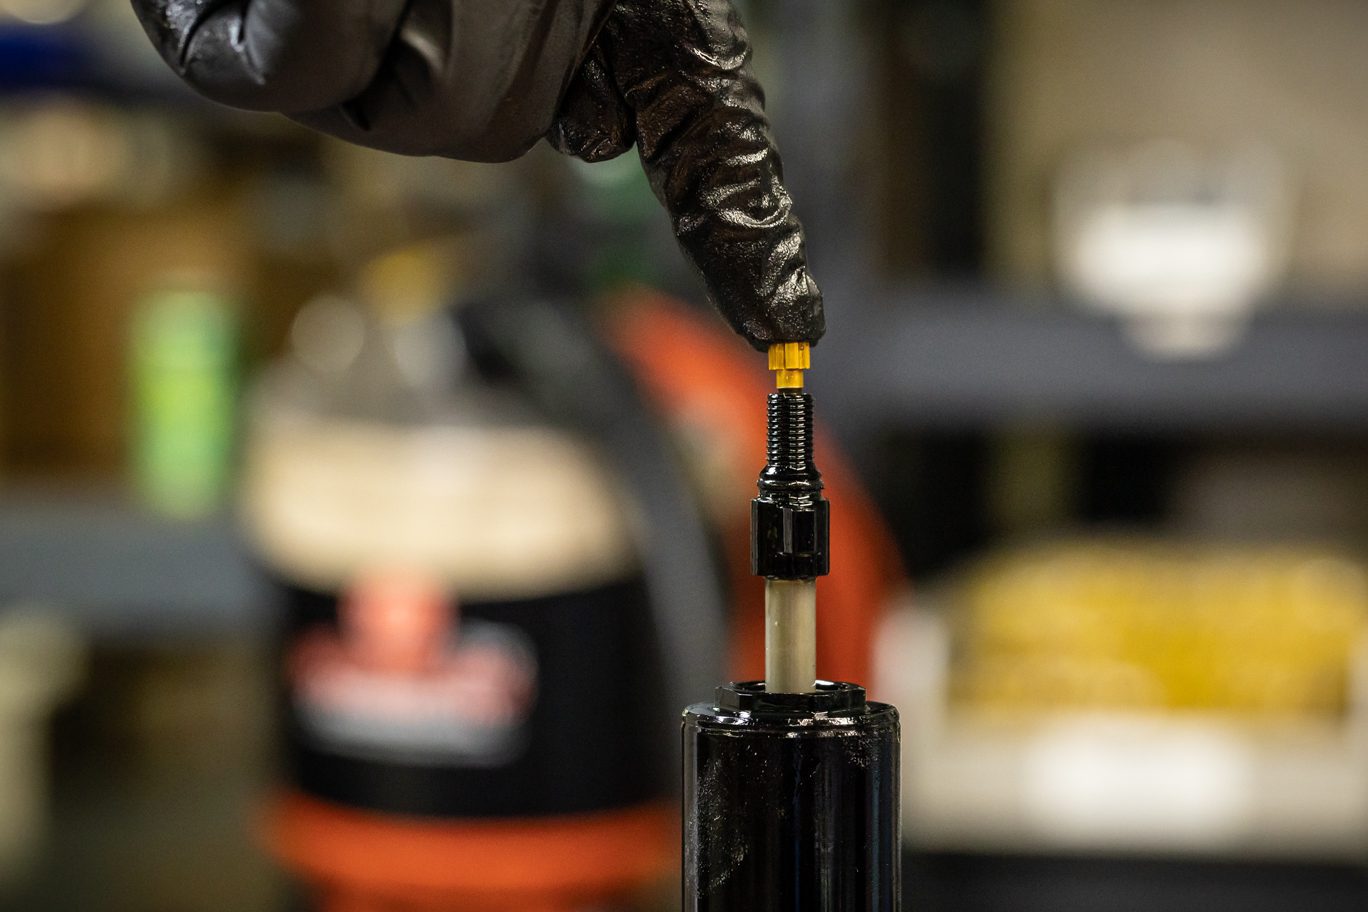
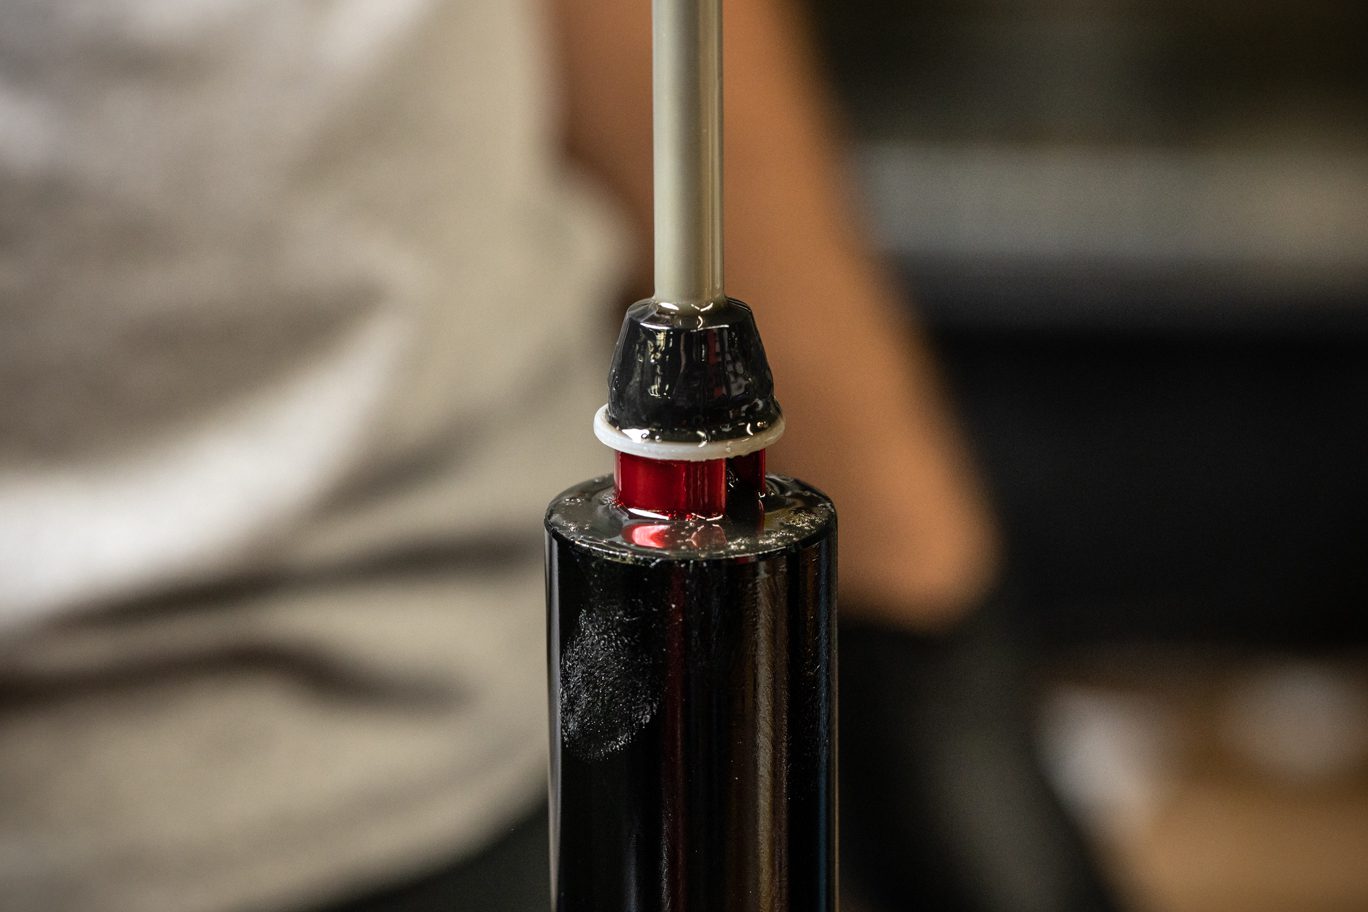
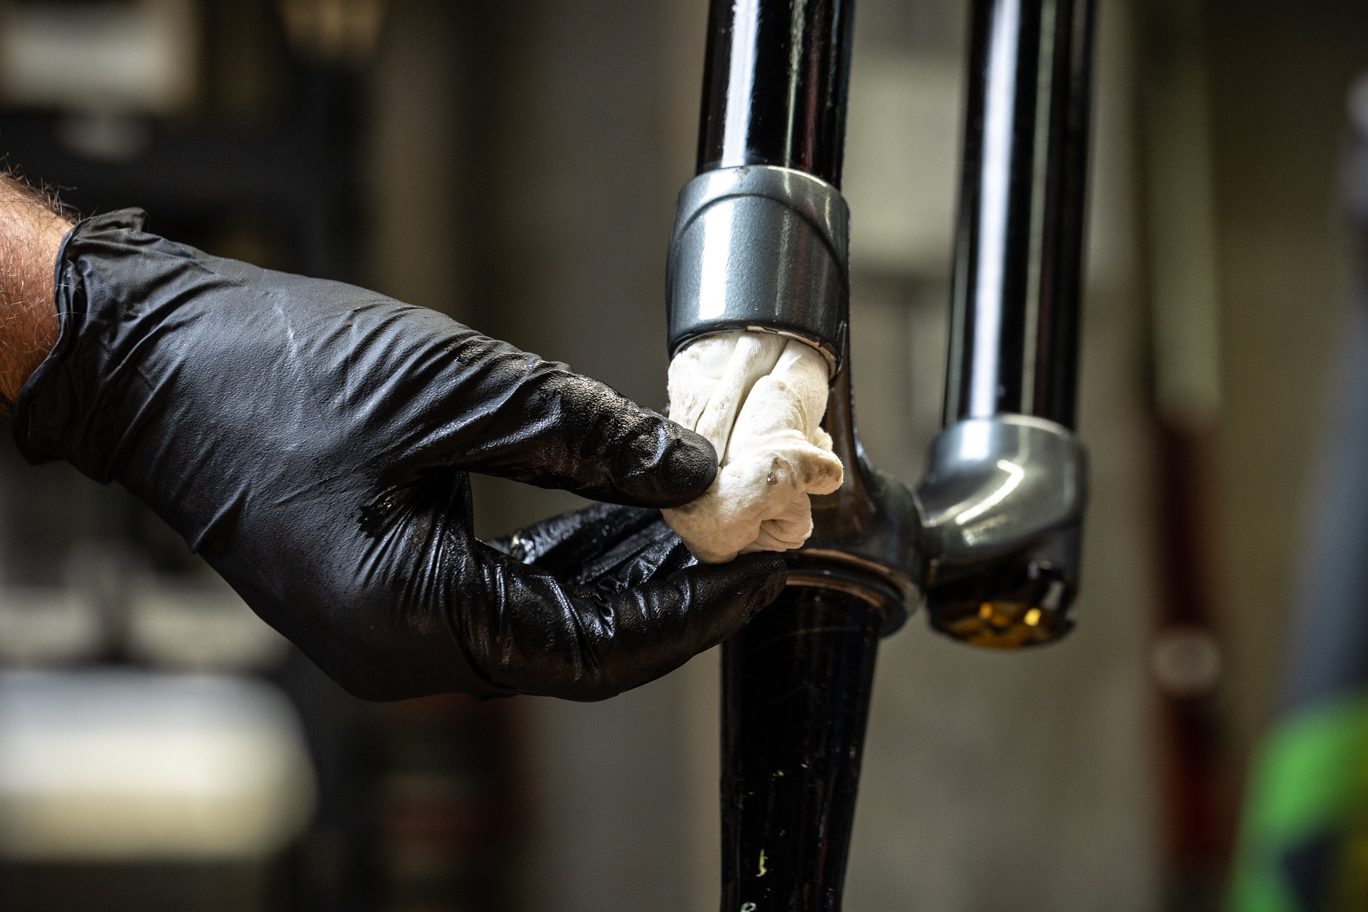
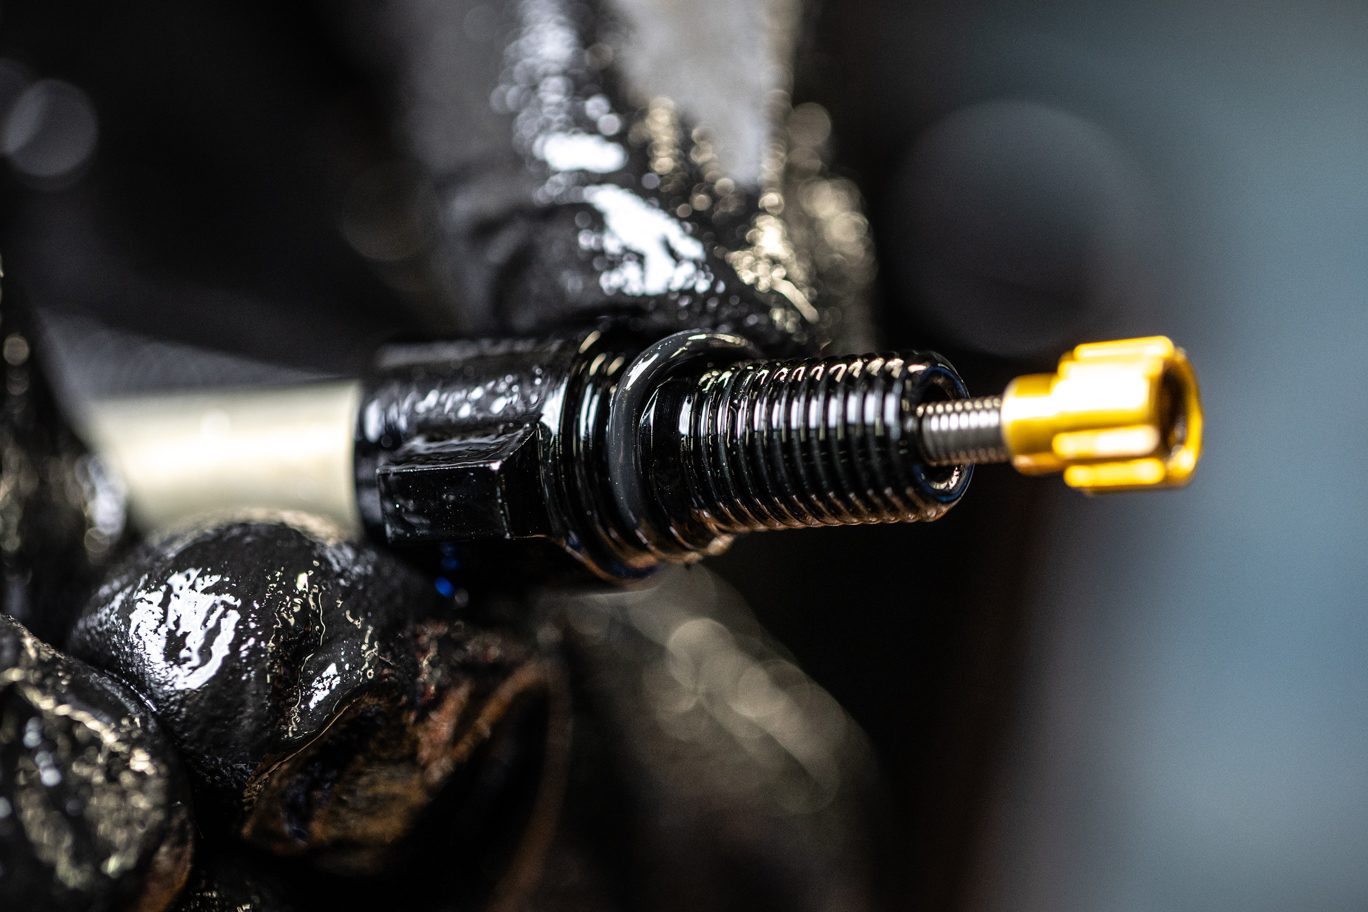
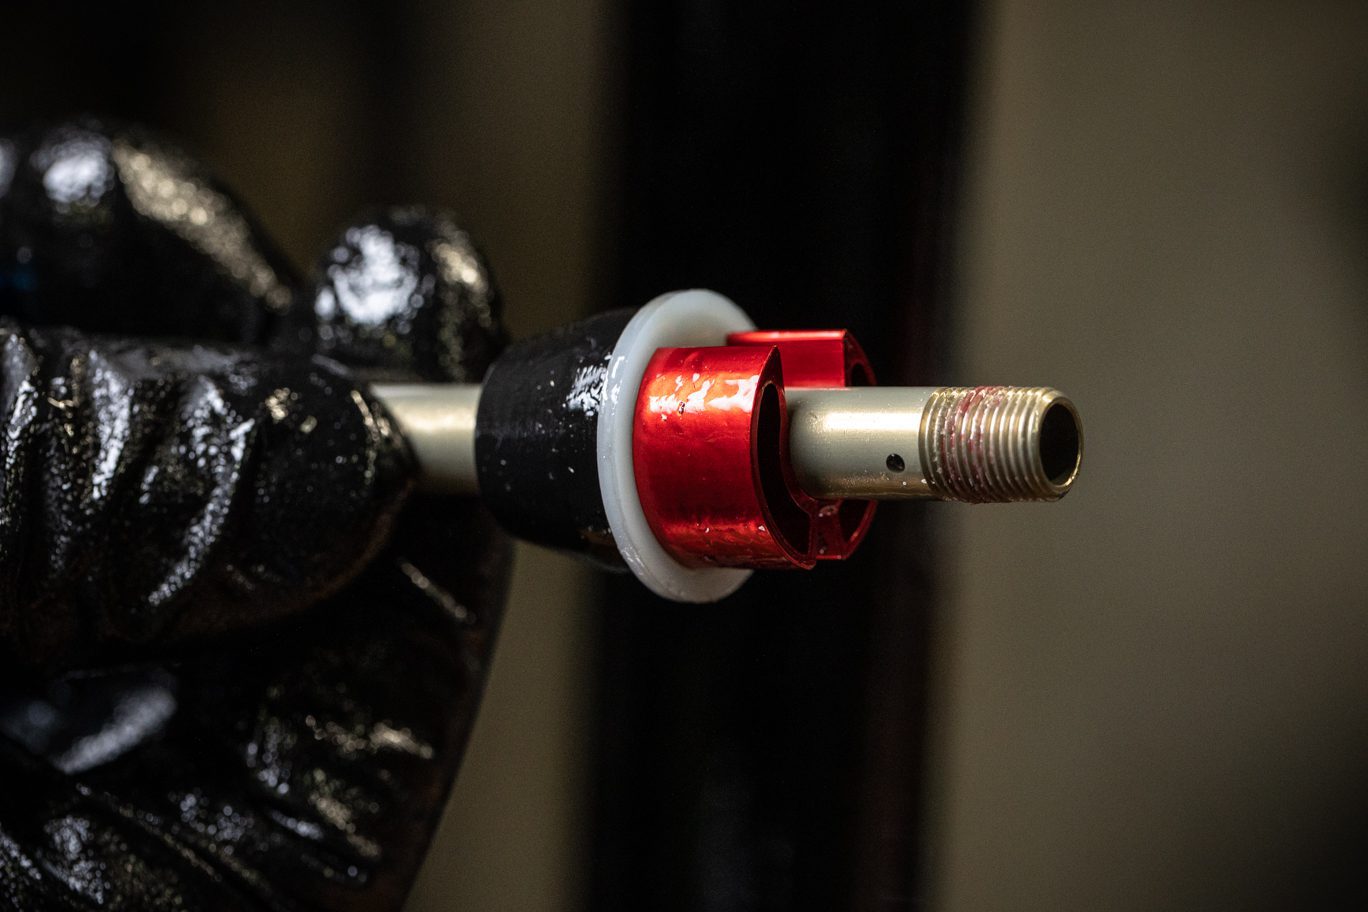
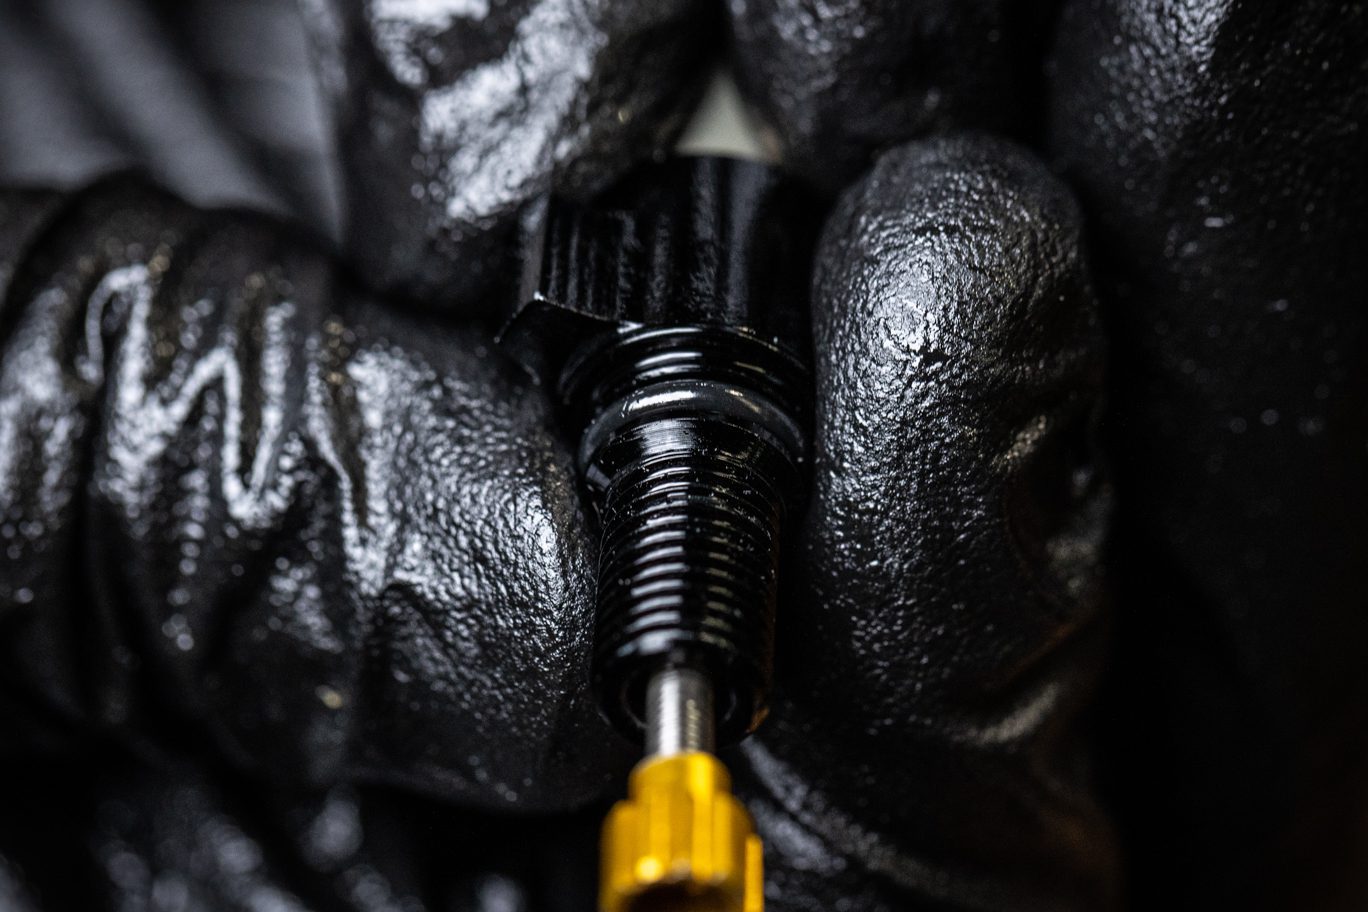
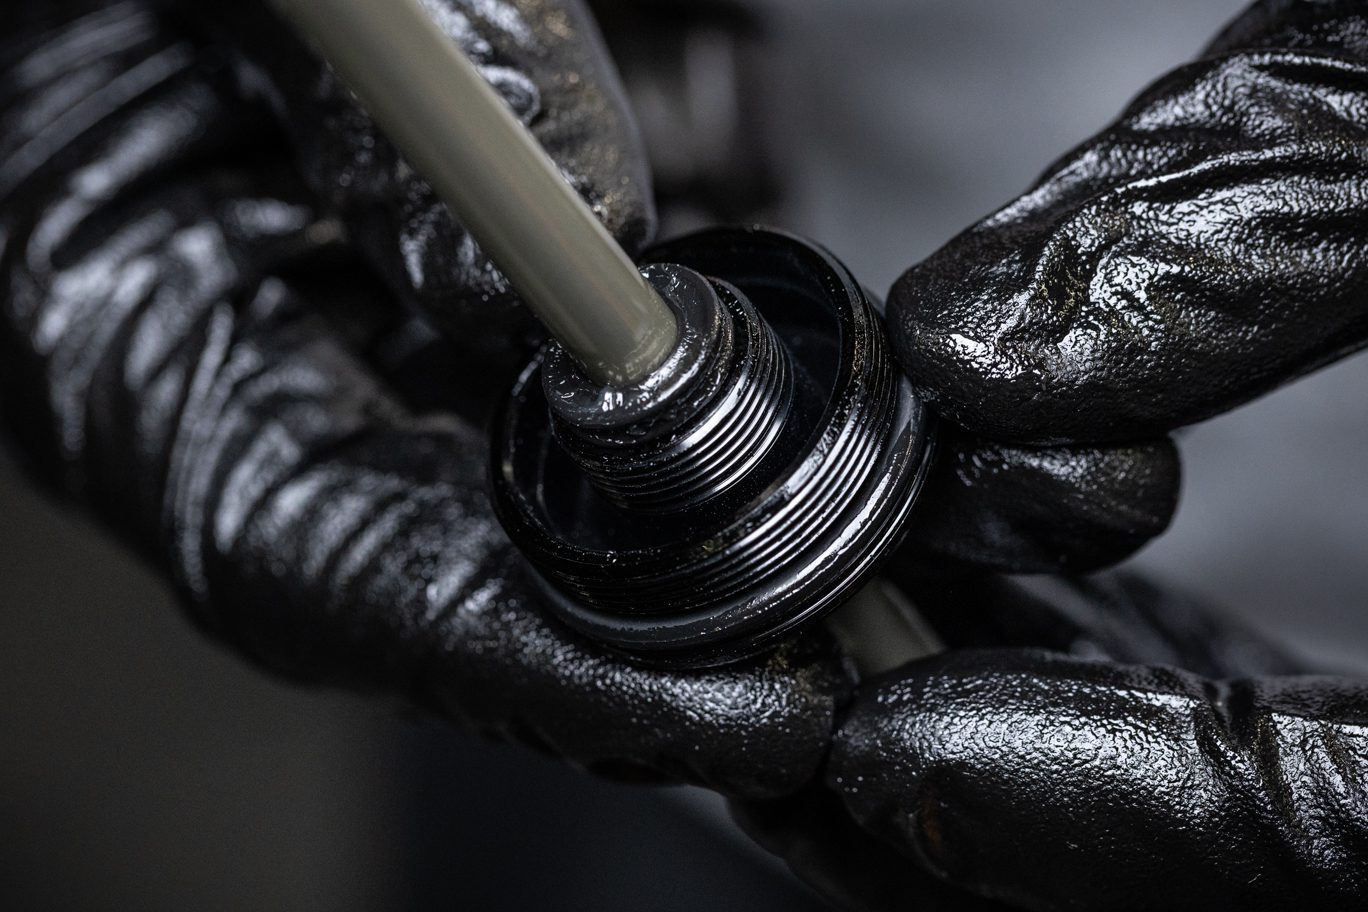
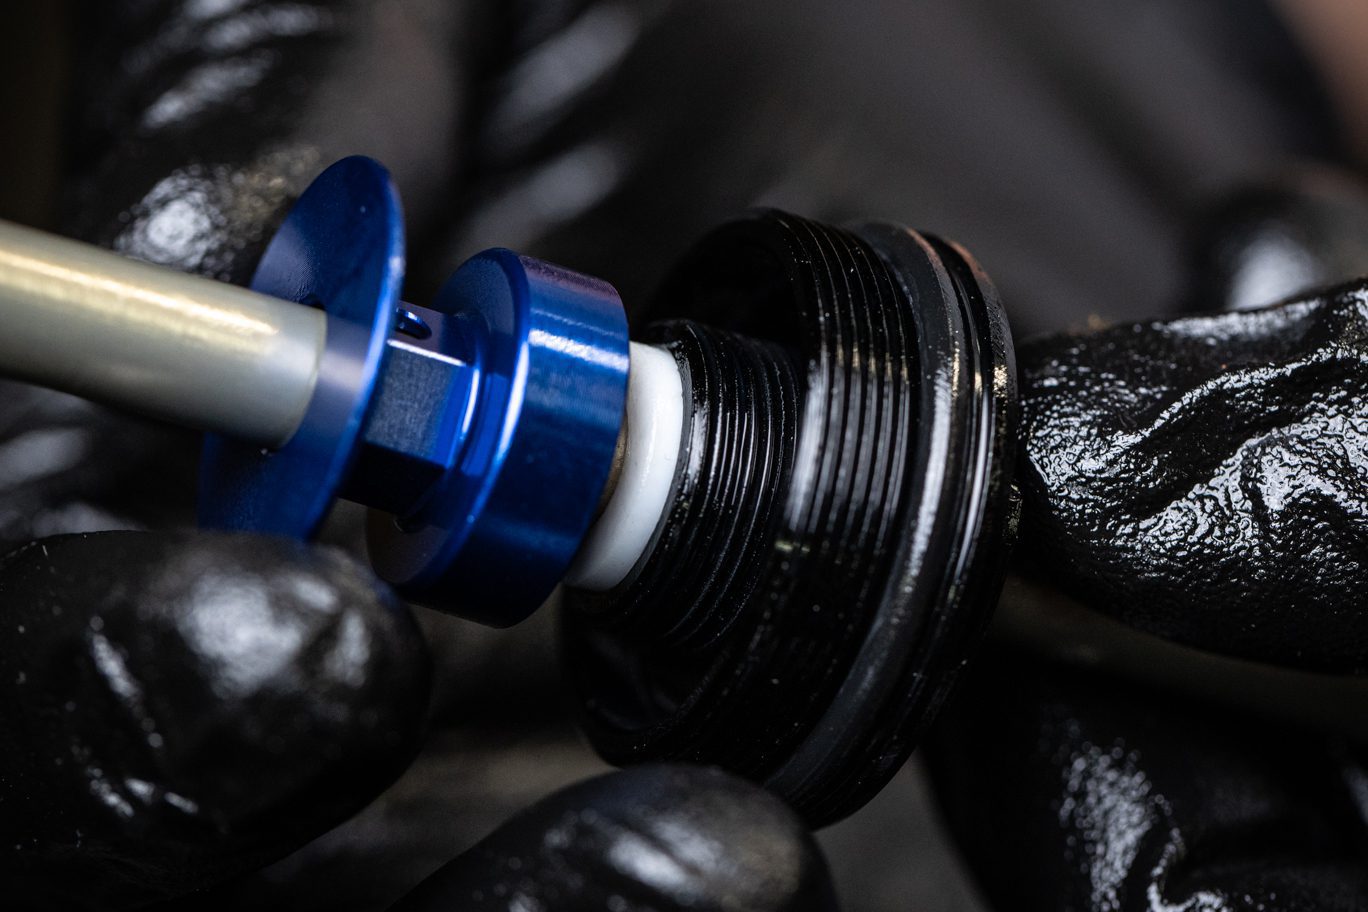
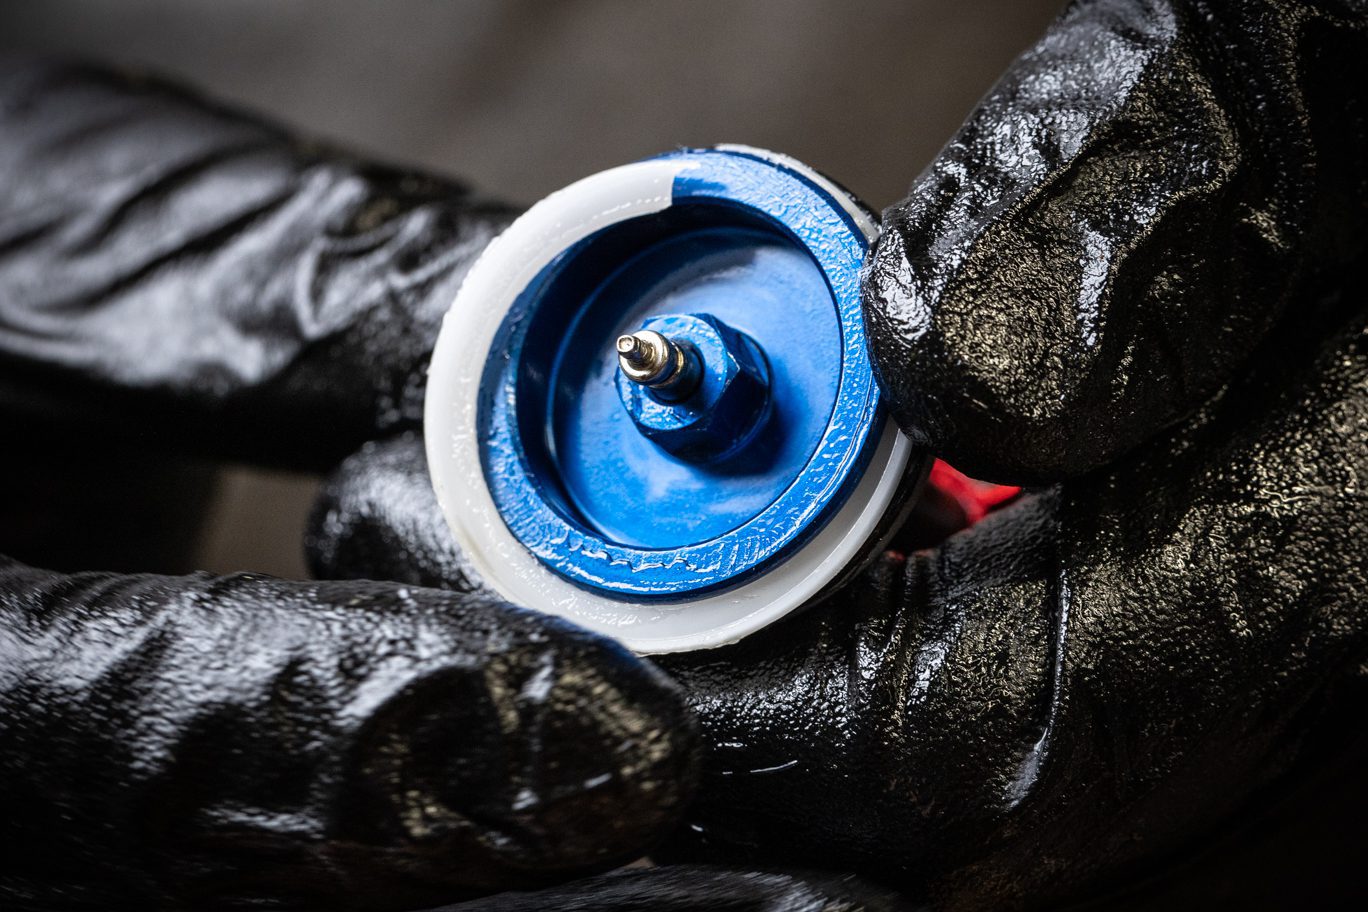
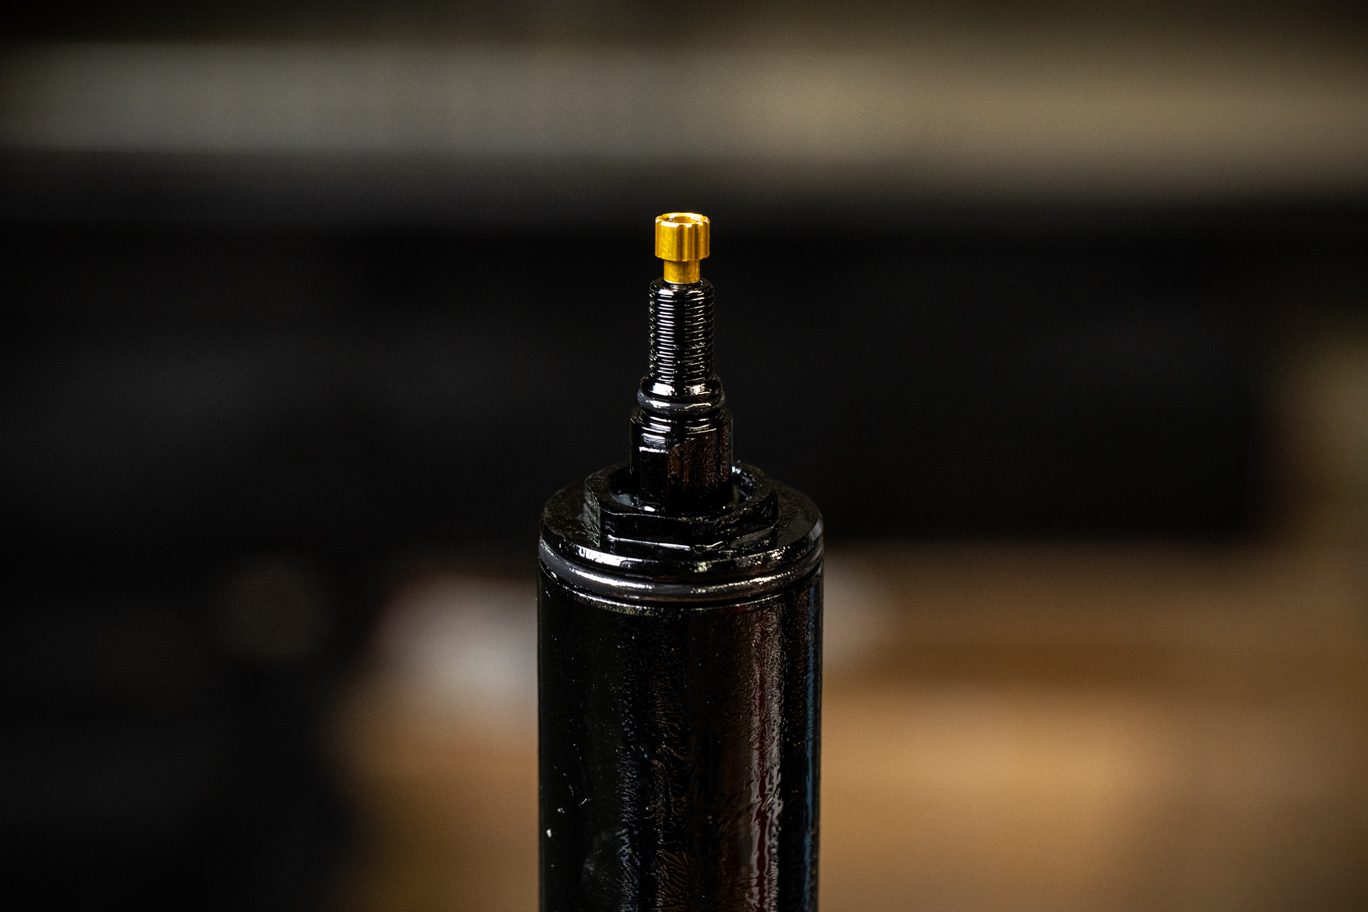
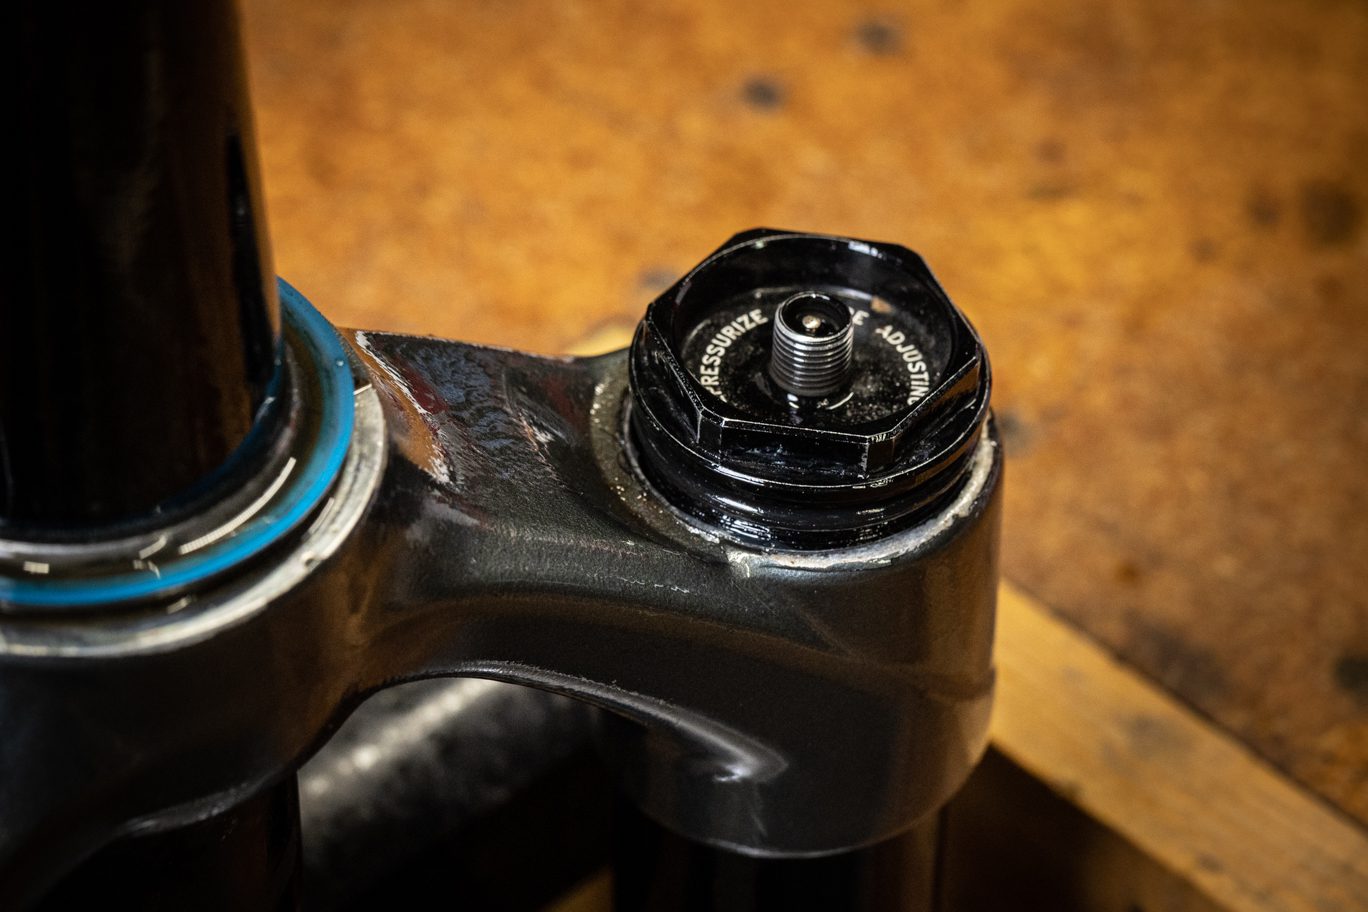
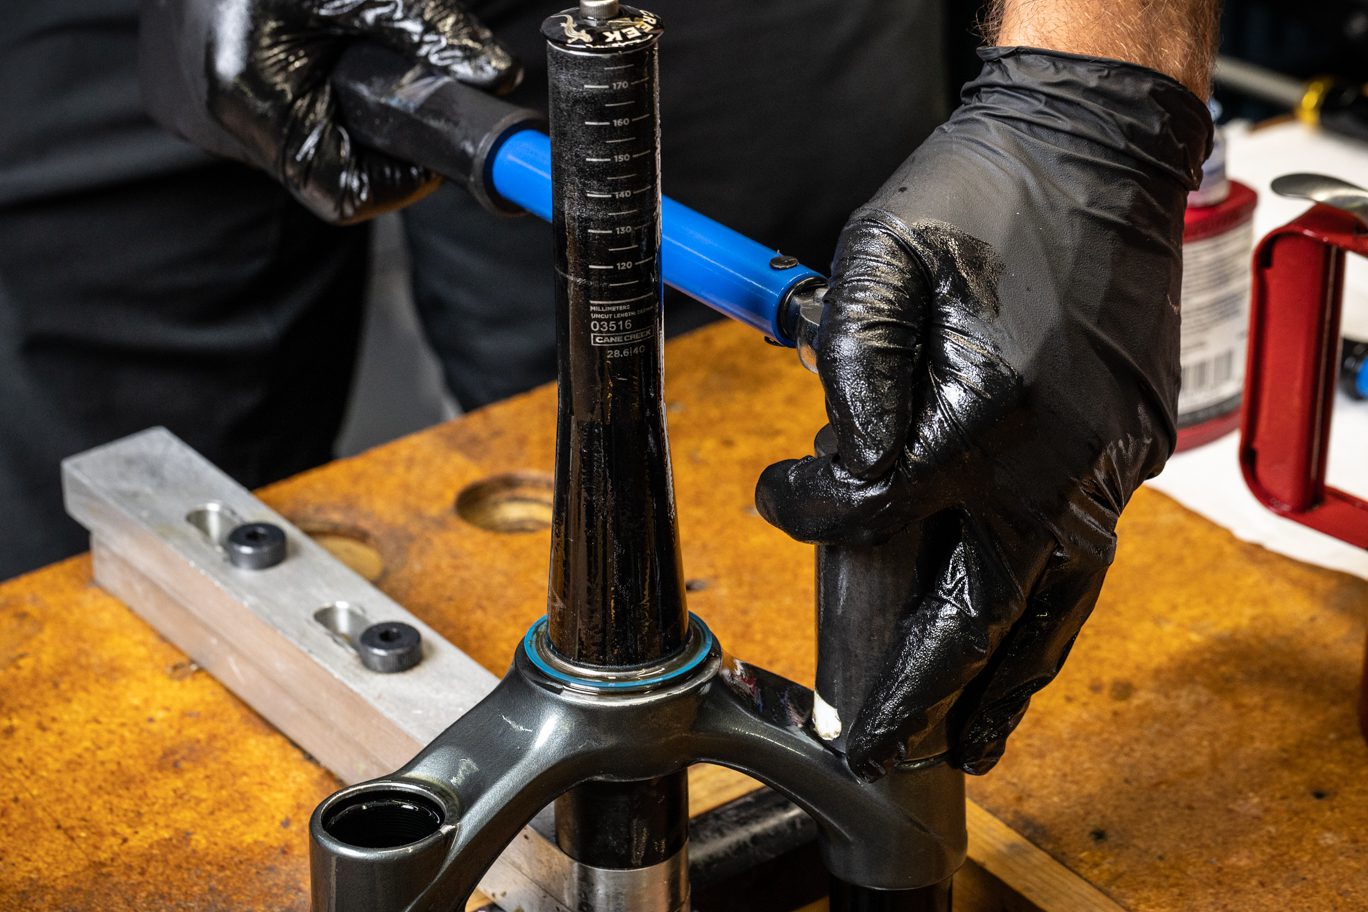
Secure CSU. Double check all air has been removed from air spring of BOTH the positive AND negative chambers by pressing the main air fill valve AND the negative charge button simultaneously. Failure to do so can result in injury. Using 30mm chamferless socket, remove Doublair volume piston. Breaker bar may be necessary. Note position of volume reduction, if present.
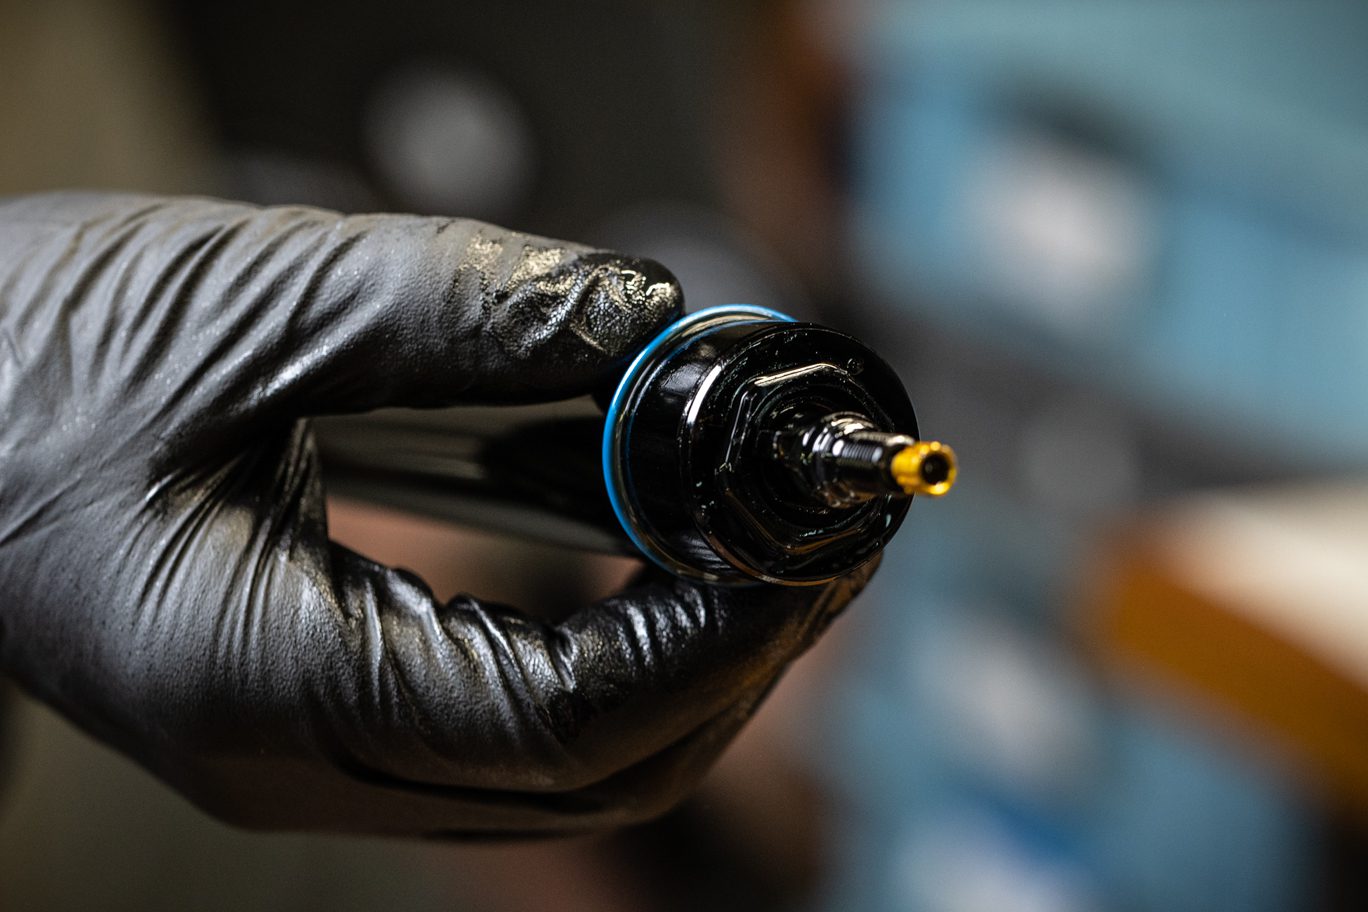
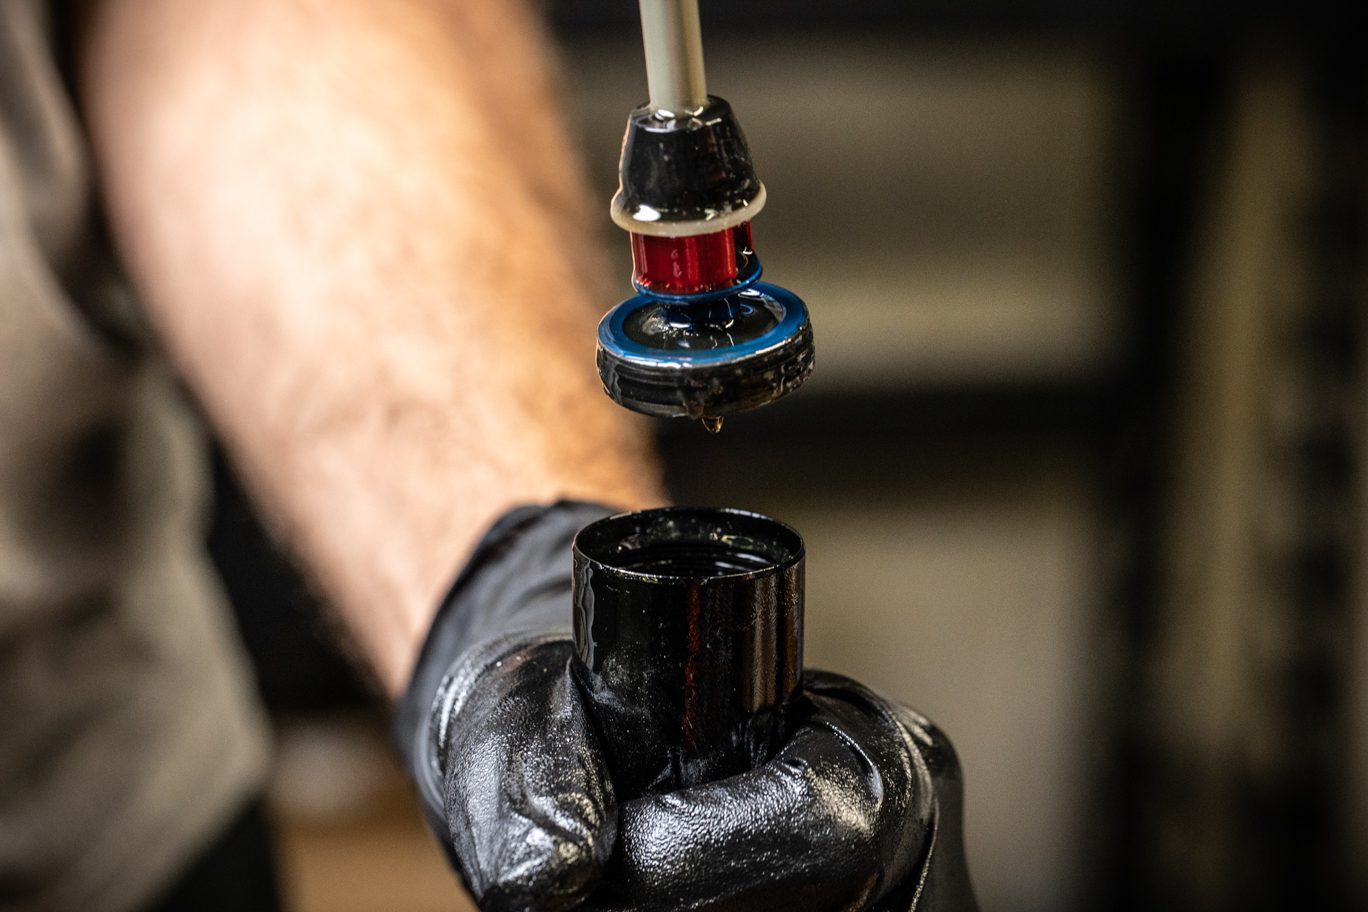
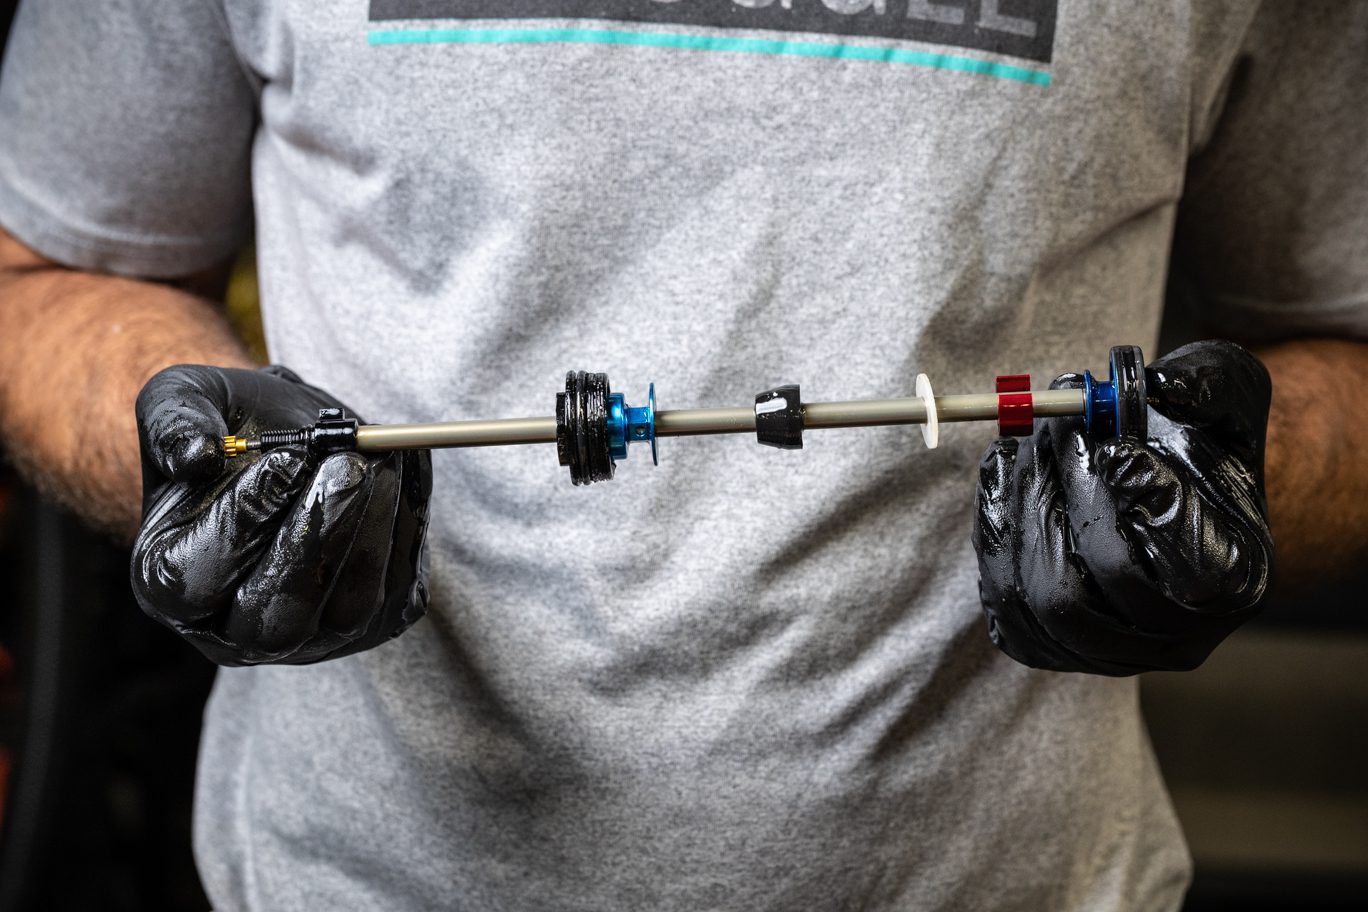
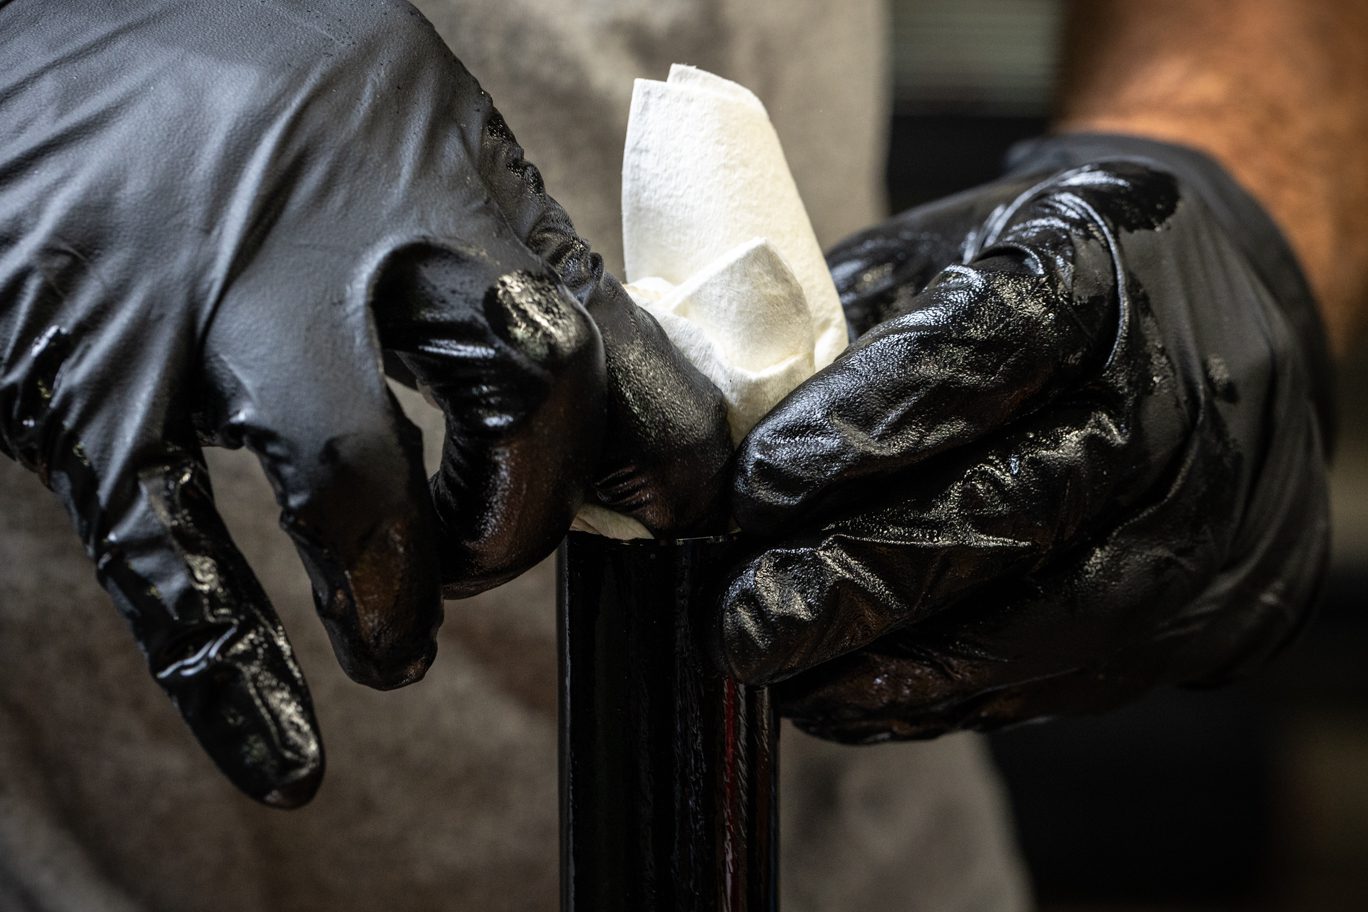
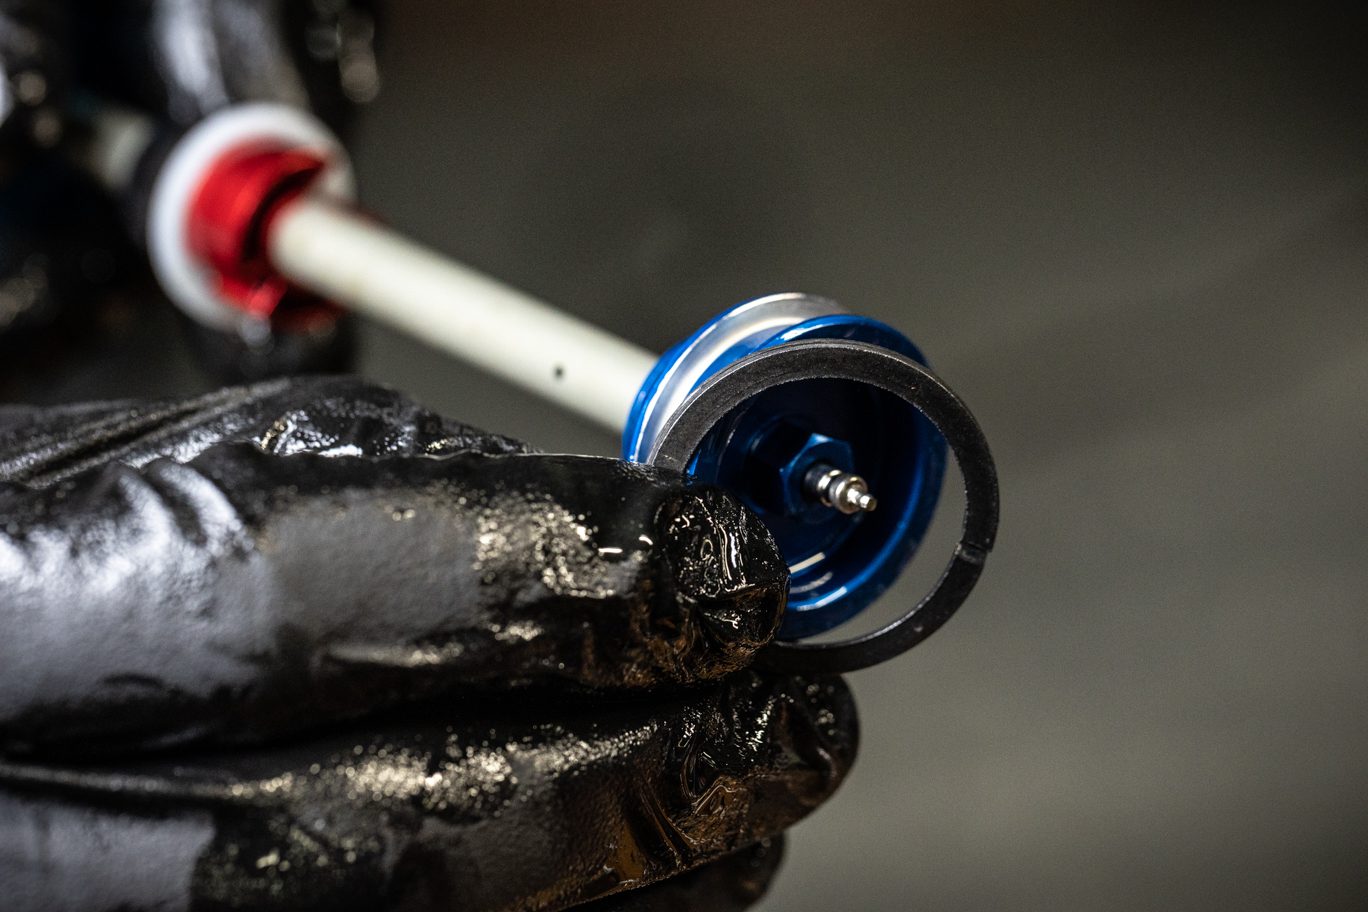
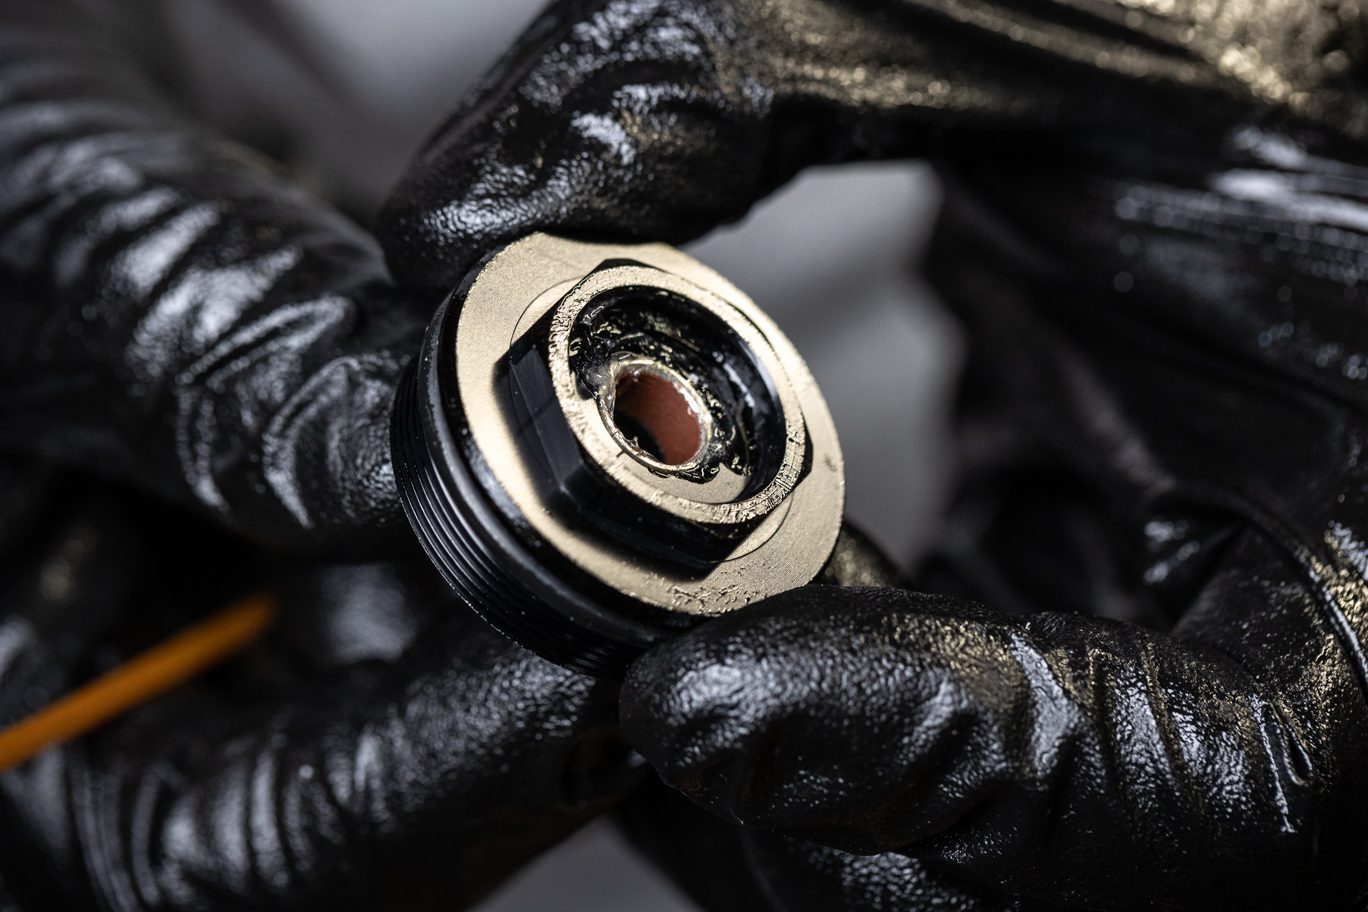
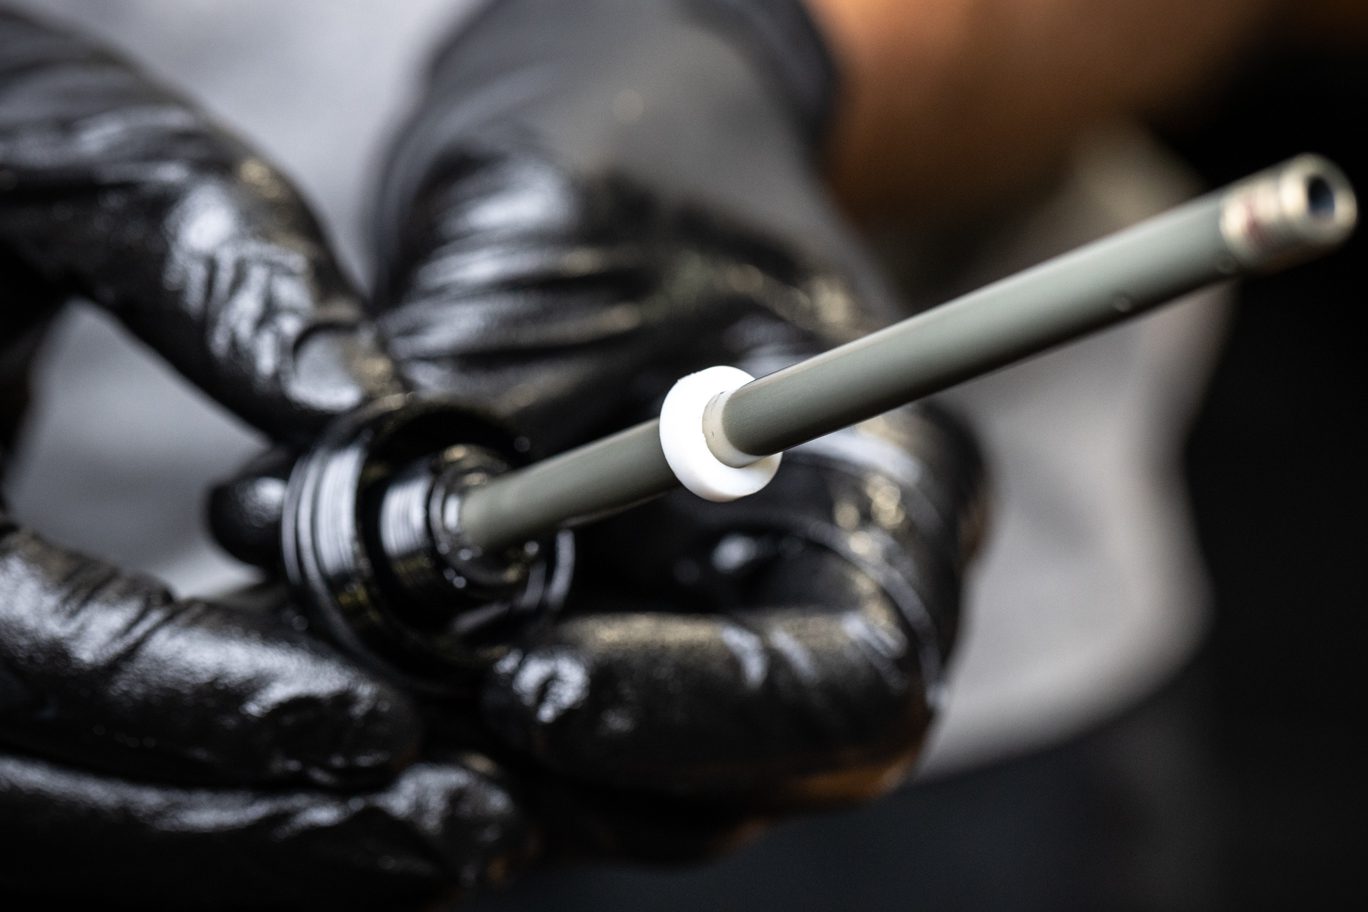
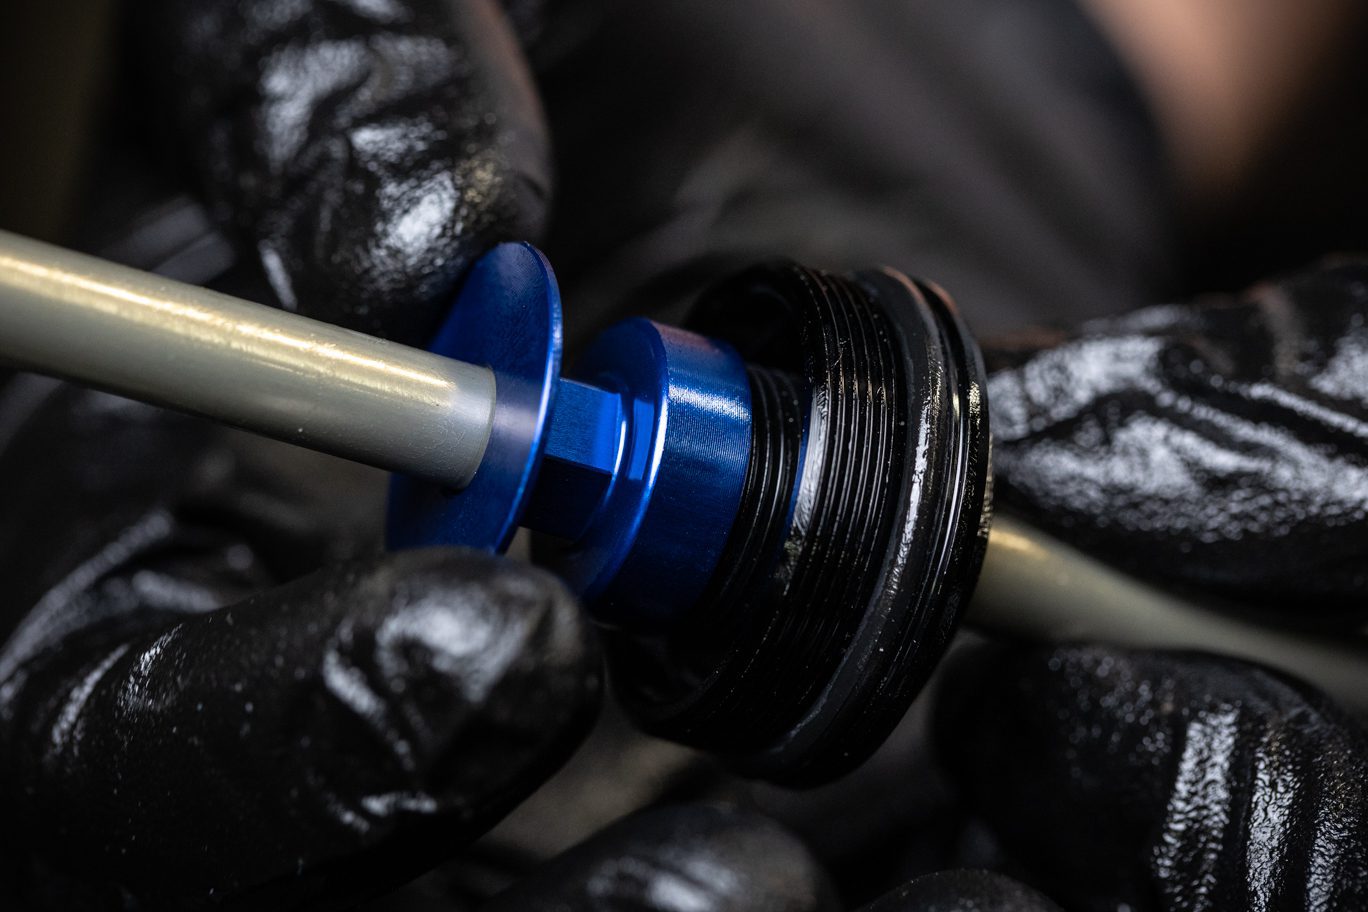
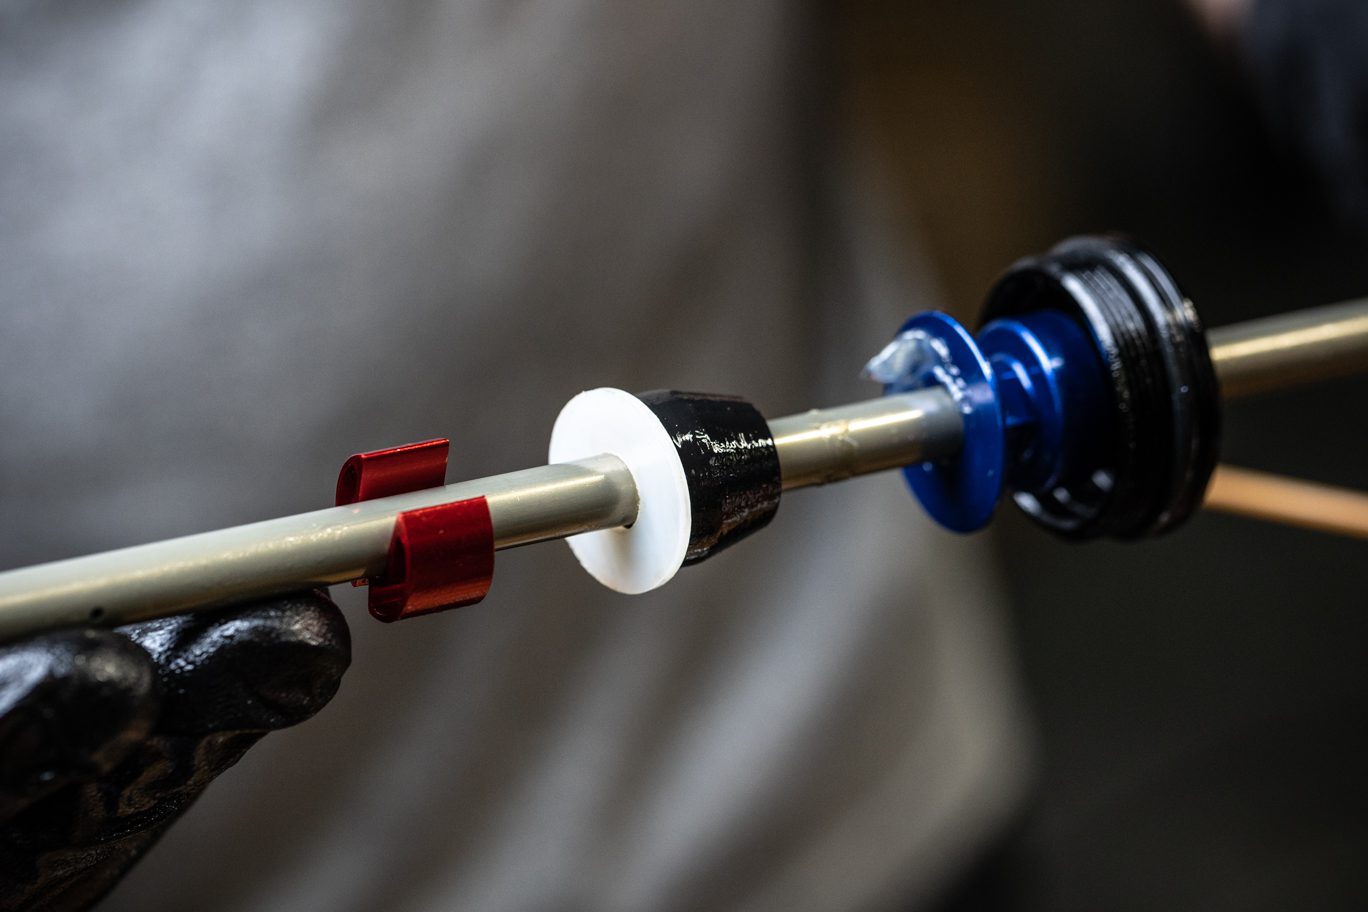
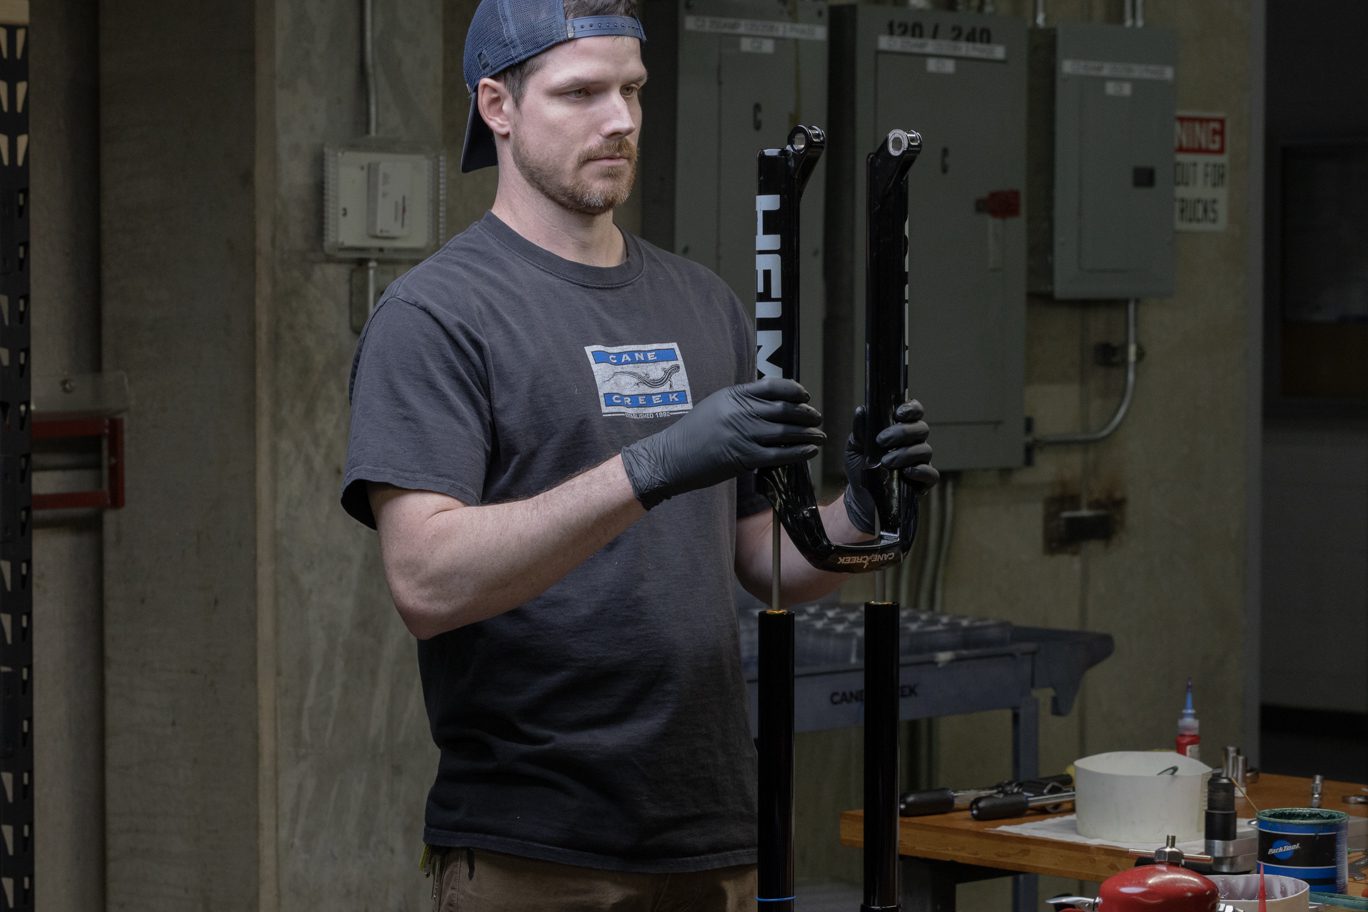
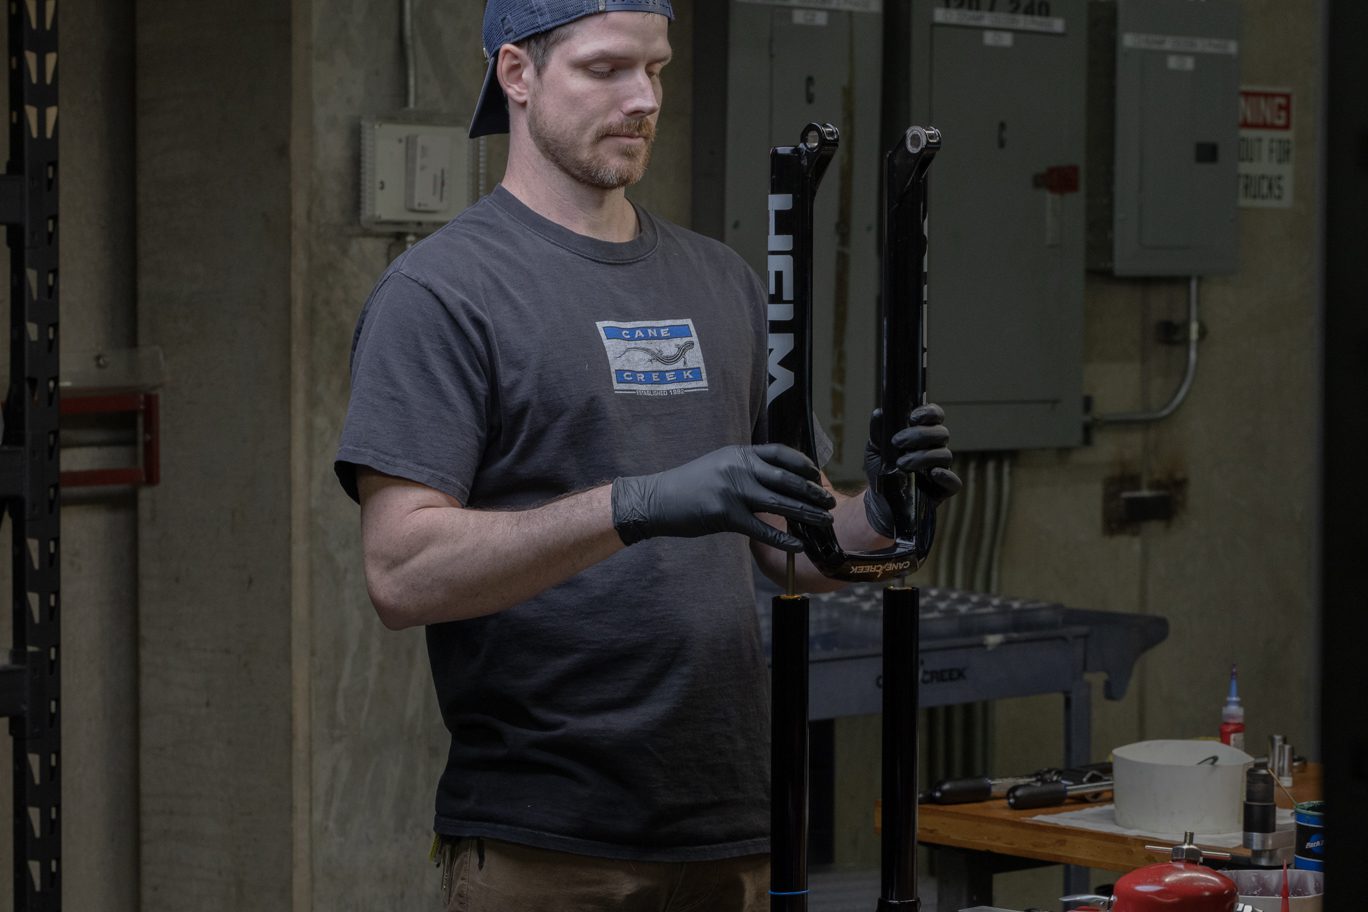
Press negative charge button and compress shaft all the way down. Remove and discard sag o-ring. Using 22mm wrench, remove air spring seal head. Dispose of splash oil. Remove air spring assembly by walking piston out past stanchion threads. Note orientation of travel spacer, plastic spacer, top out bumper and any metal shims on either side of top out bumper that may be present.
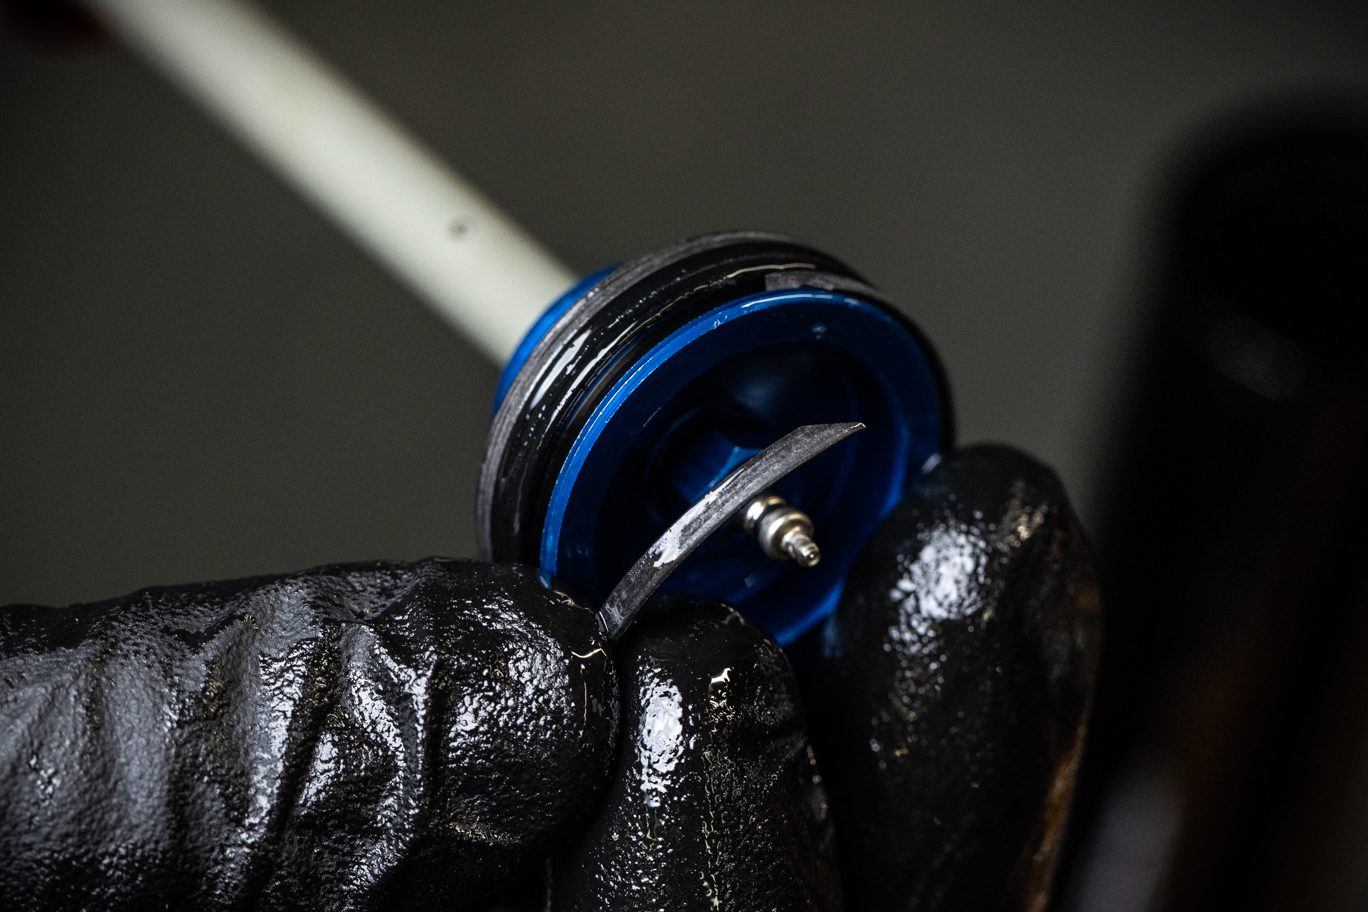
Remove any travel reduction, spacer, and top out bumper. Remove and discard air seal head/top out spacer and foot nut o-ring. Inspect shaft for any wear. Remove any Loctite residue.
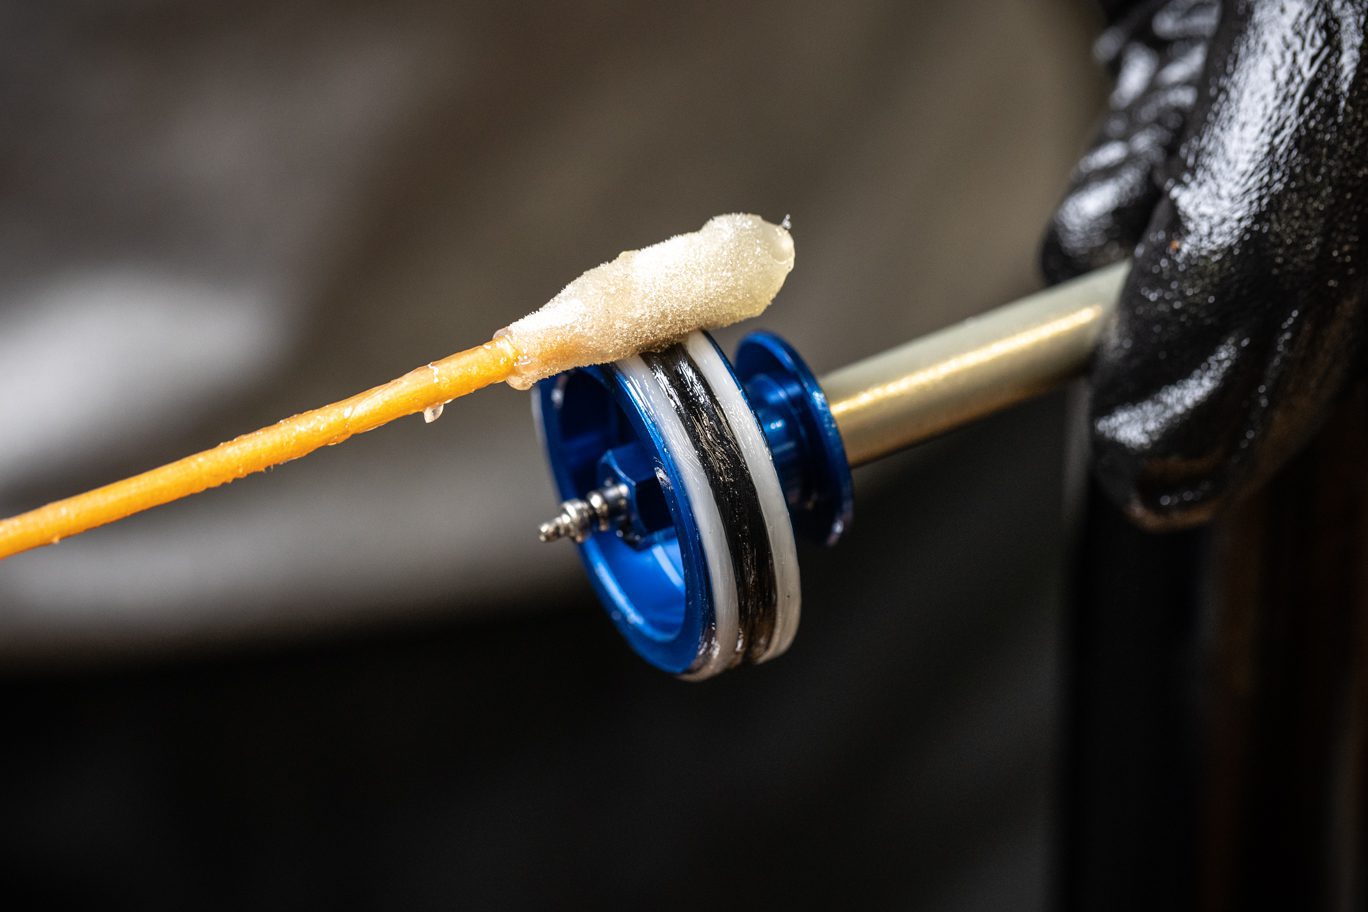
Always use extreme caution when using a pick in this step or others to avoid scratching metal parts. Failure to do this can create scratches in the o-ring glands which cause leak paths for oil or air. When possible, pinch and remove o-rings rather than using a pick.
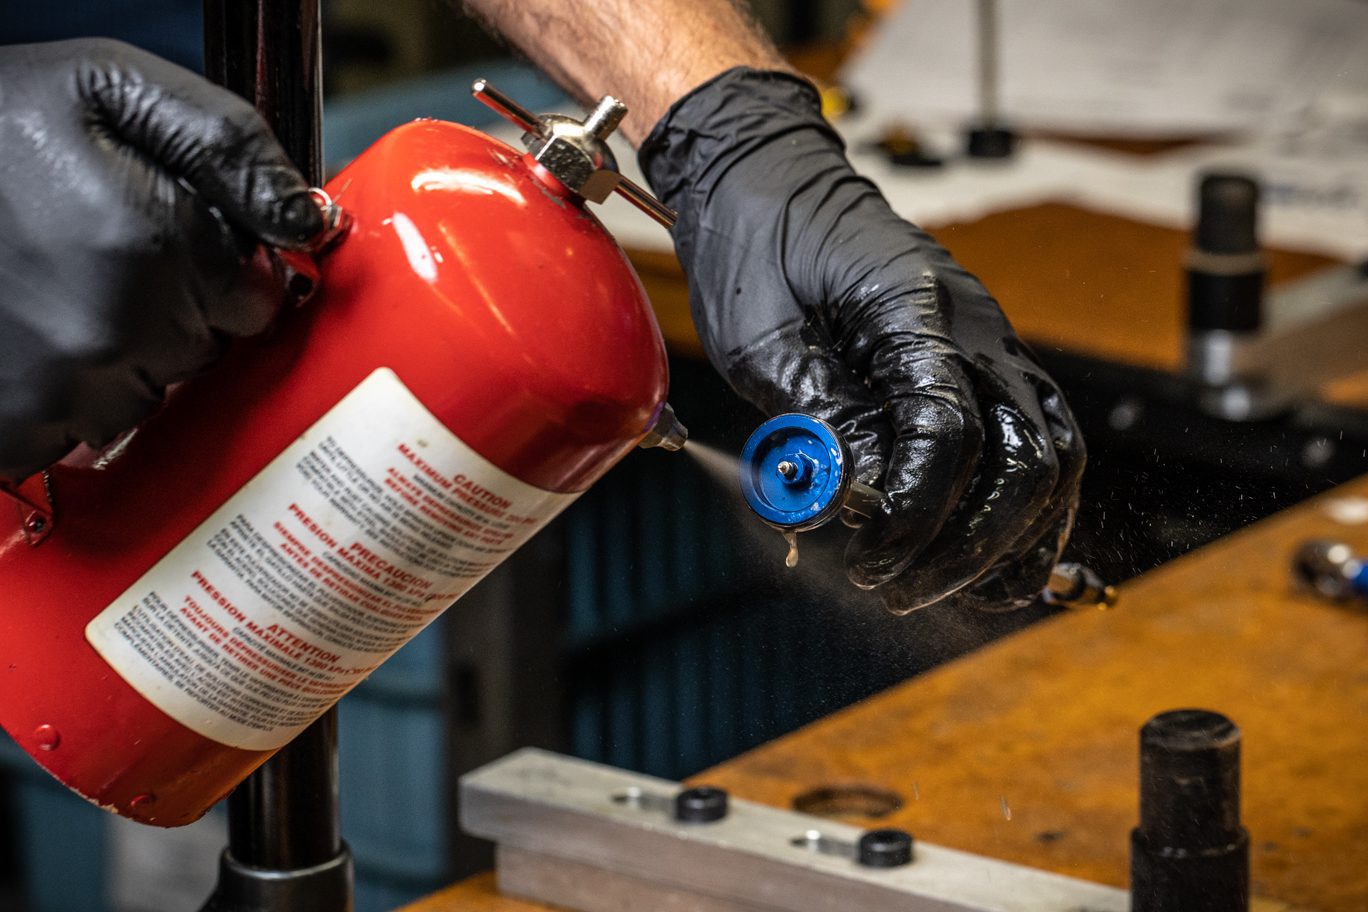
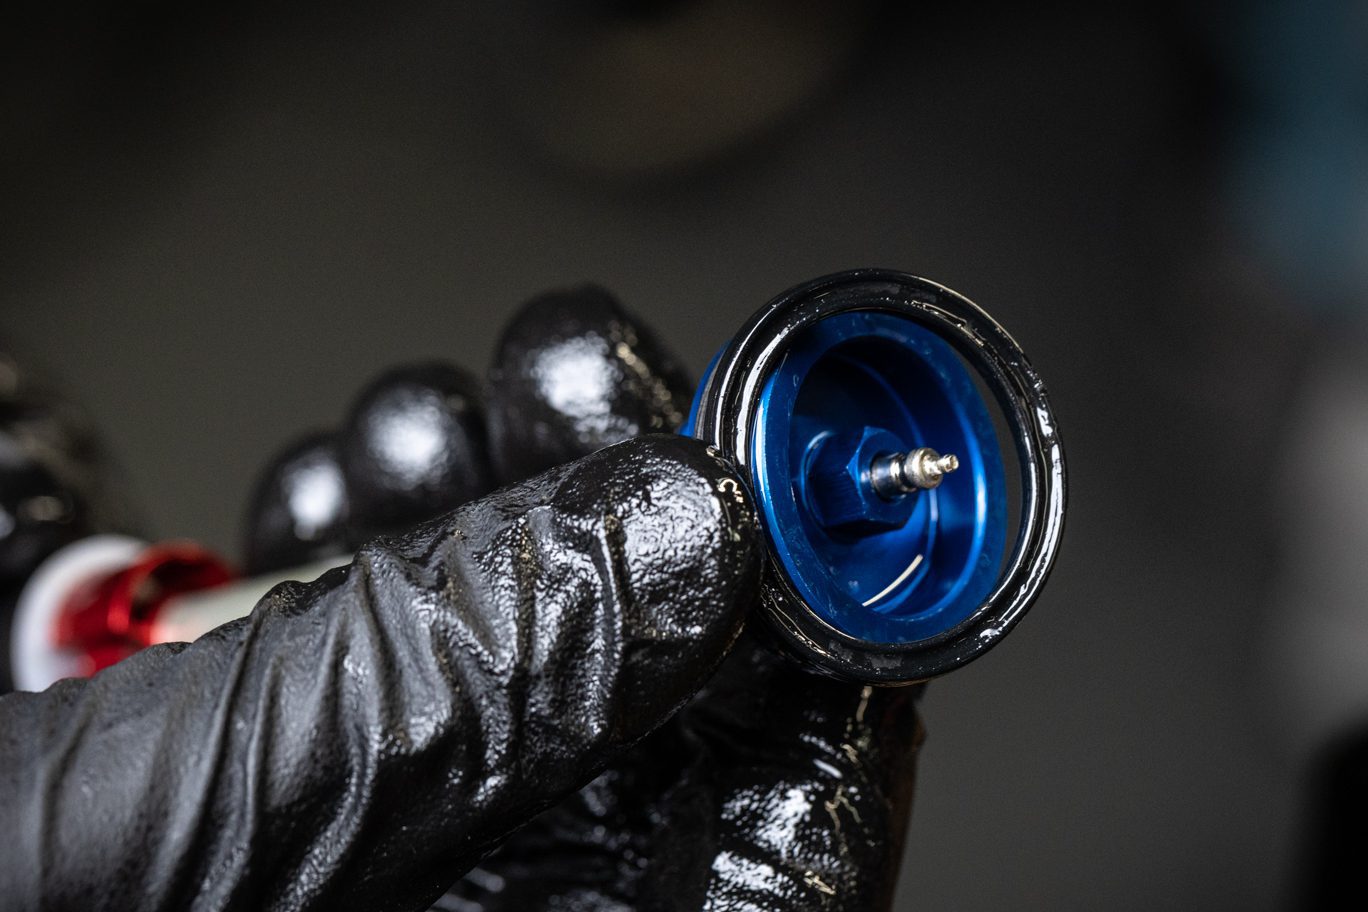
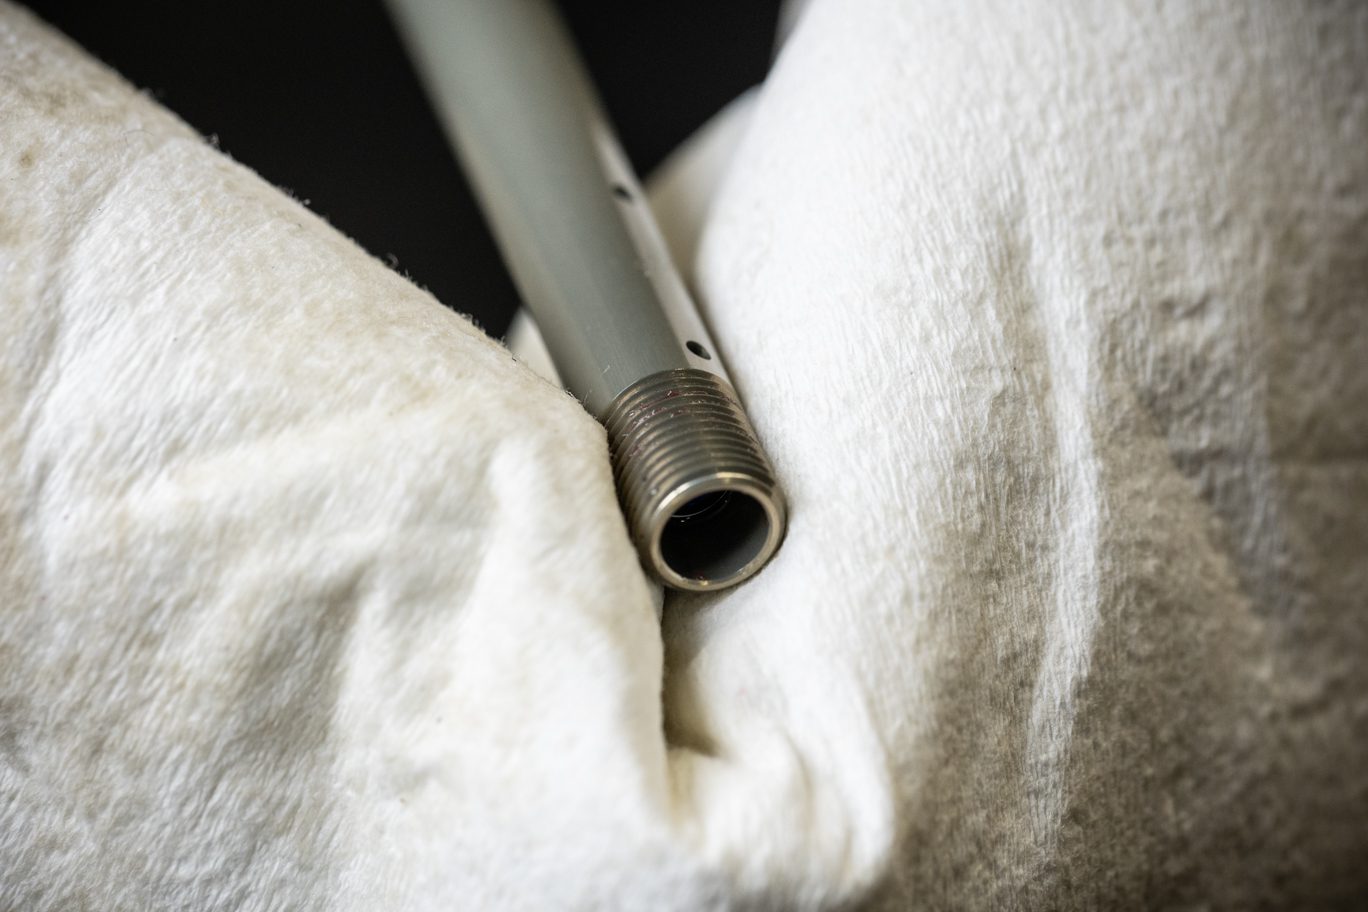
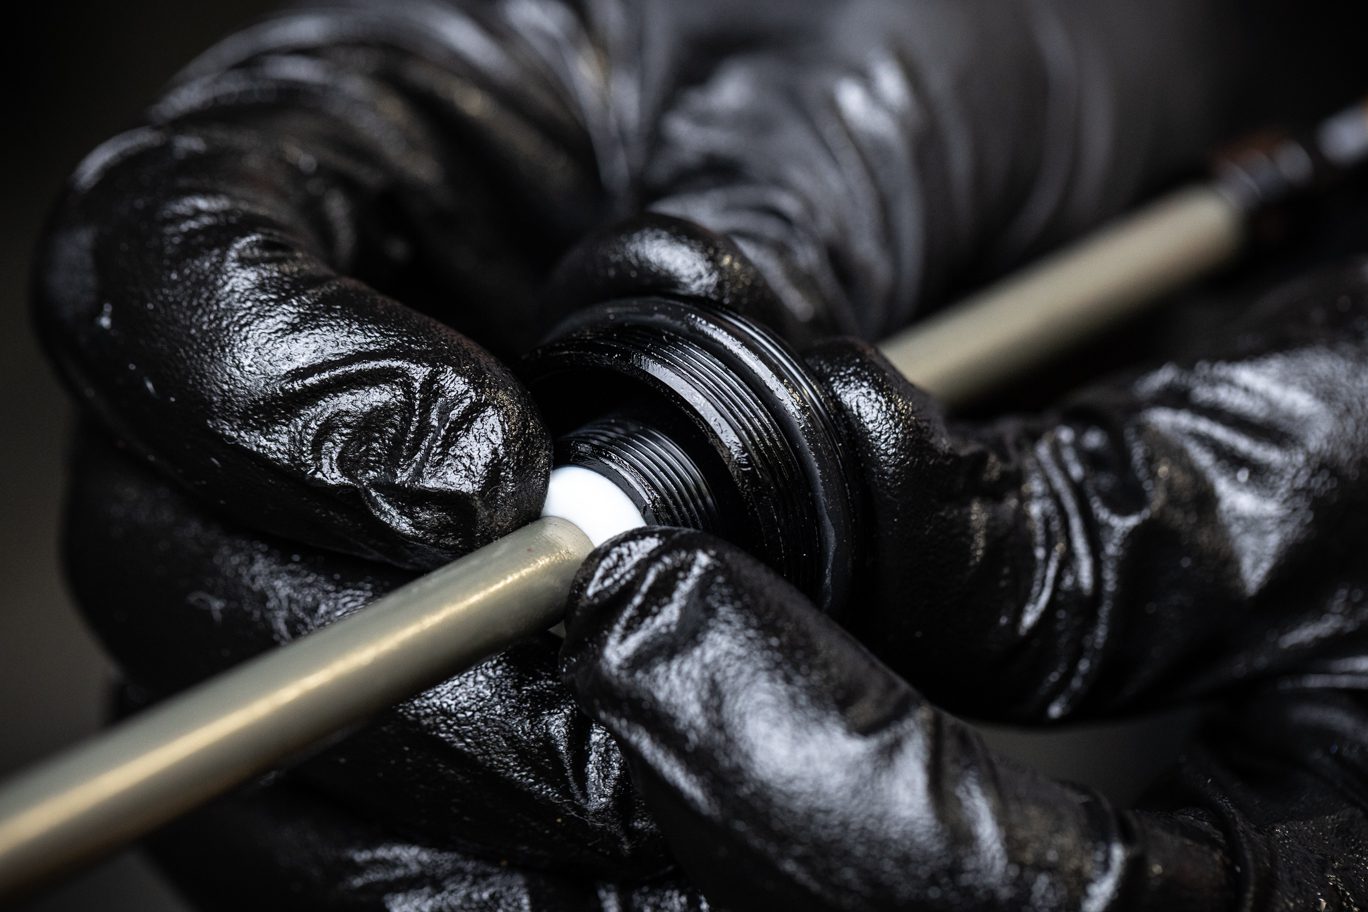
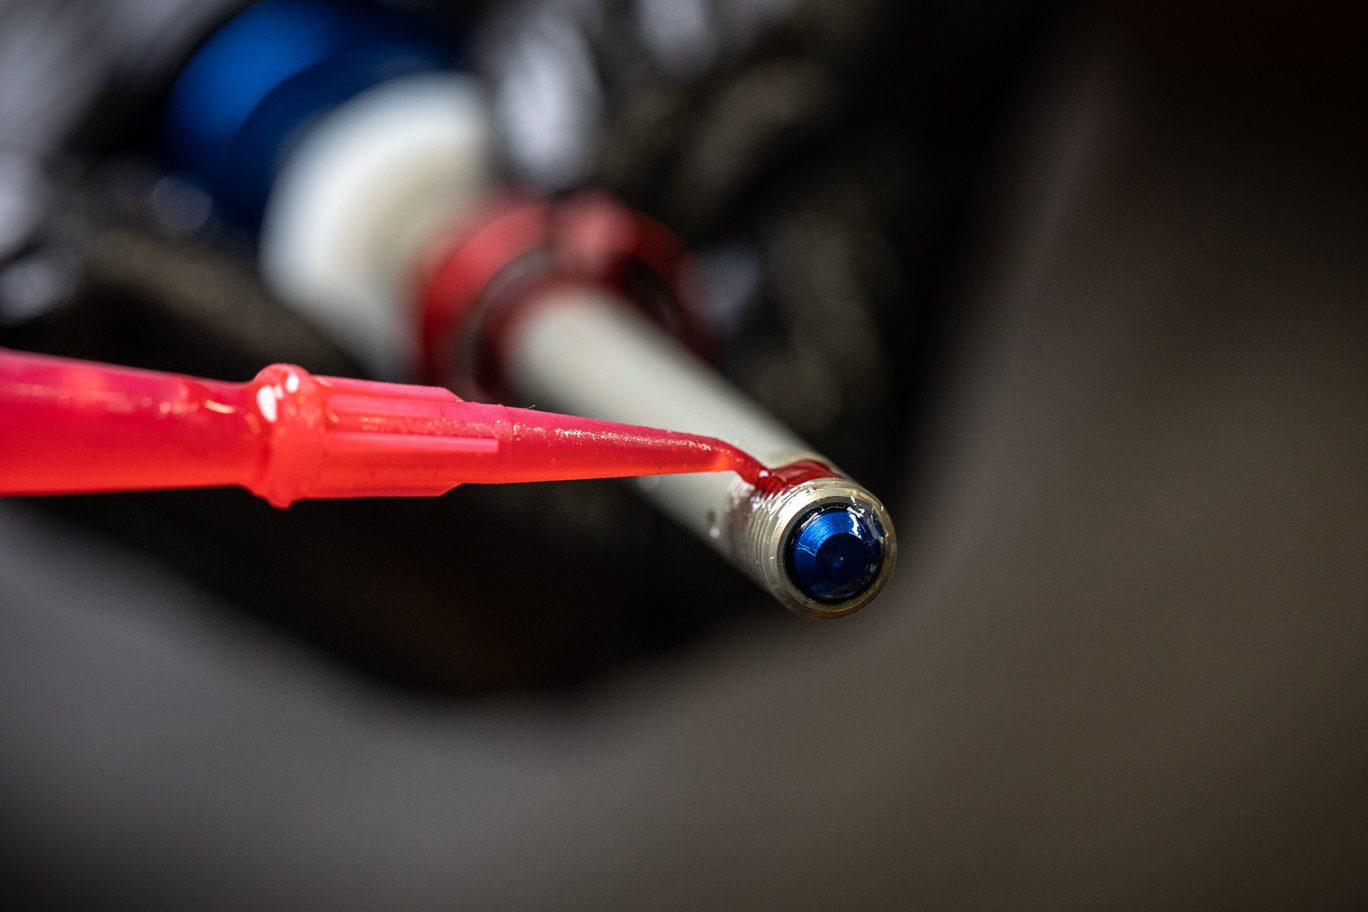
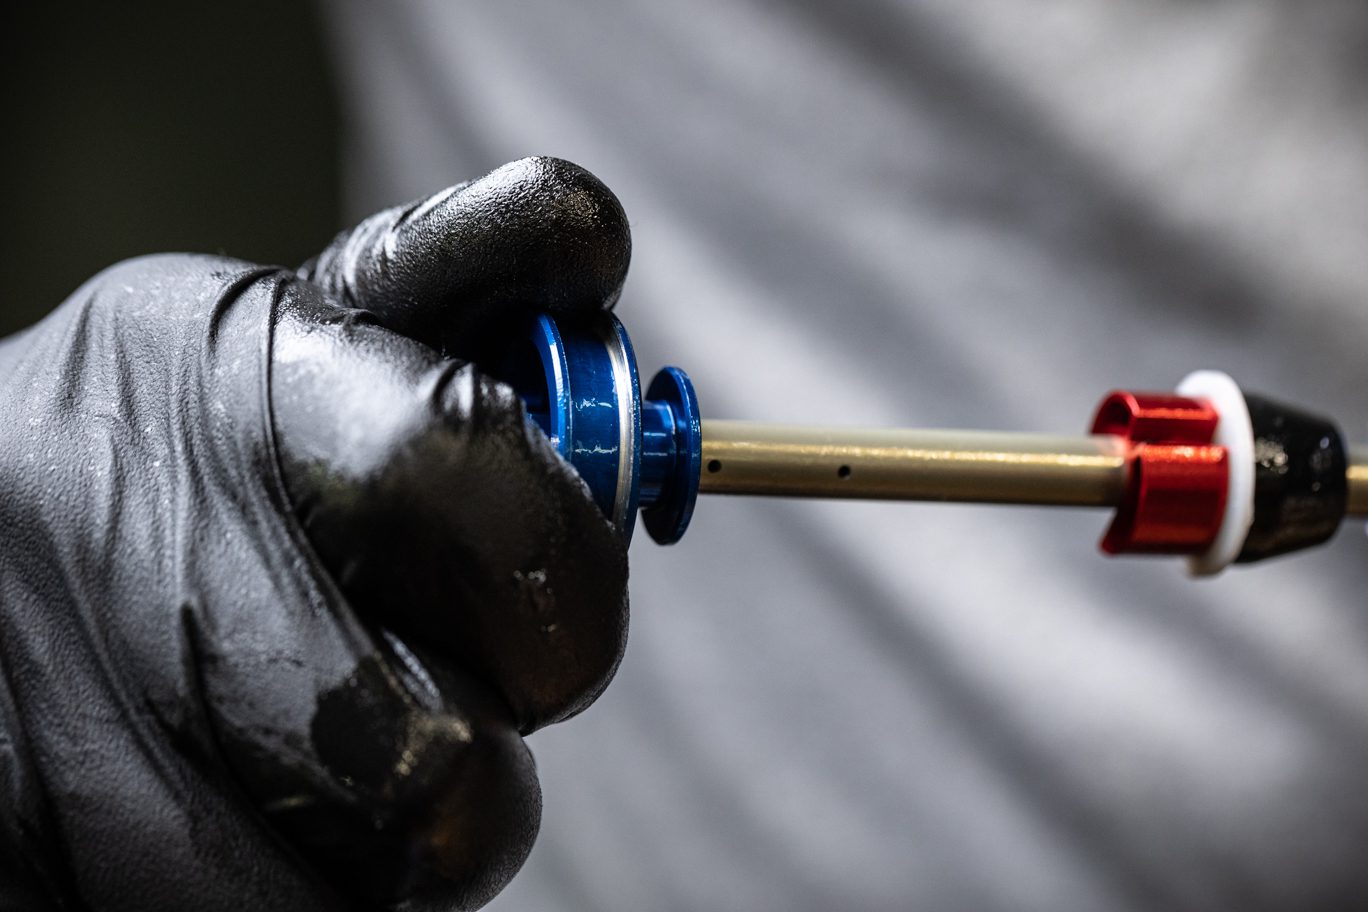
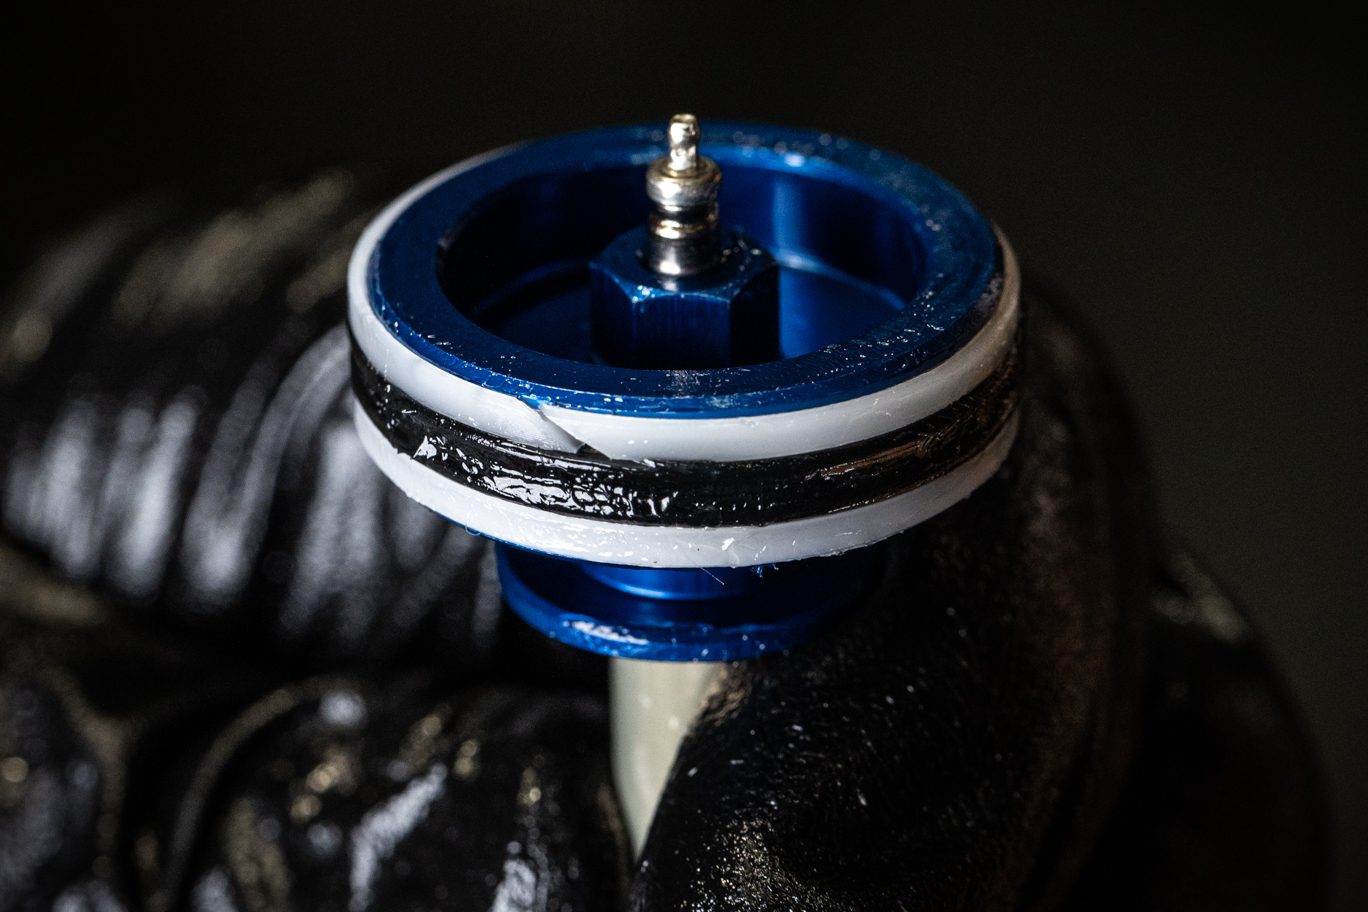
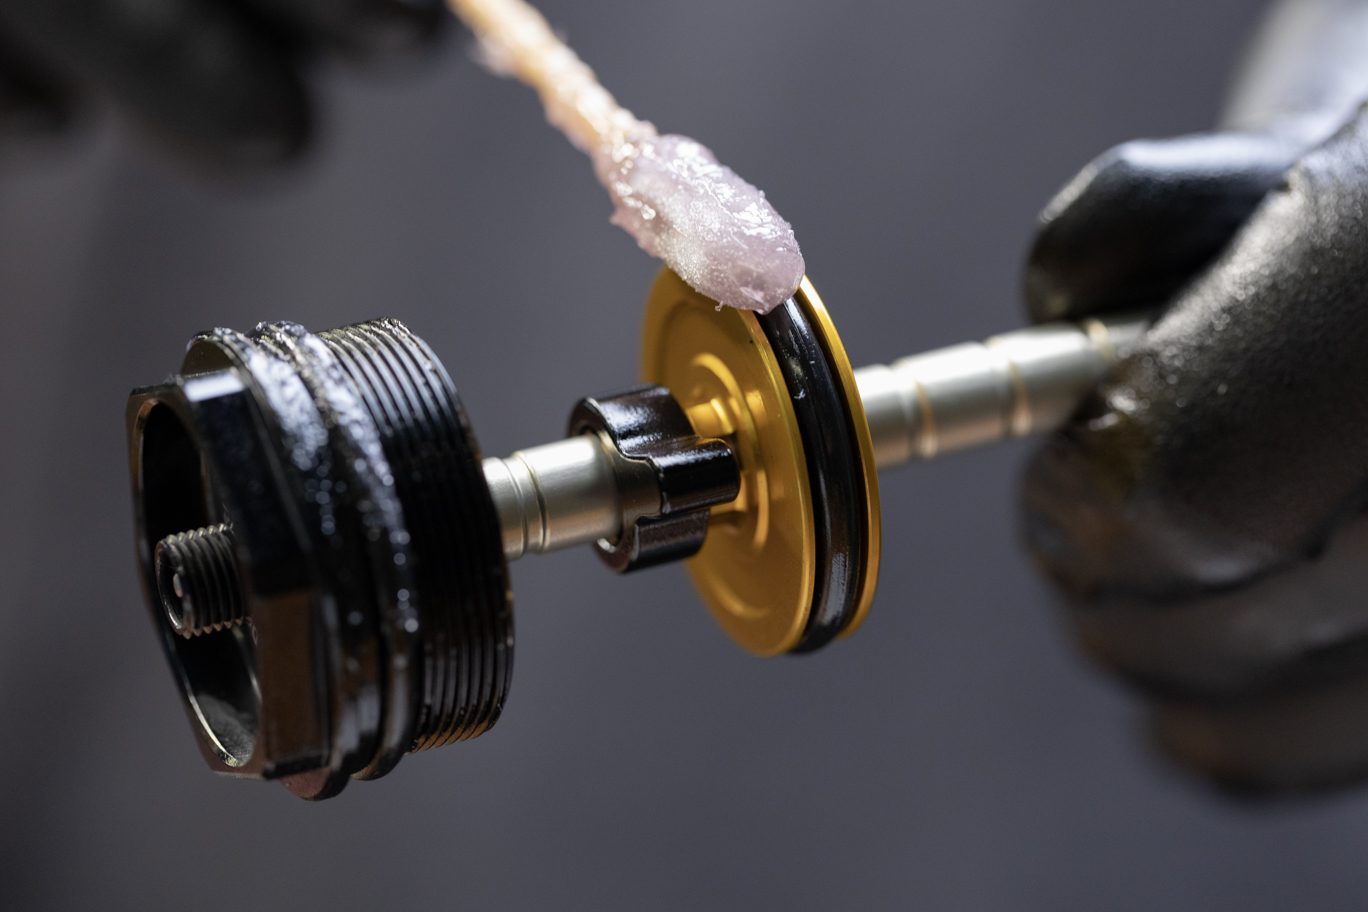
Grease and install foot nut o-ring (.AD0111) on air spring shaft foot nut. Grease bushing on new air seal head (AAG0179). Slide air seal head onto air shaft, noting correct orientation. Thoroughly grease air seal head quad ring (AAD1809). Walk it past the threads onto shaft. Press quad ring into air seal head. Install back up ring (AAG0383) on shaft. Press back up ring against quad ring into seal head.
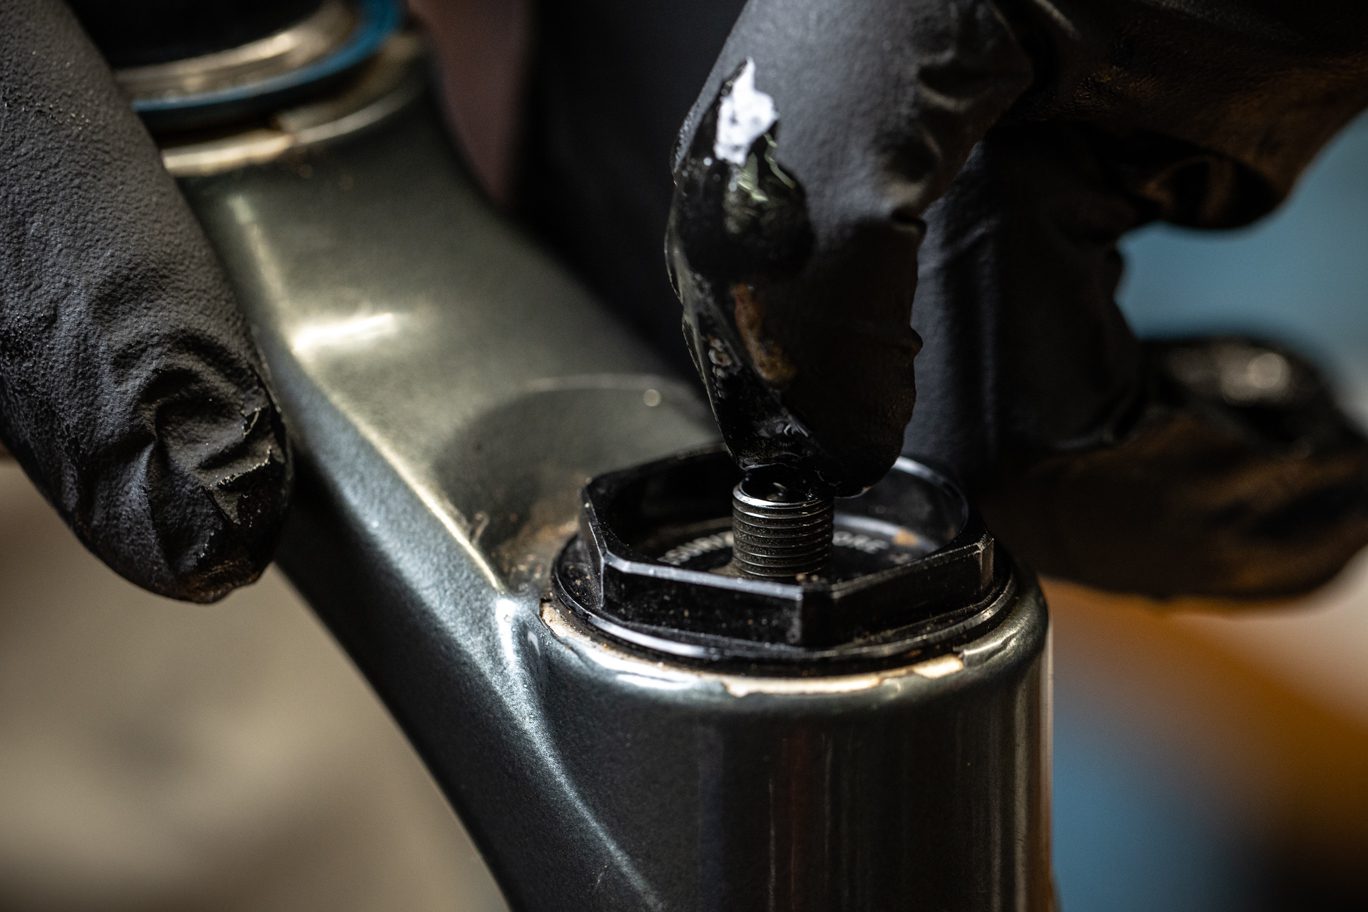
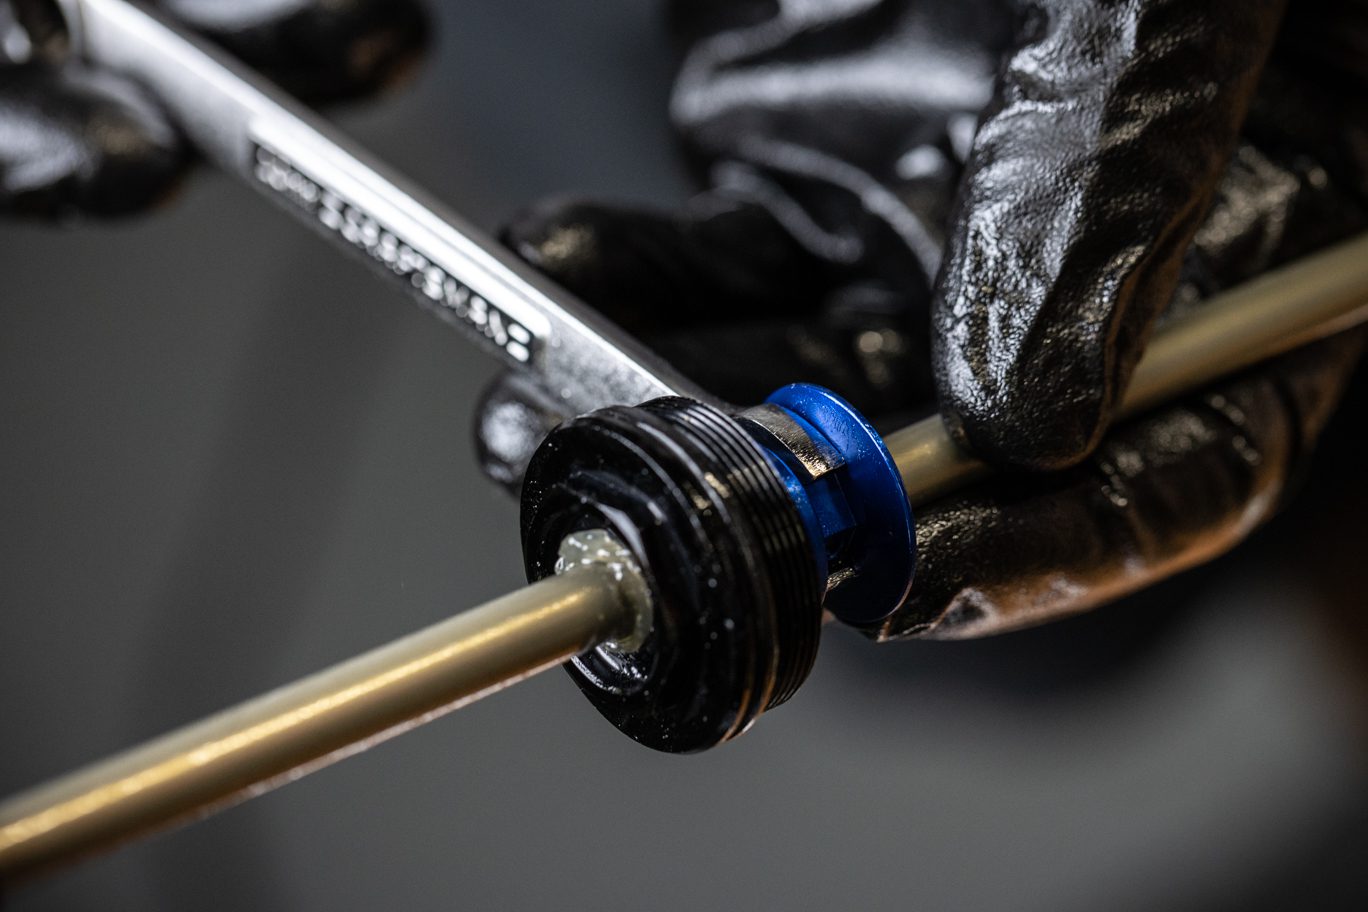
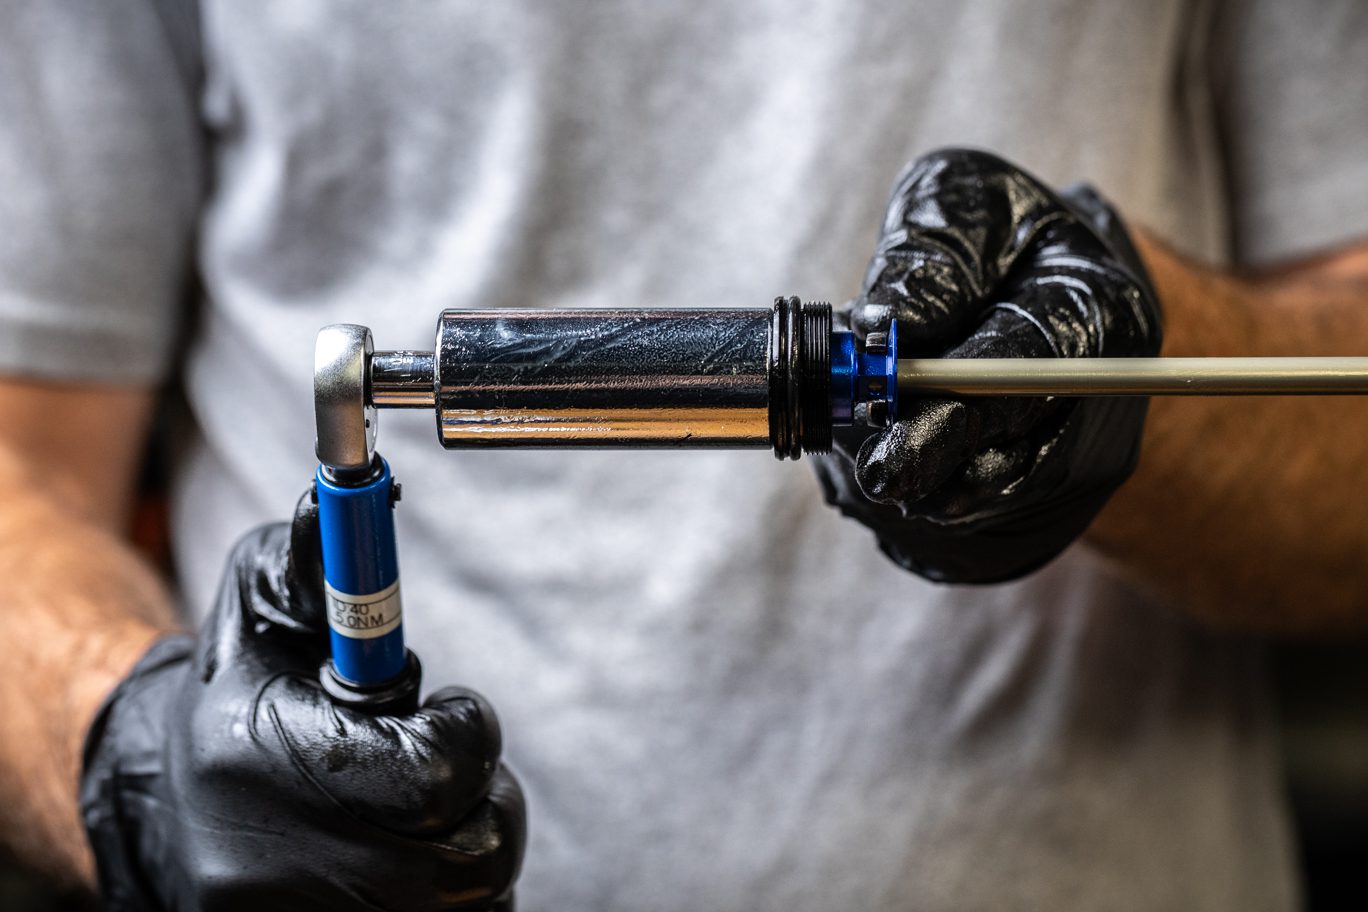
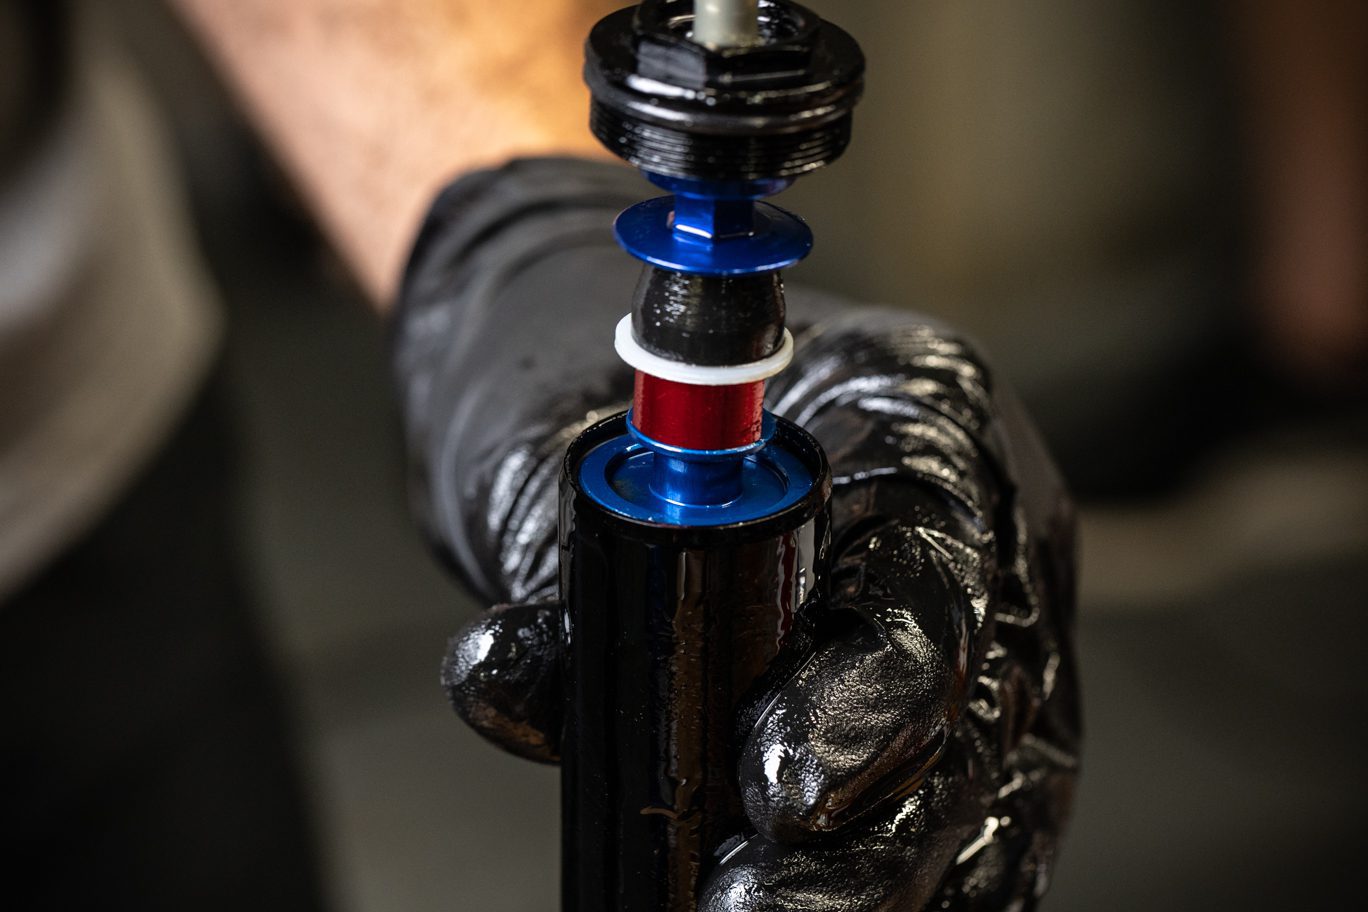
Apply blue Loctite (243) to seal head threads. Install new top out spacer (AAG0312) and thread onto seal head. Hold top out spacer with 10mm open ended wrench, avoiding putting wrench flats on port hole. Torque seal head to 5 Nm using 22mm deep well socket.
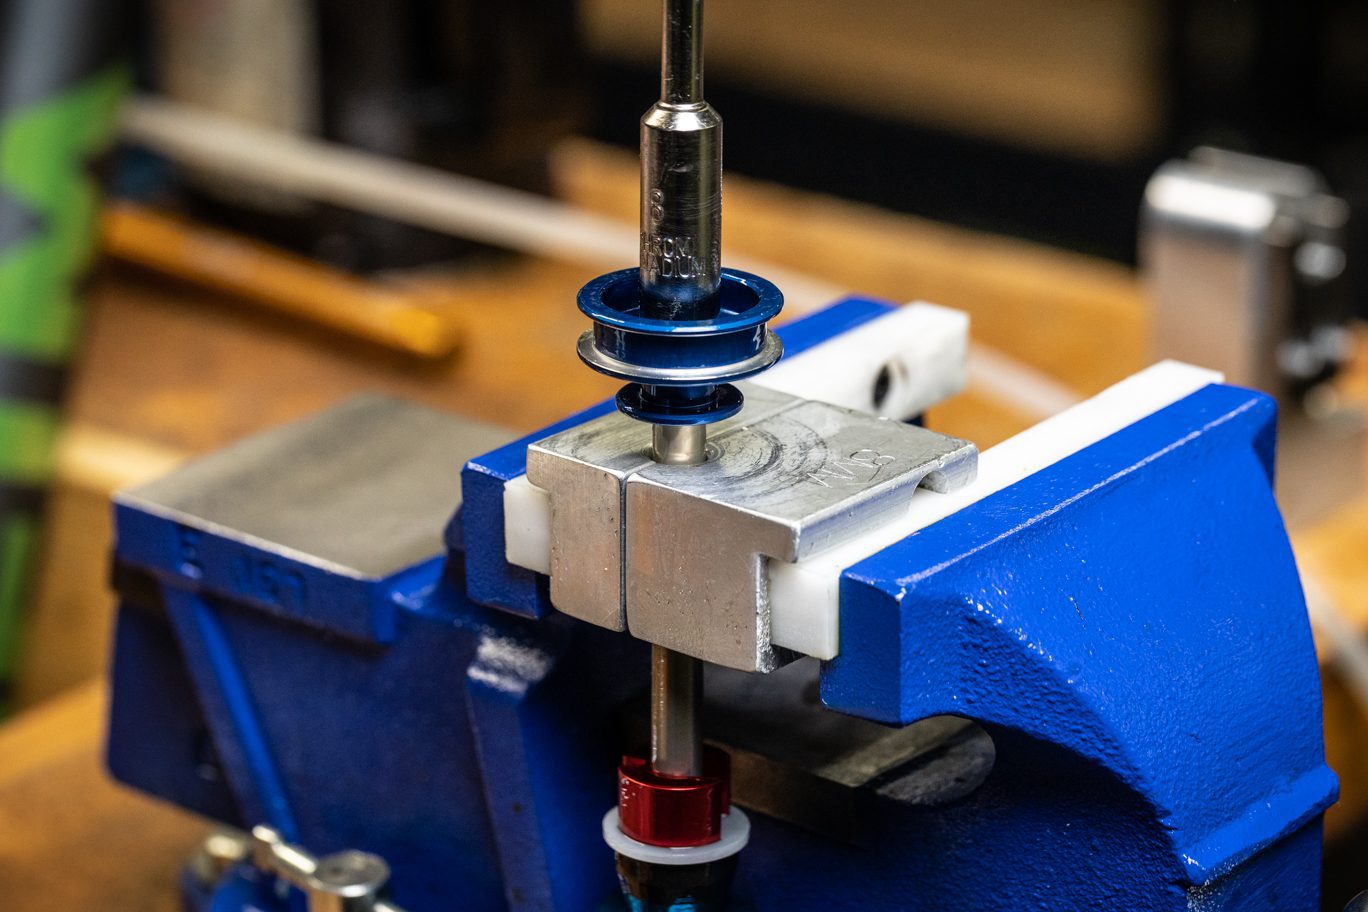
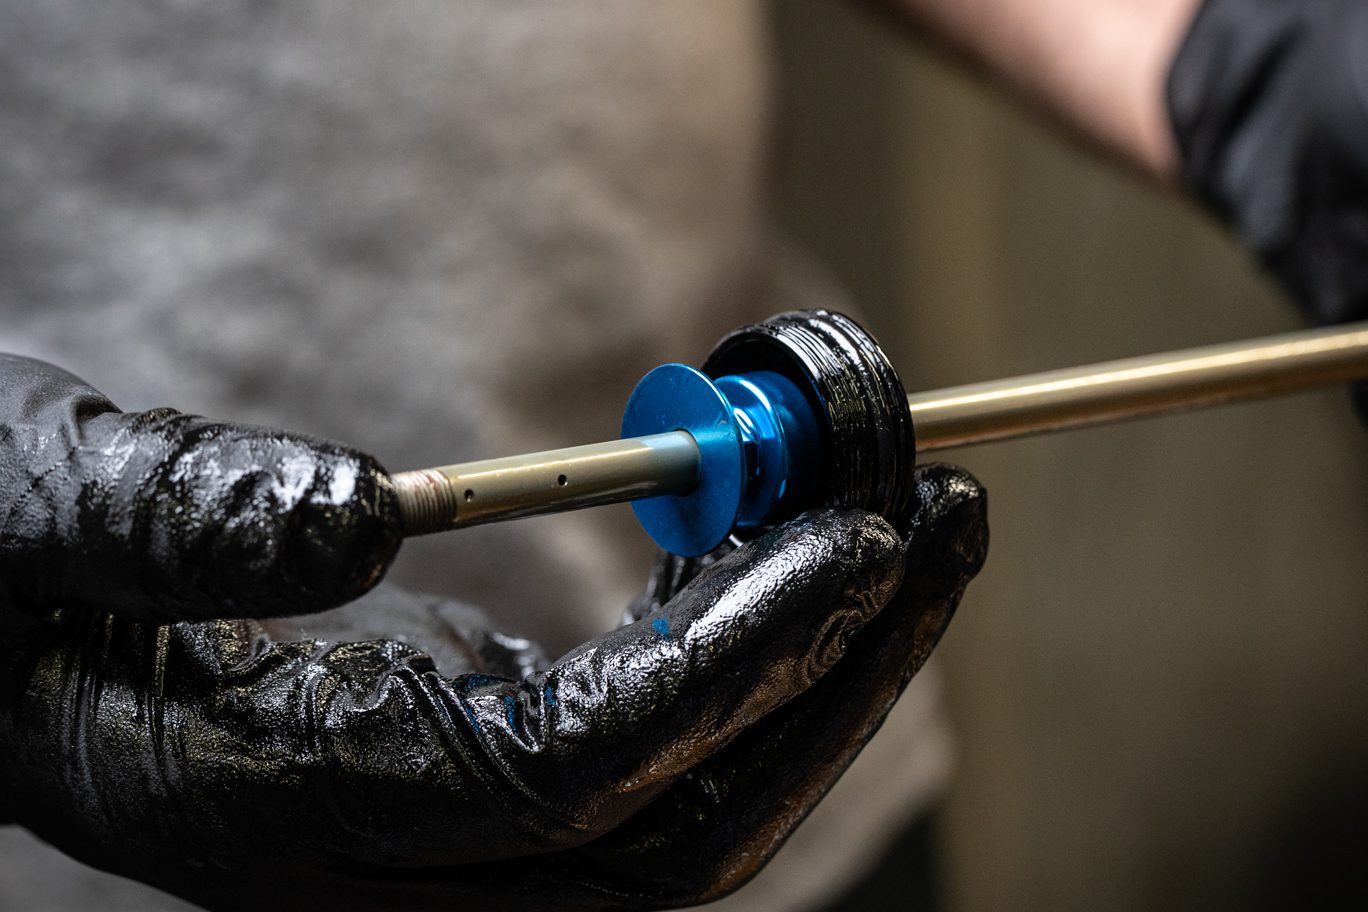
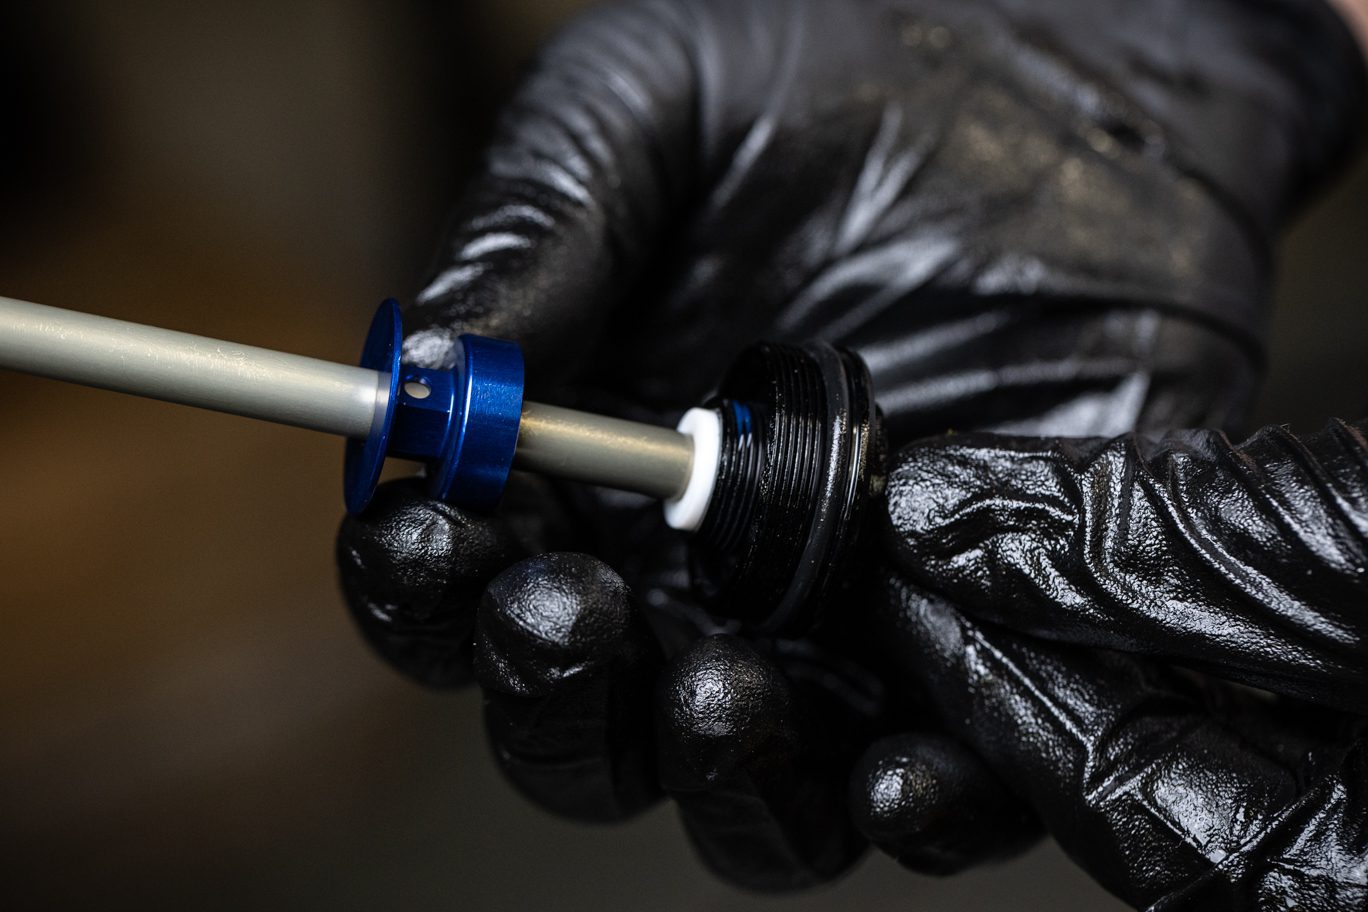
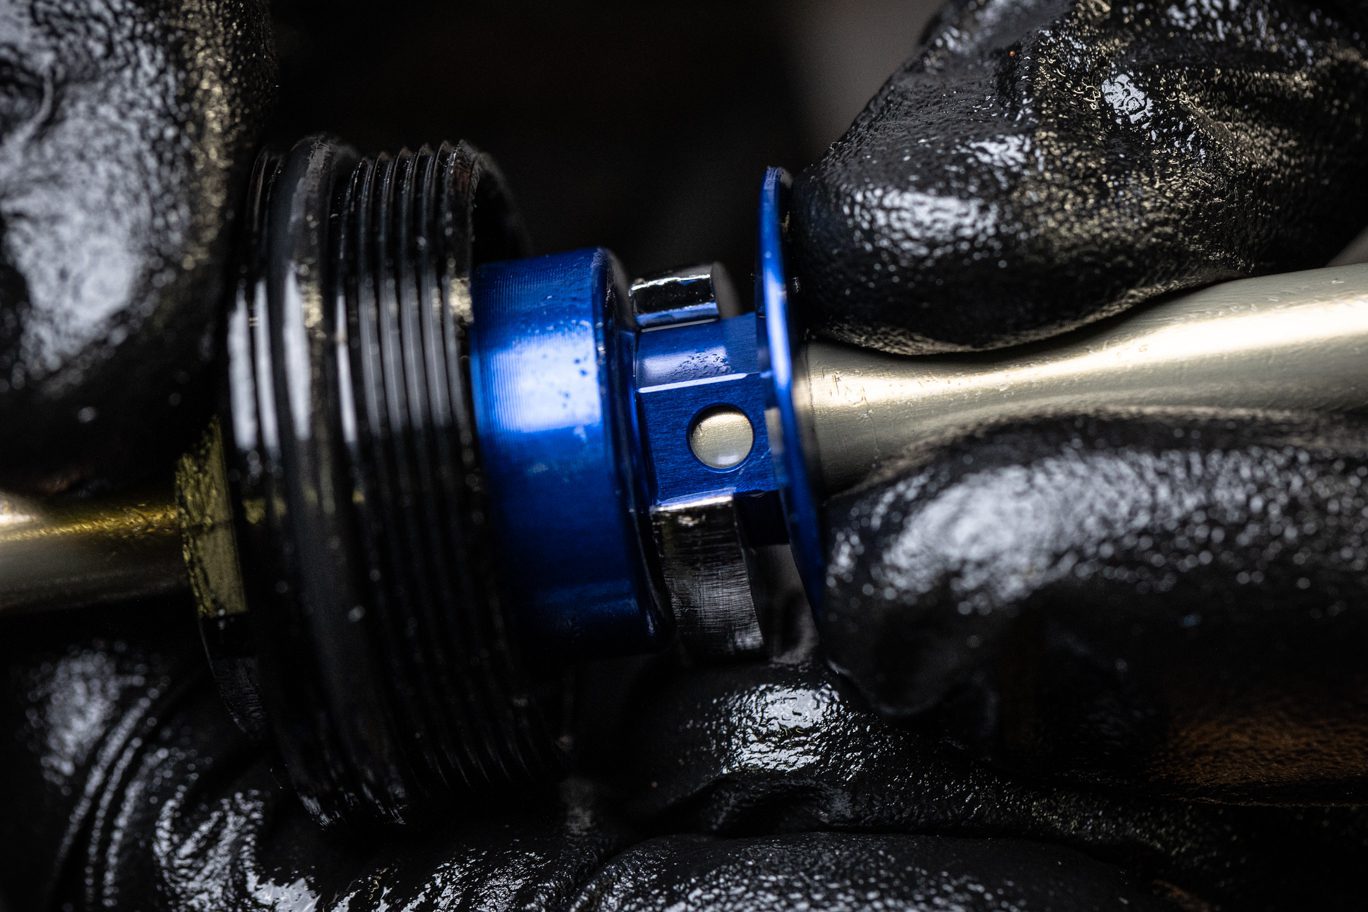
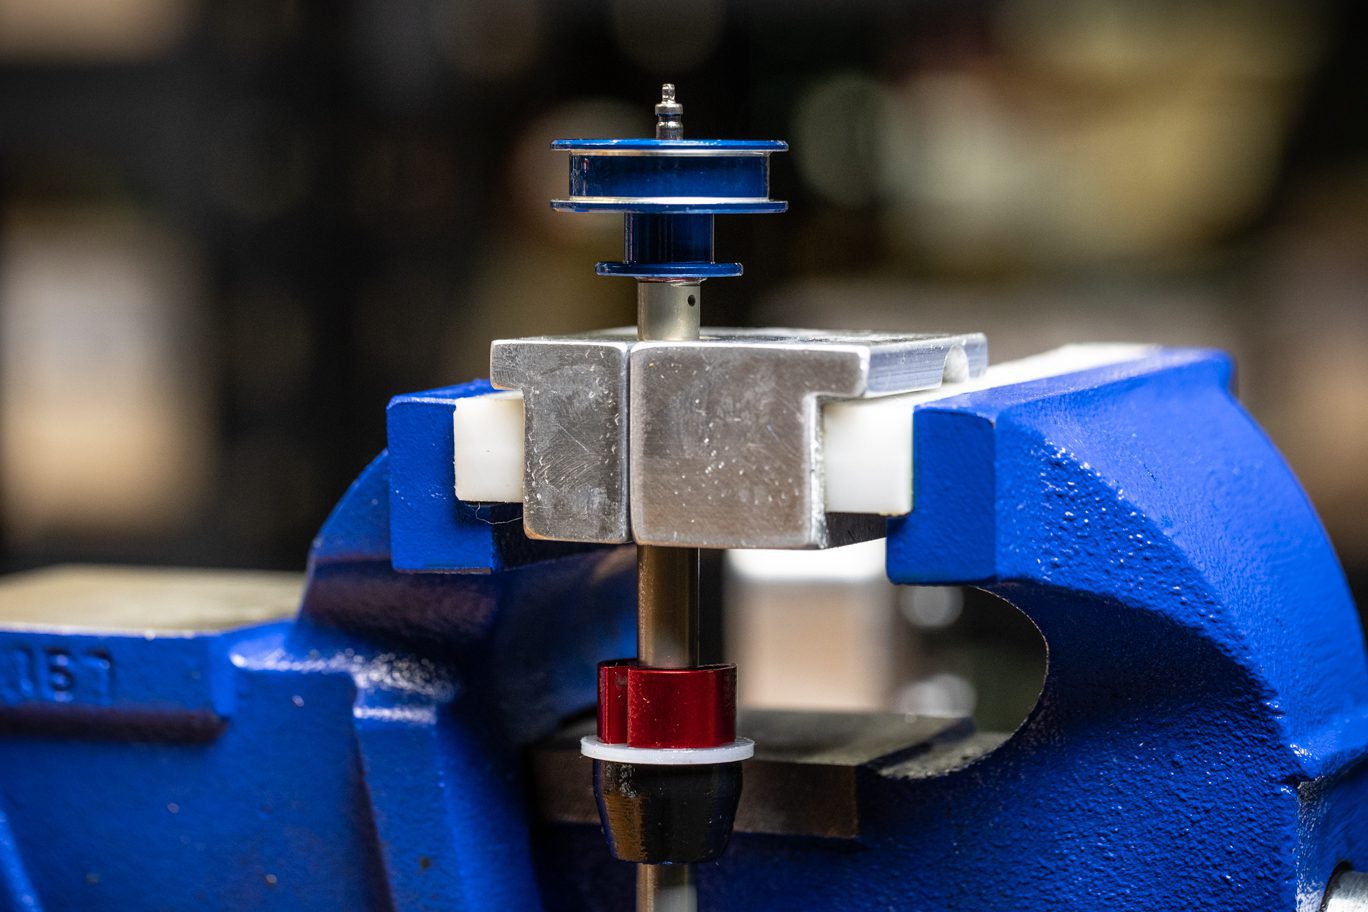
Install top out bumper (and any metal shims if present), plastic spacer, and any travel adjustment. Apply red Loctite (263) to rod threads. Thread air piston onto rod. Clamp rod in vise directly under air piston with enough space to torque. Torque air piston to 6 Nm using 8mm socket.
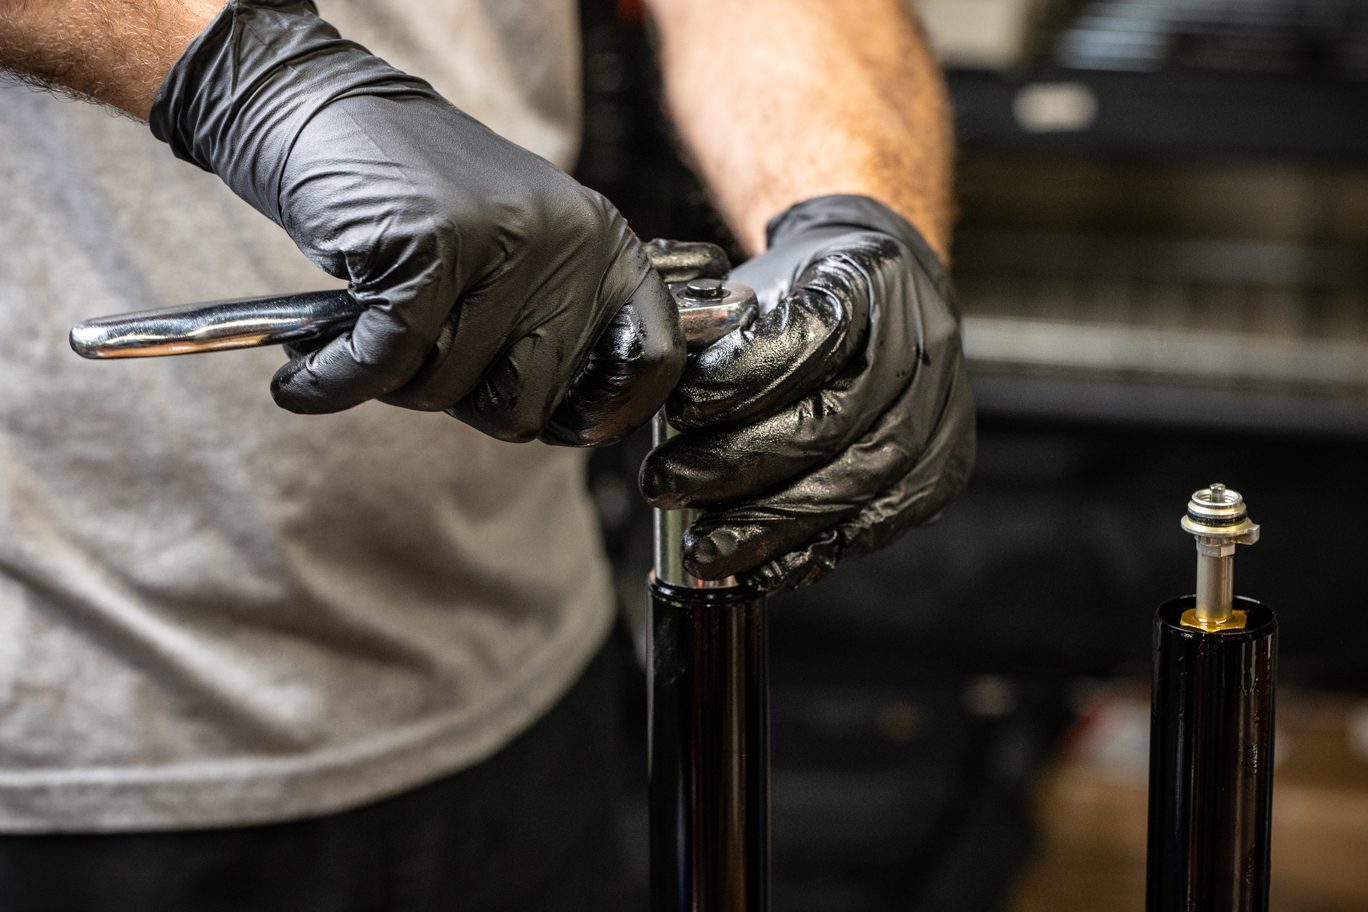
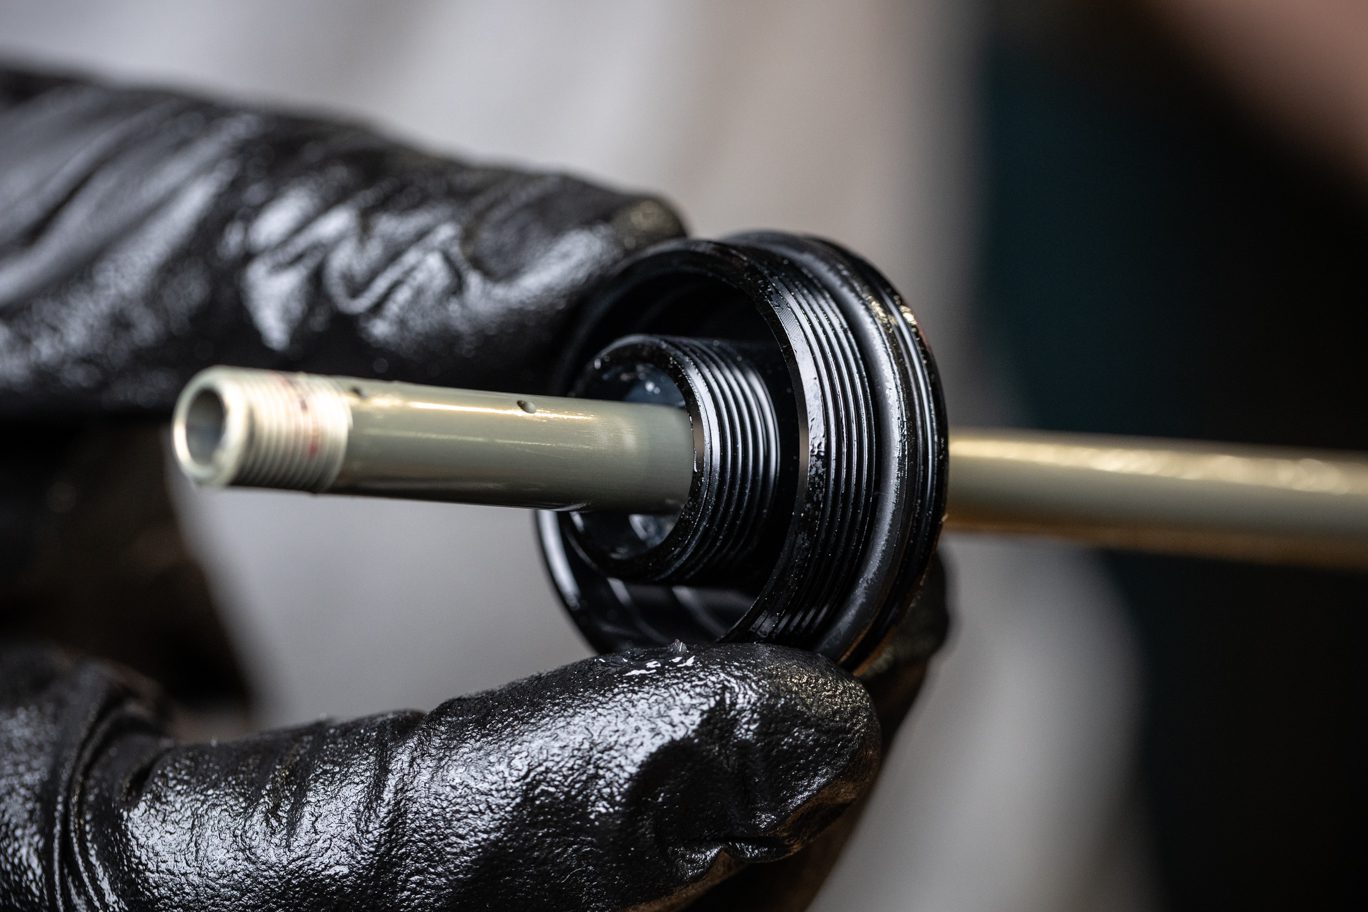
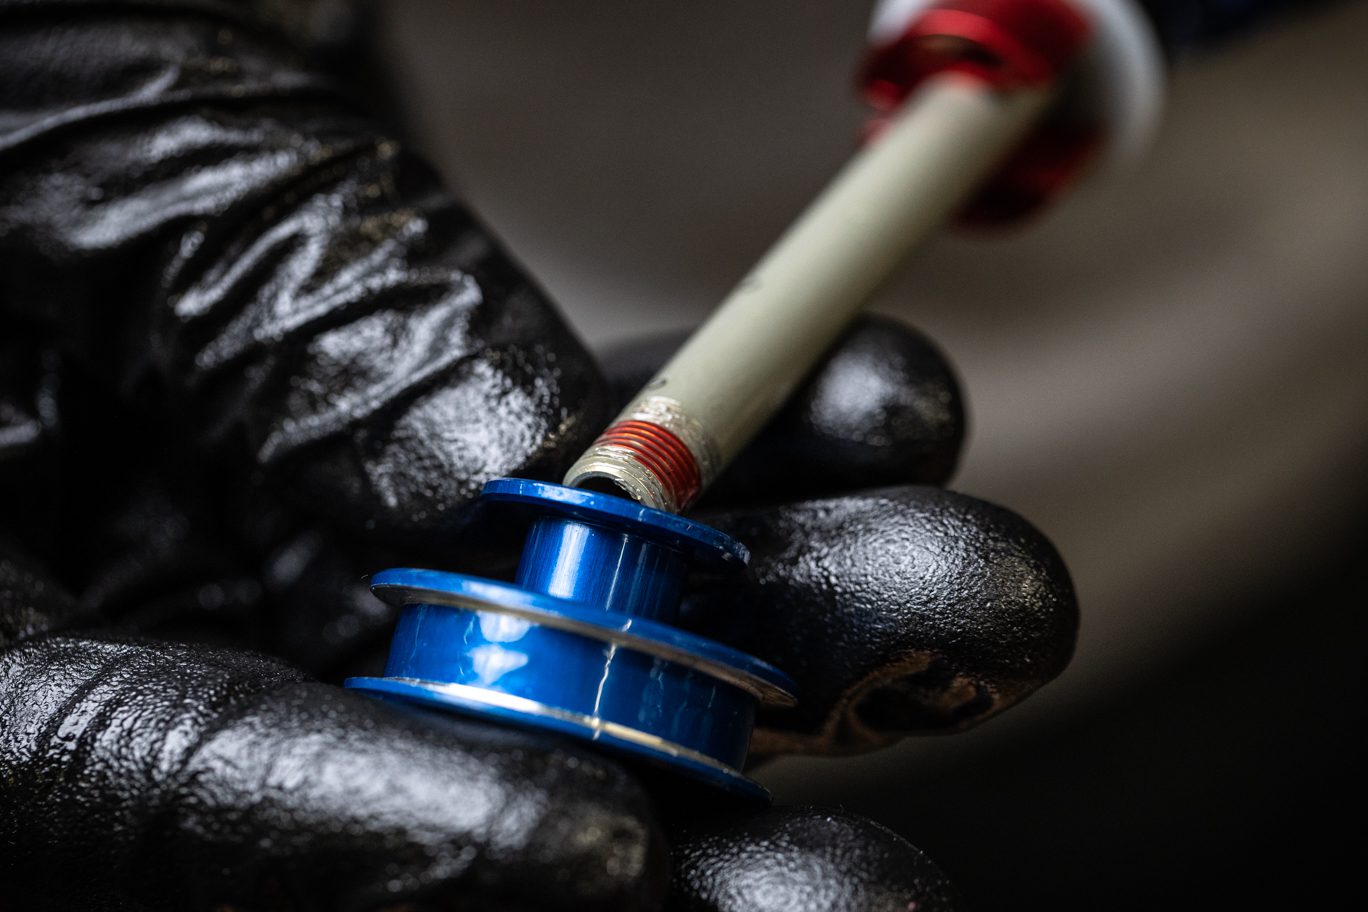
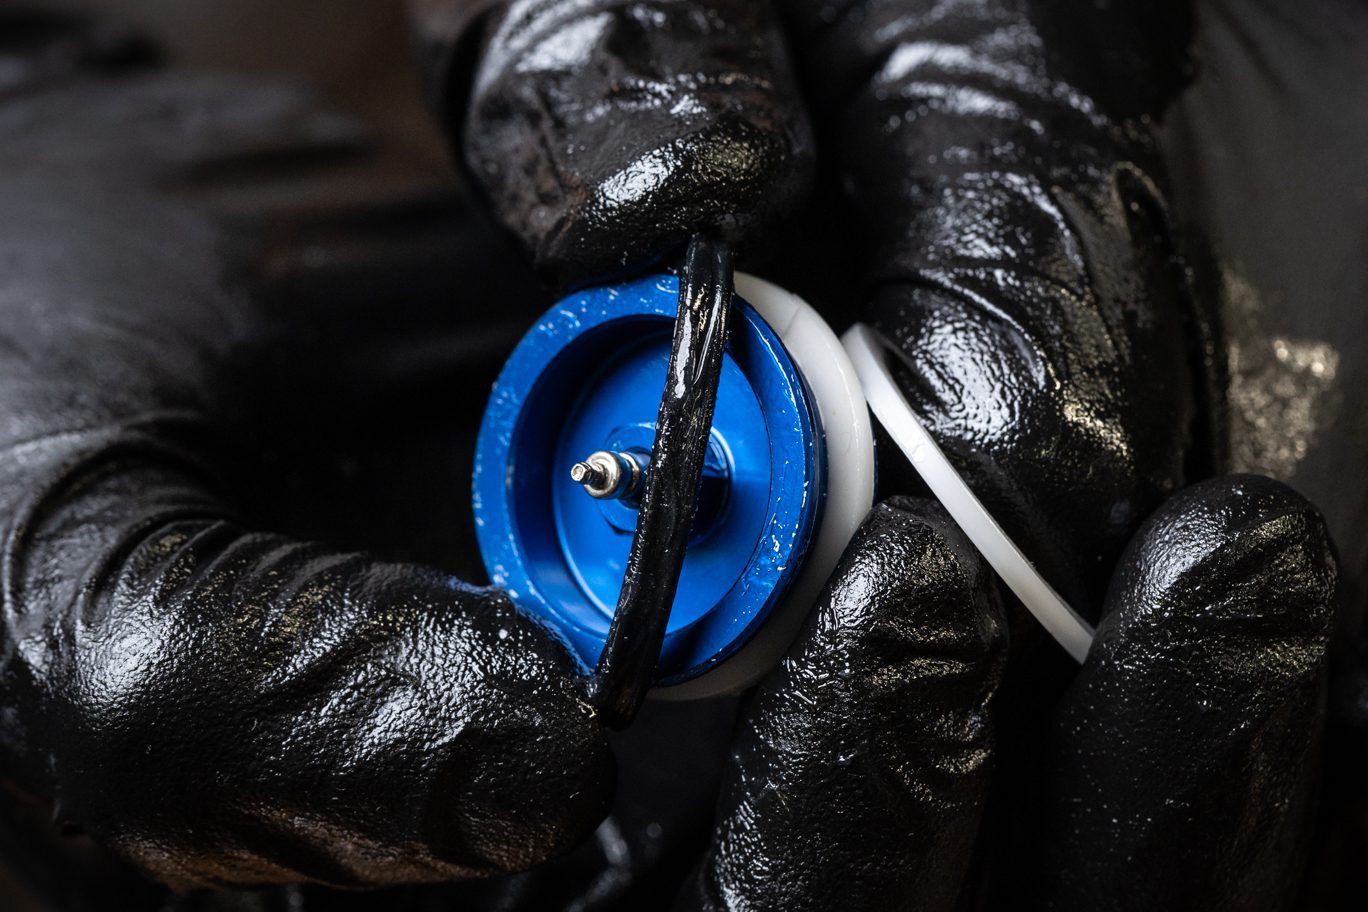
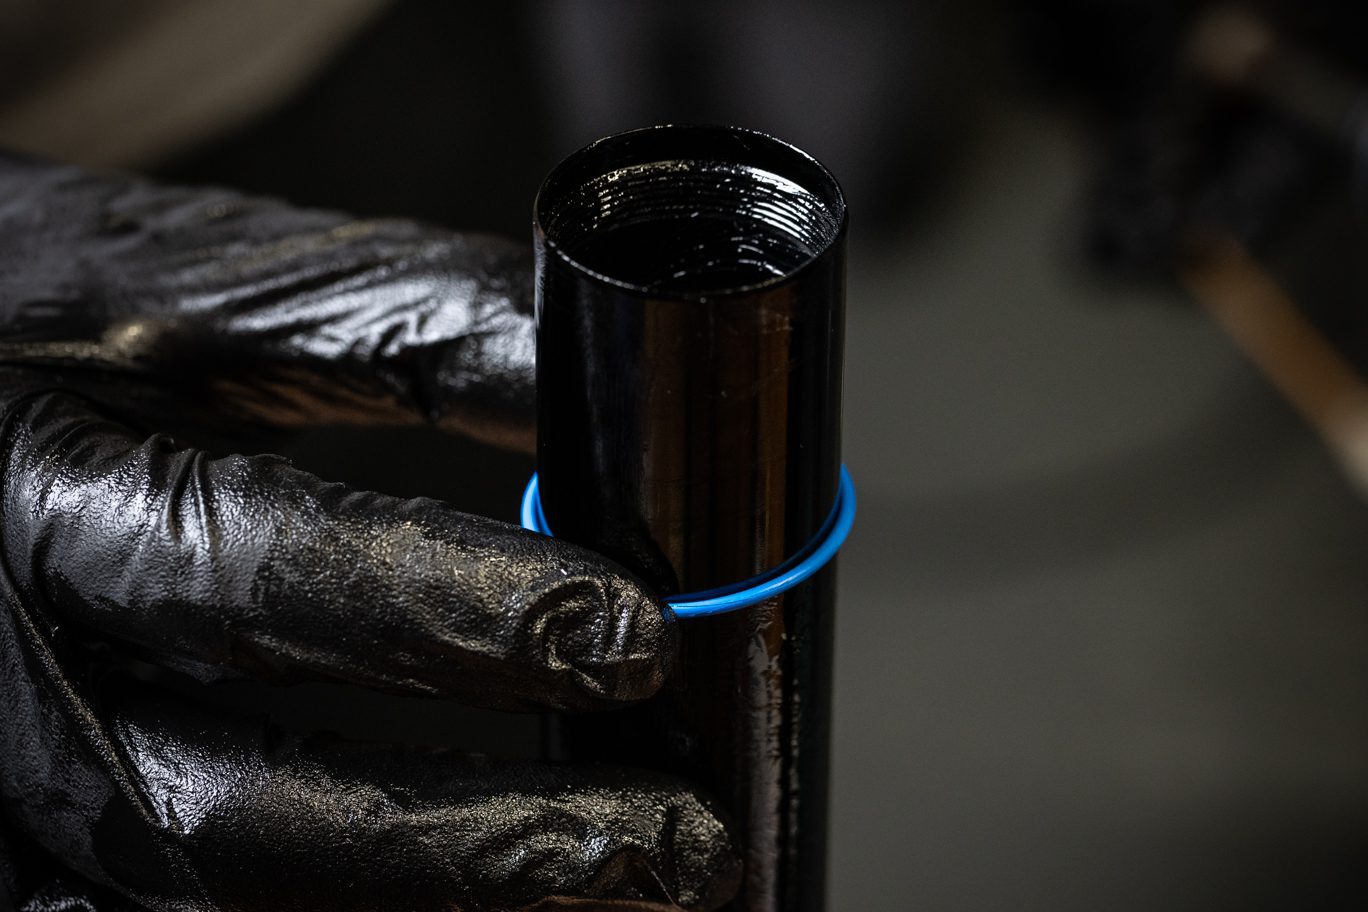
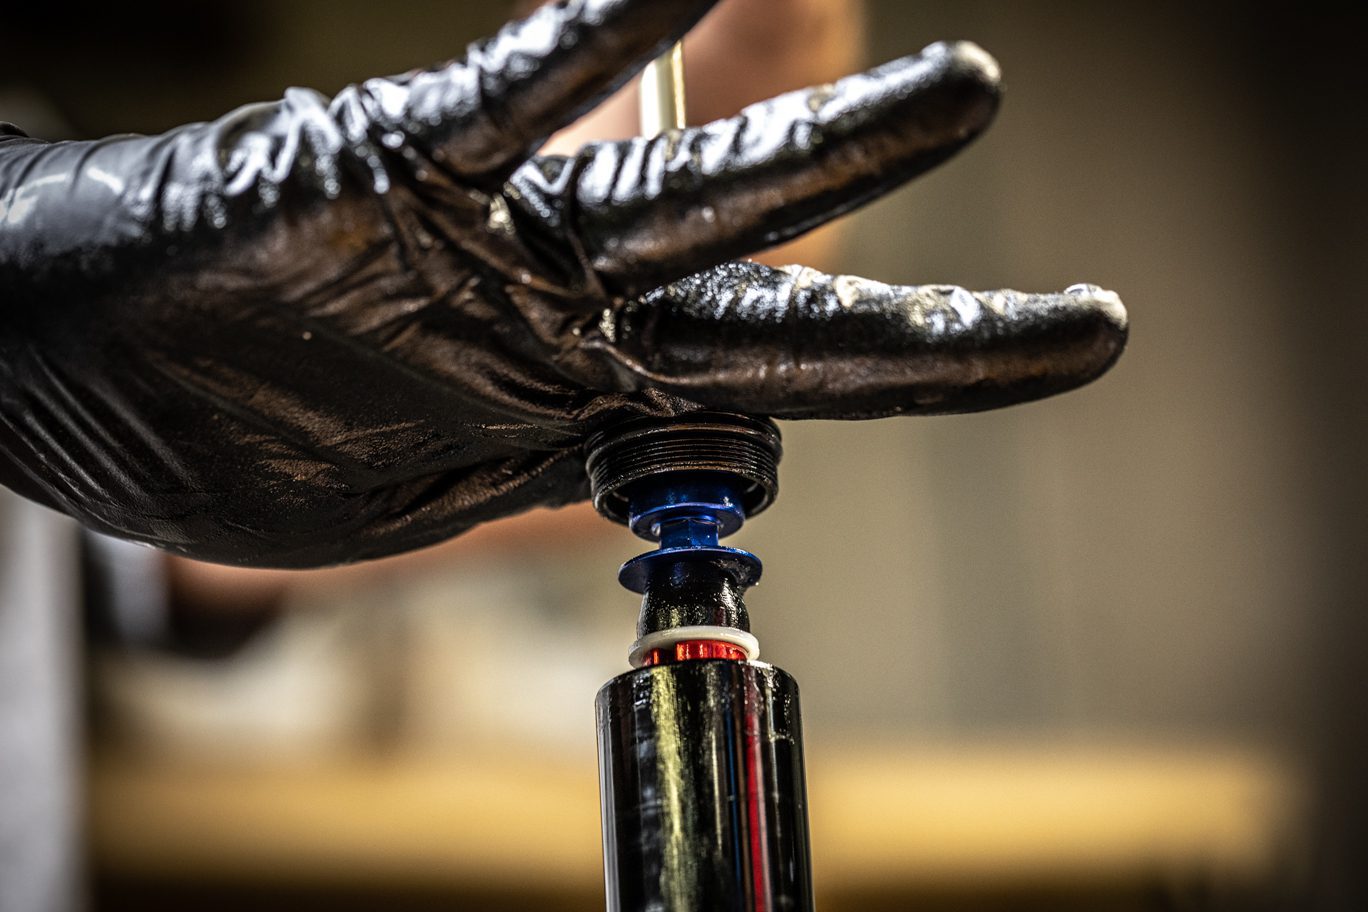
Install sag o-ring (AAG0408) on stanchion. Thoroughly grease inner stanchion and air piston. Install air spring assembly by carefully walking the air piston past threads on stanchion. If needed, use damper side stanchion to better seat rings on air piston to aid install. Keep hand above seal head to avoid pinching hand. Press negative charge button and compress shaft all the way down. Torque air seal to 16 Nm using 22mm deep well socket.
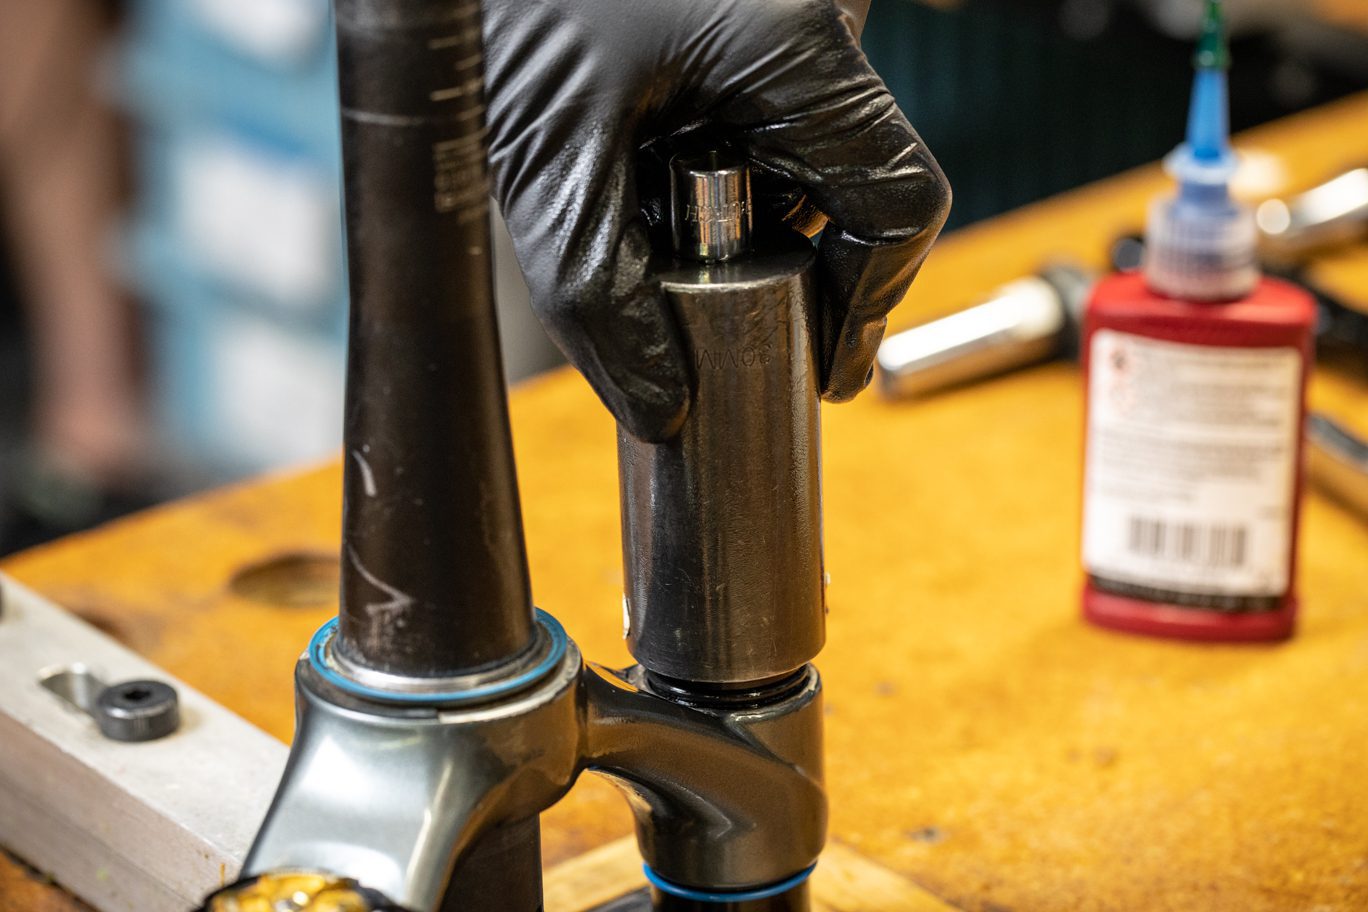
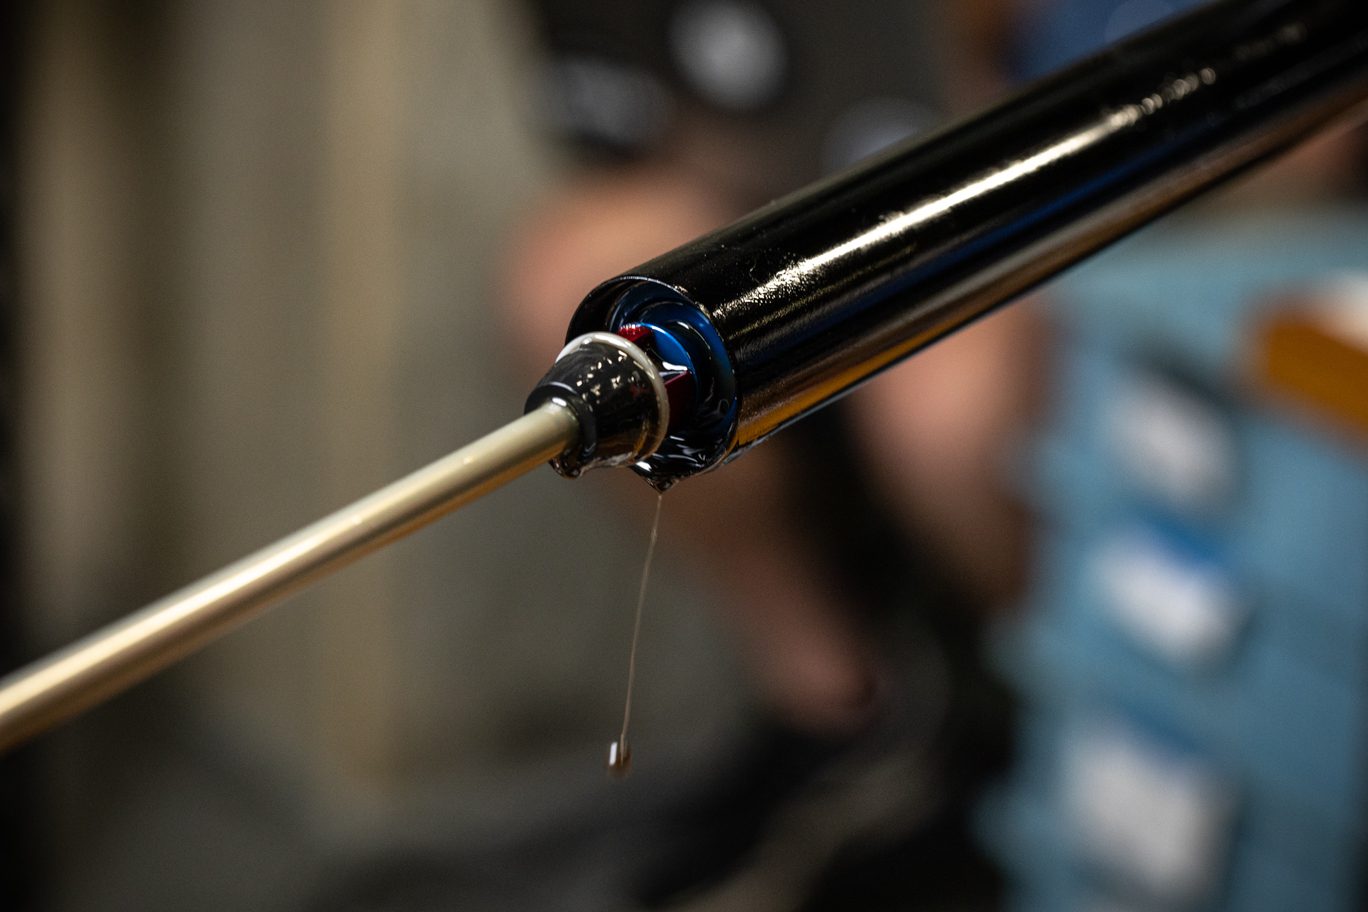
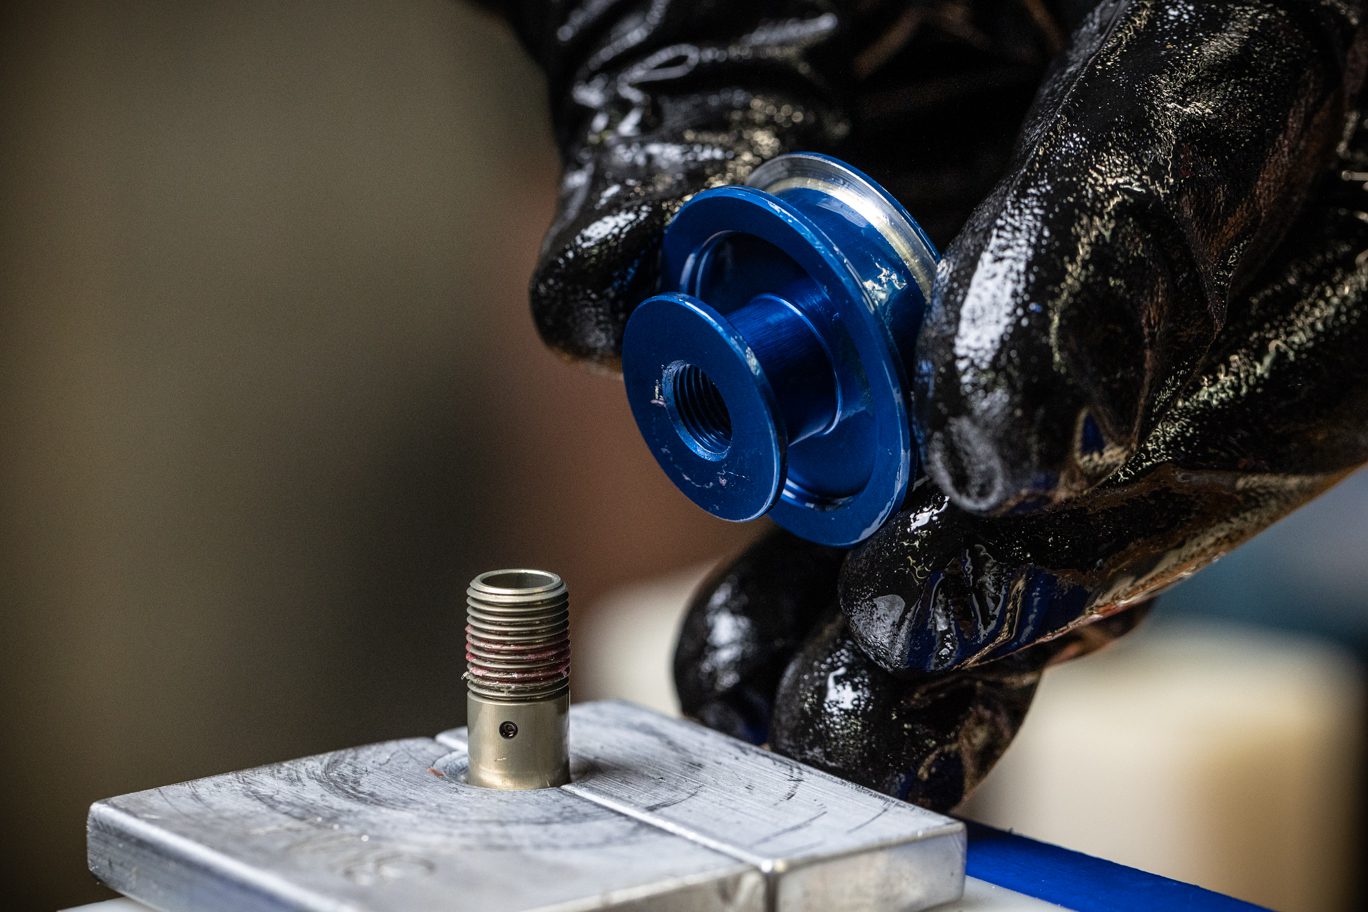
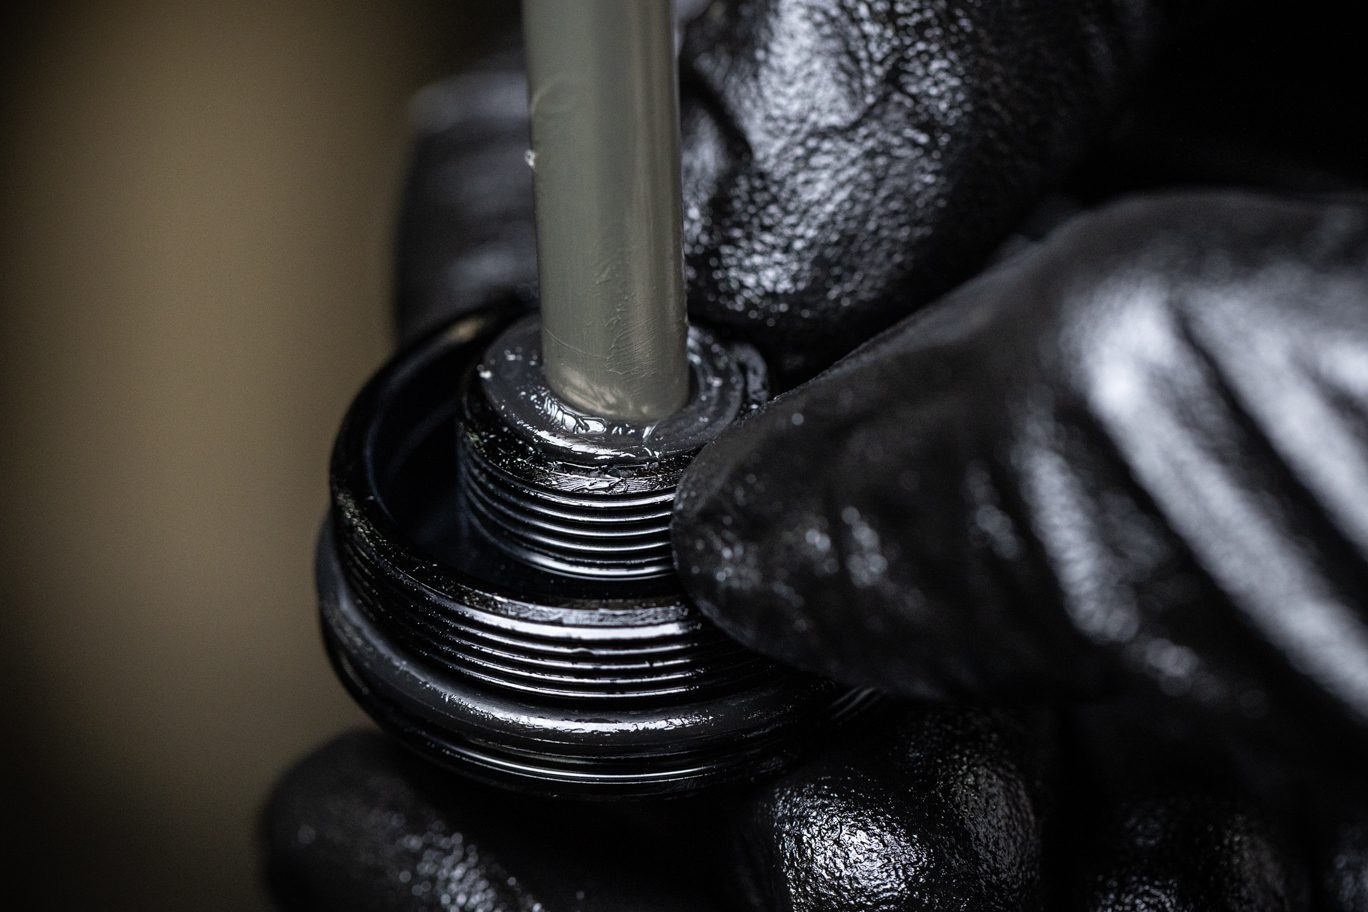
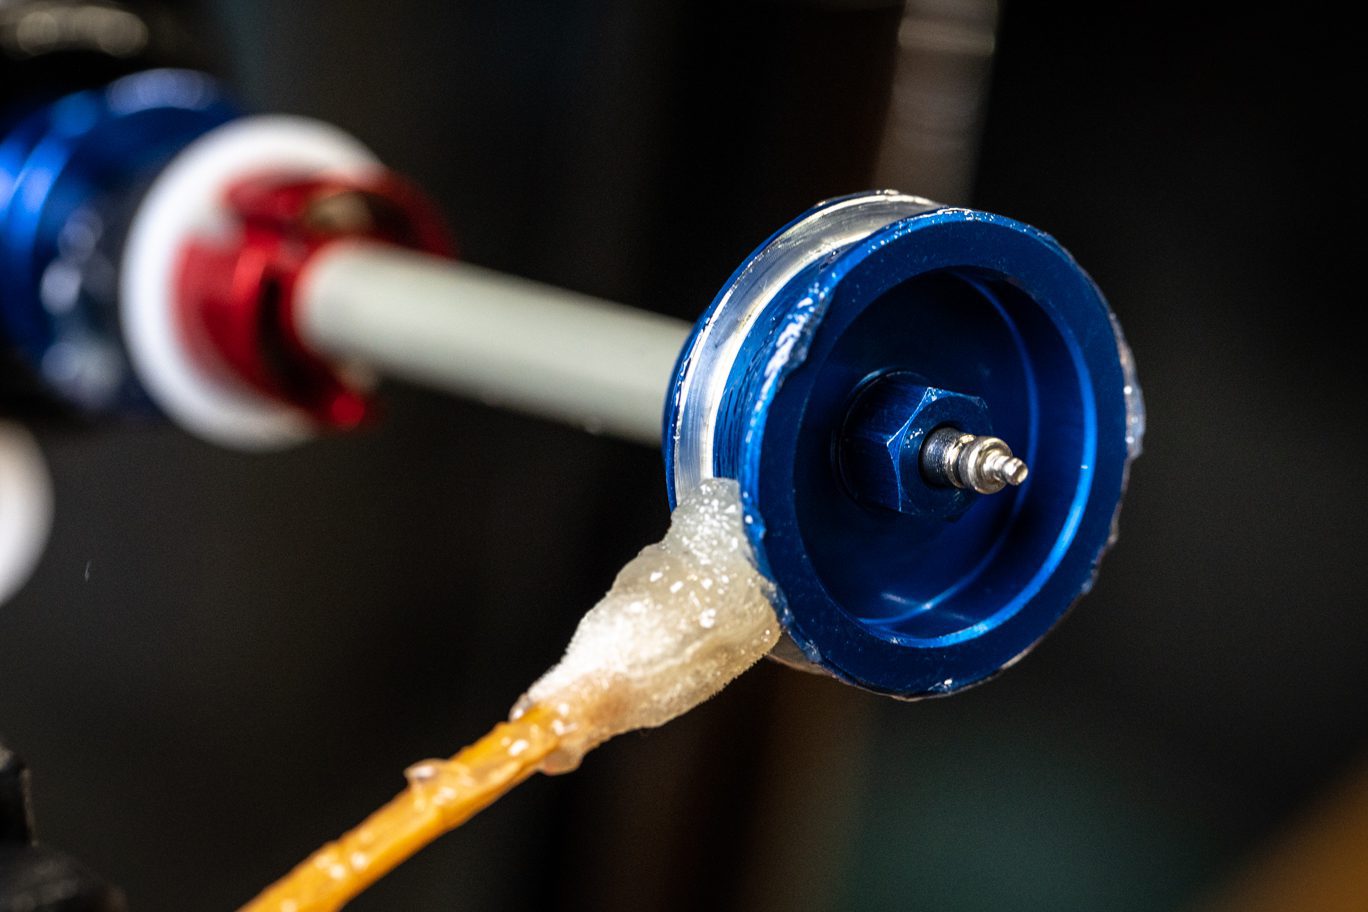
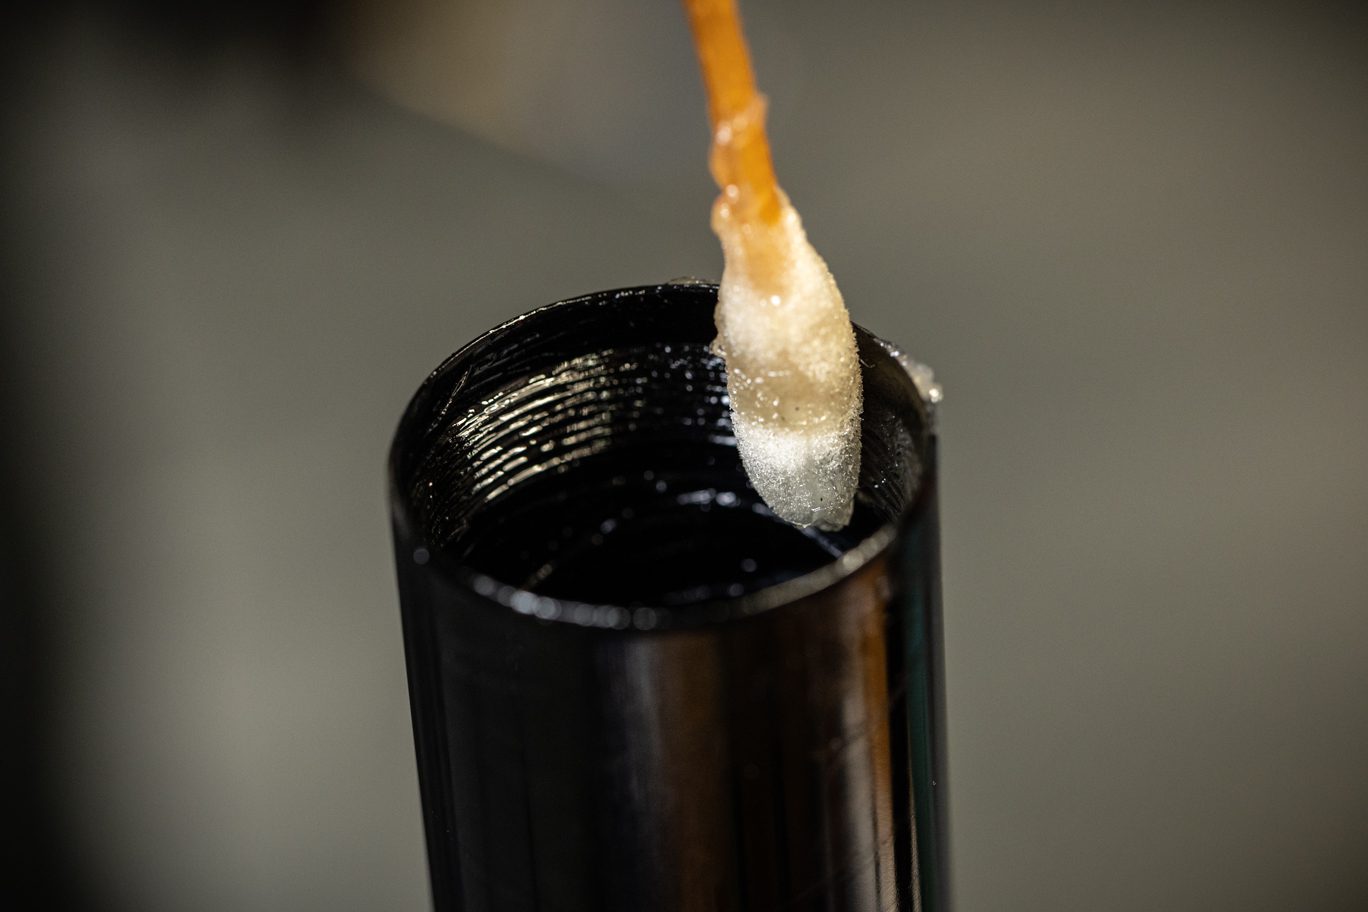
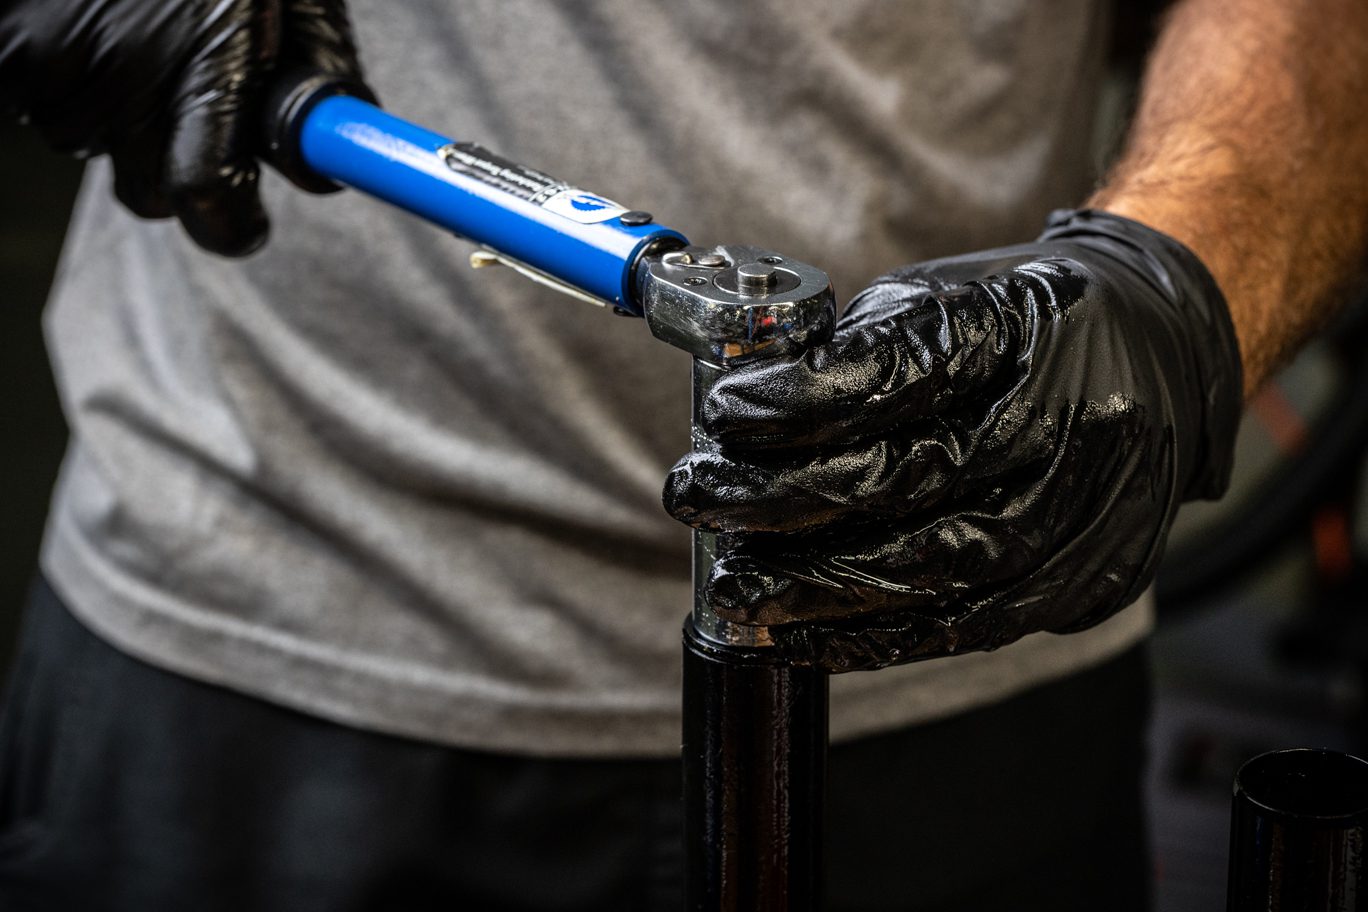
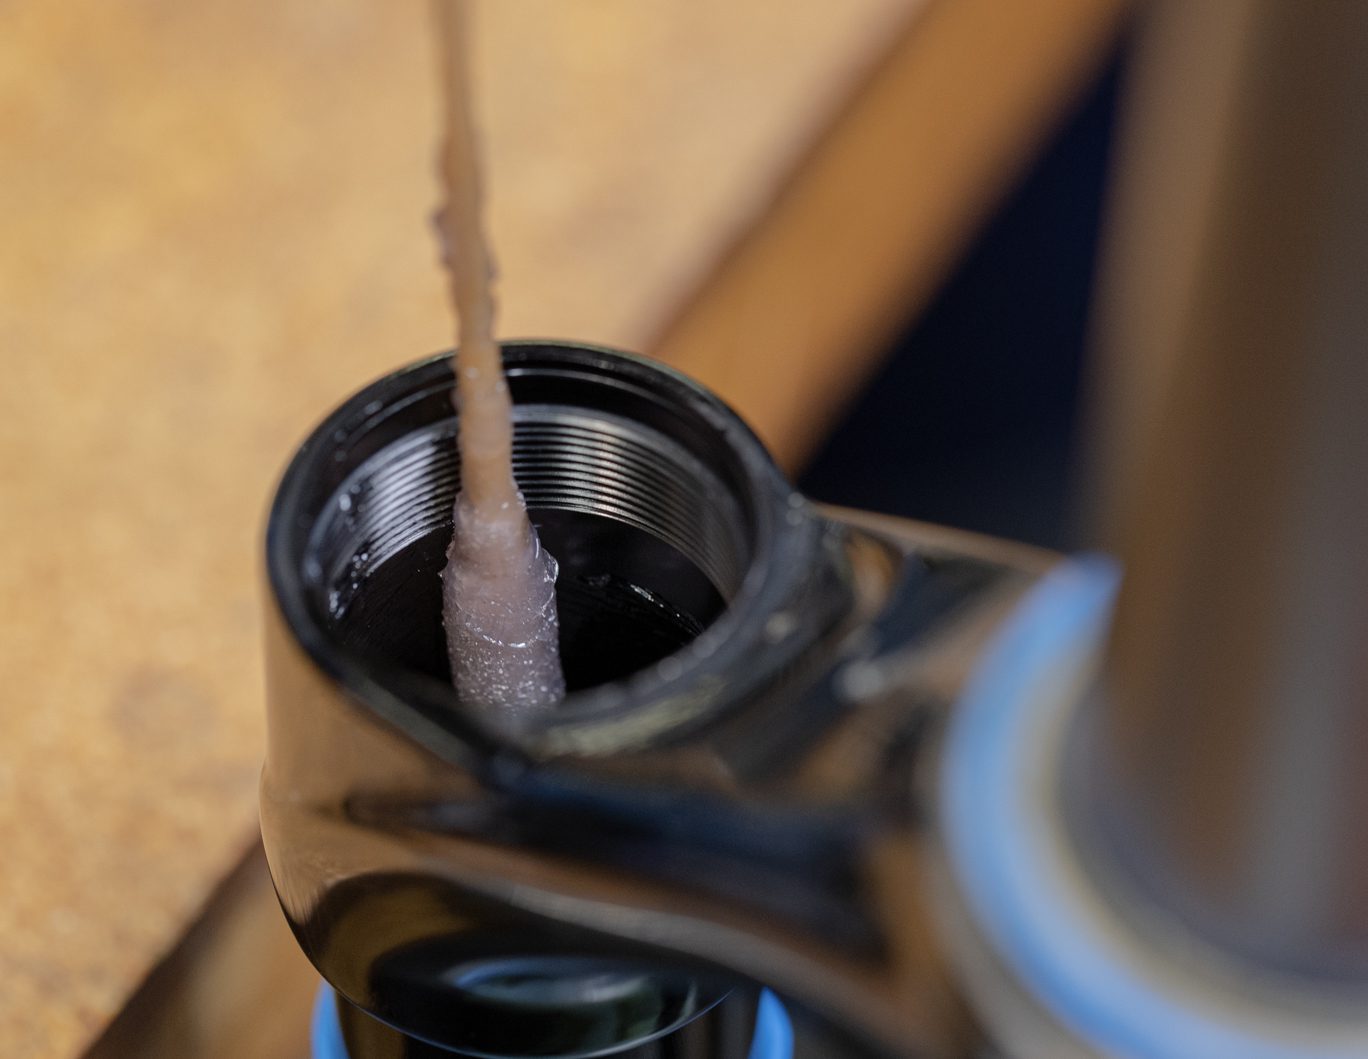
Add 2.5 ml of Royal Purple 10w-30 to the top side of the air spring. Lightly grease stanchion below the threads. Lightly grease o-ring on Doublair top cap o-ring and volume reduction if present. Apply blue Loctite (243) to threads on Doublair top cap. Install assembly. Torque to 36 Nm using 30mm socket.
Upon completion of the spring side install and any damper service, install lower assembly per the 50 hour service instructions.

Monday: 10:00 am – 5:00 pm
Tuesday – Thursday: 10:00 am – 7:00 pm
Friday: 10:00 am – 5:00 pm
Saturday – Sunday: Closed